Saturday, February 28, 2015

Disney's Tangled Inspired Corona Flower Hand-Knit Mittens

I love these new Corona Flower mittens I knit as an homage to Tangled! At the very beginning of film, there is the story of Mother Gothel and how she finds the magic flower born of the sun. It sets the whole story in motion. When I saw this beautiful pattern, Lilyfiled Mittens, by Jennifer Coleman, I was immediately reminded of that scene and I knew they would be my next project.

The color choice was obvious, the flower needed to "glow" and purple is Rapunzel's color after all. I have become a huge fan of fair isle (or stranded) knitting in the last several years. I find it sort of magical! You simply follow a chart, knit each little square accordingly, and suddenly, this beautiful picture emerges on your fabric! And I have to say, this pattern was one of the most enjoyable to follow. EVERYTHING worked as it was supposed to. That never happens to me. I got gauge (barely, with US 0 needles), my tension was just right, none of the stitches require enormous floats, the cuff detail just happened on the first try, and the size is actually right! My hands are small, so this seems incredible to me. It's the magic of the Corona Flower. It has to be. Or Jennifer Coleman tested the heck out of the pattern before she published it (which seems most likely). Either way, I'm grateful.

And the timing of these lovely knits could not be better. I just lost one of my first hand-knit mittens last month, before the weather became incredibly cold! I needed a new pair pronto! And here they are, as lovely as a flower. And much more lovely than that first pair! I can't promise they will keep you young, but I can promise they'll get you noticed! Until next time, may all your days be filled with fairy dust!

Thursday, February 26, 2015

From Belle's Library | Home by Julie Andrews

Let me start by saying, I think Julie Andrews has been remarkable in everything she's done. I love her acting and singing and wish I could have seen her perform on stage. So right away, this book, Home, by Julie Andrews, was going to appeal to me.

This is an autobiography, read by the author -- which I love -- about her early life. It takes the reader right up to her moving to LA to do Mary Poppins with Walt Disney. I didn't have any expectations about this book going into it, and I'm glad. It's a rather quiet story about a young, very talented girl with a very tumultuous childhood. I didn't realize there was so much upheaval in her early life. She seems such a staid and even person!

It was interesting to hear about her early years performing in the vaudeville circuit, her amazing voice coach and her early romance. I always wonder about the stories behind the personalities we've come to know and love. It's always more complicated than we think. As one would expect, this is a very upbeat story, highlighting the best memories and even finding the silver lining to a rough childhood. It was a wonderful read. If you have fans of Julie Andrews in your life, or of the musical theater, I am certain they would find this book appealing. To the average Disney fan, it may fall a little flat.

Until next time, may all your days be filled with fairy dust!

Tuesday, February 24, 2015

New Tangled "I Don't Do Backstory" RedBubble Design

It's been a while since I added a new design to the RedBubble shop! This design occurred to me as we were watching Tangled on one of our snow days this past week.

I have to confess, Flynn Rider is my favorite Prince! A little cocky, a  little rogue, a lot hunky, plenty of wit, and absolutely transparent to Rapunzel! I love that guy! And his insistence that he doesn't do backstory is just too funny. I had to make a t-shirt.

And for those of you who haven't been to the RedBubble shop in a while there are all sorts of ways to sport this design! The most recent is leggings! I have to admit, I love them. And I have updated my shop to include leggings, travel mugs, and cases for all my designs. Hop on over and do a little mid-winter shopping, or stock up for your next Disney trip! And until midnight tonight, you can use this code, TOPLESS20, to get 20% off all tops for men and women! It's a great deal! Remember you can customize the color and size of your t-shirt or hoodie to suit your personal style, but the other products' colors are locked in.

Until next time, may all your days be filled with fairy dust!


Saturday, February 21, 2015

Toy Story DIY Birthday Party Report


We had a rootin' tootin' good time at our party! I had a blast creating this party for Little Chef! There were so many amazing ideas on Pinterest (my party idea pinboard can be seen here)! Little Chef and I took some time looking at all the ideas and he told me what he wanted to do and I filled in the rest with my ideas. Here's what we did:

The Photo Booth

I love the fun photo booths I see at special events! I'm a big time picture taker and its a way to dress up and have fun without everyone looking at you like your crazy! This one was super easy to construct. I found an empty wall, covered it with light blue wrapping paper and taped it down with painters tape. I then cut out the toy story cloud with my Silhouette. I cut 5 of the small and 5 of the large clouds and adhered them with scotch tape. I then used a couple of hats I found through Amazon, and these adorable (and free!) cut-outs from Merriment Design for the props. Easy and lots of fun!

Snacks

Little ones don't need a lot of snacks during the party if you schedule it before lunch. We went with cheese crunches (ala Al in Toy Story 2) and "snakes in a boot" - my own idea. I used plastic boot shot glasses and organic gummy worms. Two worms fit exactly in one boot! And they were the hit of the party! I loved hearing kids and adults alike say they needed another snake in their boot!

Decor

This was so easy. I used the barrel of monkeys design from the Silhouette shop and cut dozens of them from primary colored card stock scraps. And since I used to be a paper scrapbooker, I had a whole bunch of Memory Makers snaps to use up. I just attached the hand of one monkey to the other with the snaps and it was done. You could easily use brads, but the backs might show.

Little Chef also fell in love with some directional arrows to all the fictional places in the Toy Story movies that we had seen on Pinterest. I just downloaded some images I found on the internet and cut arrows from them. The arrow shape was already in my Silhouette library! I used painters tape to adhere them to the wall for the party.

And you've already seen the Luxo Ball Boxes that held all the goodies! To this I added loads of balloons. I bought a helium tank at the party store and in 30 minutes I had 40 balloons blown up and tied down all over the house. They made everything just a little more festive. And of course, we set up our Toy Story toys around the house as well, ready for a play date with destiny!

Activities

I cut out these rocket shapes from card stock using my Silhouette. I gathered up some craft supplies in the dollar bins from the local craft store, put out the glue and crayons and let the kids go for it! It was really fun. And then they played in the photo booth and with the toys we already had out and the ones we unwrapped. It was just enough for these 4 year olds.

I can't say enough how much fun this was to put together and how much fun the kids had! I'd love to see what you do for your Toy Story party! Until next time, may all your days be filled with fairy dust!

Thursday, February 19, 2015

DIY Disney Pixar Toy Story Birthday | Luxo Ball Party Favor Boxes


I had a hard time deciding what we would do for goody bags for the Toy Story birthday party. I thought about making lunch sacks with the Pizza Planet logo on them, but that wasn't really what I had in mind. Pinterest is chock full of ideas, but they just weren't as exciting as I hoped. Then, I stumbled upon this 3D bowling ball box in the Silhouette design store and I had a great idea! I wanted to turn it into the famous Luxo ball from Pixar!

How did I do it? Here's the skinny:

1. I downloaded the 3D Bowling Ball Box shape ID 57679, and used a generic star shape that was already in my library.

2. Once opened in Silhouette software I resized the box to be as big as my Portrait will allow, 16.5" x 25.15" on the full design. Then I separated (or ungrouped) the pieces of the design in order to cut them out in different colors of card stock, base blue and lid yellow.

3. I sized the star shape to the lid (4.865"x4.635") and cut it out of red card stock.

4. I created the names on each one by using the Gill Sans Ultra Bold font and adjusting the kerning (or character spacing) until I had the look I wanted. I then used the offset function to create the red background for each name. Each name was approximately 1" tall.

That's it! It was easy to assemble, although time consuming. I spent one day's nap-time cutting and another day's nap-time assembling. And it used a fair amount of paper! I needed 3, 8.5"x11" sheets of card stock for each lid and each base. And it was TOTALLY worth it! I love the look of these and it's not just another goody bag like every other birthday party!

Most of my readers will probably know that the short film, Luxo Jr., was one of the two shorts that really catapulted Pixar into computer animation leadership, in as much as it relates to animated films. Here it is:


This Luxo ball shows up in all the Toy Story films and shorts and many other Pixar films. It's exactly the sort of thing Pixar likes to do. So when I realized I could use it at the party, I knew I needed to! Until next time, may all your days be filled with fairy dust!

Tuesday, February 17, 2015

Colonel Hathi's Elephant March Hat

I love this Rose & Lily hat pattern. I am all about the fair isle knitting and this pattern was just screaming out to be knit. The first time I saw it, it reminded me of Colonel Hathi's march in the Jungle Book movie.

I already had the sock yarn for this, so it was easy to pick it up and get started. I knit this one in the adult large size using one size larger than the pattern suggested and using the directions for the slouchy hat. I tried to get Doc to model this one for me, but he said it was a little too hipster for him. Best compliment ever! This is definitely staying in my winter wardrobe. I love it!

Until next time, may all your days be filled with fairy dust!

Saturday, February 14, 2015

Simple Paperman Inspired Valentine


Happy Valentines Day Disney lovers! If you have never seen the short film, Paperman, by Walt Disney Studios, it's absolutely worth a moment of your time. It won two Oscars and absolutely makes you want to believe in love. It's perfect for this Valentines Day (or any other Valentines Day).

And this Paperman inspired valentine has to be the easiest valentine ever. Seriously. I know I say that a lot, but this is truly so simple. All you need is some sort of official looking paper (I used an old Analysis Pad), some bright red lipstick and you are set! Fold your paper into an airplane, give it a kiss and viola! A super quick and easy valentine for your favorite Disney lover.

Of course, if you have the time, you could go crazy and make a whole flock of them. Be inspired! Until next time, may all your days be filled with fairy dust!


Thursday, February 12, 2015

DIY Disney Pixar's Toy Story Birthday Party | Creating A Digital Invitation

There are a lot of invitations available on Etsy if you are not so inclined as to create your own. But I love creating this sort of thing, AND I wanted something that could be used in a text message. I don't know about you, but texting is a huge part of my life and seems easier for moms in my circle to use than anything else. I also seem to get an RSVP from most everyone. And since we all send a very informal "save the date" message via text anyway, it seemed logical to just have the invite be a text and let that be that!

If you are inclined to want to do this, here is how I created this invitation.

Start with a 4" x 5" canvas in photoshop.

I used a selection of scrapbooking supplies from two sources: Papelland's Toy Story Collection and Frontier from Project Mouse. Select the plaid paper and size it to your background. Remember it's going to be on a digital screen, so don't make it so small the checkers go all funny on your eyes.

Select a custom shape; I chose this 8-pointed star frame. In a new layer, create the frame in any color. Move the cow print paper onto the shape and reduce the size the same way you did for the background. Then group the paper to the shape (paper layer on top of the shape layer). Your shape should now be filled with this cow print. To outline it, use the stroke function.

To create the inner star, I selected the same custom shape, but the solid version, and made it in white. Then I layered on the cloud paper and changed the opacity to about 30%.

Making the script was fairly simple. I already had the Gill Sans font. Bump it up to Extra Bold and use the stroke function to create the blue border. Then use the emboss function to make it stand out. I then drew a red rectangle behind the word "turns" and used the skew function in the transform menu to shape it like the Toy Story logo.

And that pretty well sums it up! I love having something so easy and it will transition to the scrapbook with no trouble at all! Until next time, may all your days be filled with fairy dust!


Tuesday, February 10, 2015

Sitting With Grandmother Willow | Heather of The Happy Haunt

As part of our on-going series, Sitting with Grandmother Willow, I am happy to introduce you to Heather of The Happy Haunt. This series of blog posts highlights artists and fellow bloggers of all stripes with one thing in common: a passion for Disney!

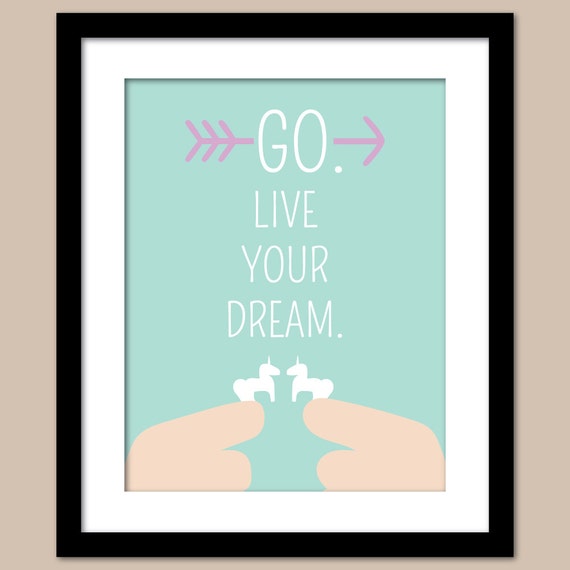
Heather has incredible planning tips and planners, digital prints and parties ideas and tools in her Etsy shop? My favorite print from Heather's shop is the Live Your Dream print shown here! Be sure to check all of them out and visit her blog; there's something for everyone. I'm so glad Heather could join us on the blog this month!


Disney by the numbers (with apologies to Harpers):

# of trips you have made: I have been to Walt Disney World 8 times. I have been on a school trip, with extended family, on a surprise trip my husband and I planned for my sisters, on a whirlwind trip courtesy of the Walt Disney company to shoot a spot about our family for the Christmas Parade, as a couple sans children, as a very pregnant lady and with a one year old.

Date of first trip: I was kind of a late bloomer by Disney fanatic standards. I didn't visit until I was going into my senior year of high school. It was a high school marching band trip and we only visited the parks for one day. We could choose which park we wanted to visit and I went to EPCOT. Little did I know at the time, it turned out to be my favorite of the four!

Date of next trip: We will be in The World this coming May to celebrate my husband's graduation from nursing school.

# of Resorts stayed in: We have stayed at 4 resorts. The best one was the Boardwalk (especially since Disney paid! Free is always better.)

Usual # in your travel party: As you can tell from my variety of trips, there isn't really a "usual".

Pairs of mouse ears in your cottage: I have actually never purchased a pair of ears!

WDW or Disneyland (or other)? Walt Disney World by default. I have never been to Disneyland, but hopefully I will make it someday.

How do you usually travel to Disney? I have driven in a bus, driven a minivan and flown. We have flown most often and it is wonderful! It actually take less time for us to fly to Disney than it does for us to drive to NYC (which we do quite often).

Do you have any tips for trips? Oh my goodness... this is a loaded question! There are countless sources of information out there so I will try not to repeat what everyone else has already told you. Except to do your research because that tip is so very important.

My top tip: try not to have too many expectations. Your plans will almost always change. It doesn't always go the way you planned or imagined it. Sometimes, it is disappointing, but it can also be a wonderful bit of unexpected magic. Don't be so rigid in your touring and timing that you don't allow for spontaneous fun. On your way to make your fastpass for Tower of Terror, but happen upon the Citizens of Hollywood? Stop and watch! Are you trying to get to the Polynesian in time to get a Dole Whip and watch Wishes from the beach, but your little one is absolutely enthralled with the indoor play area at the Dumbo ride? Stay and play, grab a funnel cake and catch the show from Storybook Circus. It may not be the best place to watch Wishes, but it beats a toddler meltdown!

Do you have a favorite place to eat while in Disney? This is like asking me to choose my favorite child. If there is one thing I dream about when I am not at WDW, though, it would have to be the Sweet and Spicy Waffle Sandwich from Sleepy Hollow Refreshments in Liberty Square.

Or the Mediterranean Chicken Wrap at Tangerine Cafe in EPCOT. I have such fond memories to stopping here for dinner and eating outside. I can just see the glow of the lights and hear the people passing by. It is not a bad place to watch Illuminations from, either ;)

I swear I have eaten at a ton of great table service restaurants, but the counter service options are even better sometimes!

What is your absolute DON'T MISS attraction? This is going to sound totally crazy, but I can NOT visit WDW and pass by Spaceship Earth. If I don't ride it, my vacation is not complete.

Stage shows, yes or no? It depends. I am definitely not standing in front of the castle with 1,368 other people to watch the afternoon show. I do love the shows I can sit down in a theater and watch, though. Finding Nemo the Musical has to be one of my favorites. It reminds me of the puppets they use in Lion King on Broadway and the production value is right up there as well.

These kinds of shows can give you a welcome break in an air conditioned space. Time your attendance to get out of the heat at the peak of the afternoon or get out of the rain during the inevitable 4:00 downpour.

Parades, yes or no? Eh. If I am there at a slow time that I don't have to fight the crowds and I HAPPEN to be passing by the parade route as the parade is happening, sure. Otherwise. I take advantage of the shorter lines at the popular attractions.

Best Fast Pass to get: Toy Story Midway Mania without a doubt. This queue is a bunch of switchbacks all in one room that you have to listen to Potato Head on a loop for, sometimes, upwards of an hour. There is a lot to look at, but by the time I get halfway through I am seriously considering skipping the attraction so I don't have to hear one more word out of his mouth.

Favorite park: EPCOT. Enough said.

One piece of advice you'd give a novice about WDW/DL: Don't eat burgers and chicken nuggets your whole trip. The food is, hands down, my favorite part of a Disney vacation. Even if you are only eating counter service there is so much good food for you to eat. Do some research and find out where to go to make some memorable dining choices.

How do you create extra magic for your family? Probably the most "magical" thing I have done for my family is to plan their first trip without them knowing. We had Disney movie nights every week for a year and then surprised them with the vacation. They were SO excited!

How can we connect with you? You can visit me at www.thehappyhaunt.com. You will be able to find all of the links to my shop, blog, and social media accounts there. I hope to see you all soon!

Saturday, February 7, 2015

DIY Pixar's Toy Story Inspired Gift Tags with Silhouette

We are about to have the Rootin-ist, Tootin-ist party this 4-year-old has ever seen! Pixar's Toy Story has become an obsession in the cottage. There are days when we frequently view the Toy Story trilogy in a day. We are, in fact, still watching the Toy Story That Time Forgot (thank heaven for DVRs!) and calling it "the new Toy Story". That said, there will be some Toy Story toys joining our toy box soon. Wrapping them has been fun, knowing Little Chef is going to be so excited to see them.

I've been having some fun with gift tags too, using my Silhouette machine. I rounded up some of the shapes from the silhouette store that reminded me of Toy Story. Here's a list (with links!) of the designs I used for the gift tags:


Cowboy Hats (ID 30733)
Sheriff Badge (ID 29056)
*Dinosaur (ID 6784)
*3D Army Envelope (ID 58554)
Rocket Ship (ID 16622)

Some of them needed an offset (background), so I used the little offset operation at the bottom of the screen to quickly create the background shape. (It's the one that looks like a bullseye.) I put an asterisk next to the design shapes for which I needed that function. In all it was a quick and easy way to add a little Toy Story magic to our gifts. I'll be posting more great Toy Story ideas this month that we used for our party. So stay tuned! Until next time, may all your days be filled with fairy dust!


Thursday, February 5, 2015

Trip Report: WDW Contemporary Resort | Atrium Club Level

View From Our Balcony

I visited the Walt Disney World Resort in Florida for my birthday this year with a friend who's birthday is one day before mine, and her daughters. This was my first trip without my family (although we consider these friends family) and I was beyond excited to experience Disney in a whole new way! Our all-girl trip was the perfect birthday celebration for me, and the accommodations were out of this world!


I have to start by saying the Contemporary Resort is one of my favorite places to stay "in the World." It has flair, nostalgia, and the best location, location, location for me and my money. You are within walking distance of the Magic Kingdom (there's a foot path to guide you), and you're the first stop on the monorail when leaving the Magic Kingdom. But I have always said that for me, a stay at the Contemporary isn't worth the money without the Magic Kingdom view. I don't usually care what our view is when we stay at Disney, with two exceptions: The Animal Kingdom Lodge, and the Contemporary Resort. I want to wake up seeing that castle and go to bed watching the fireworks! This trip did not disappoint!

Check-In

Upon checking in we were greeted at the door and taken up to a separate check-in desk on the 12th floor, the Atrium level. Once there we were helped right away. Our magic bands were activated and our room was ready and waiting for us. 

We were also given a card with a number to call or text any time we needed something, so our personal concierge service extended to us in the parks! This was a perfect Disney touch, and it worked! We made dining arrangements for a princess meal while on the fly. So Disney.

The Lounge

We were given a quick tour of the lounge area upon check-in. There was always a cast member on duty there and every request we made was readily handled. There were snacks and drinks conveniently available whenever we were there. We had breakfast in the lounge each morning, and the kids were delighted to have cookies and milk when we came back in the afternoons. I was delighted to see the wine and cocktails out before we went back to the parks in the evenings! Beverages were available all day, and they even provided us with small water bottles to take into the parks (upon request). The full schedule of offerings in the lounge are as follows:

7:00 a.m. - 10:30 a.m.  coffee, pastries, fruit, cereal
11:30 a.m - 4 p.m.  cookies, chips, beverages
5:00 - 7:00 p.m.  hot item samples, children's corner, crudites, cheese tray, beverages, wine, beer
8:00 p.m. - 10:00 p.m.  cordials and desserts

Our Room

We were treated with a box of chocolates upon our arrival, one even had the image of the resort screen printed on it! There were 5 of us, and we all fit quite comfortably in the room, with the exception of the bathroom. Five girls and no counter/vanity space in the bathroom was a challenge to say the least! We improvised and used one sink at a counter and one as a sink. They are incredibly large and look very cool and contemporary, but they are not so functional. That bathroom is one of the biggest drawbacks I see in the room. And apparently, I'm not alone. Several other reports on the resort have mentioned them as well.

The beds were quite comfortable and I even had the daybed to sleep in. The bed itself was very comfortable, but the vent was blowing directly on me at night. I would request an extra blanket right off the bat if you are sleeping there, and sleep so your head it toward the balcony!

I've included a floorpan of the room, courtesy of Your First Visit, so you can see how everything is laid out.

Perhaps because we were at the end of the hall (and far away from the wireless point?) the wireless access in our room was spotty at best. But I found that the signal was quite strong in the lounge and there were plenty of tables and sofas to work from and download our Memory Maker photos each day. 

What more can I say but that the view was worth every penny! It's the number one thing I'm paying for. Waking up to Cinderella's castle and seeing the fireworks each night were a dream come true! And nothing is better than seeing the fireworks, complete with music from your balcony, and then cozying up in your bed without fighting through a crowd to get home.

Overall, the experience was really special. Would I do this every time? Probably not. But for a special occasion this was definitely memorable and a great way to plus the magic! I loved all the special attention and Disney magic associated with being on Club Level. 

Until next time, may all your days be filled with fairy dust!


Tuesday, February 3, 2015

DIY Disney Bookmark Valentines

Last month I posted about this adorable and easy to make paper clip bookmark. Today, I'm going to show you how simple it is to turn these little handmade treasures into lovely, simple valentines. If you missed the tutorial on making these bookmarks, you can check it out here.

In order to turn these bookmarks into simple valentines, I used these great printable cards from Mique from Thirty Handmade Days. (That's pronounced Mickey - coincidence? I think not!) I simply printed the cards out on card stock, used my paper cutter to cut them out and make a small slit in each one, and attached the bookmark to it. That's it!

I happen to know a certain pre-school teacher at Little Chef's school who is about as Disney crazy as we are! I think this would be the perfect thing for her valentine this year! It's inexpensive, cute and functional. I know that was just the sort of thing I liked when I was teaching!

I hope you are enjoying this run up to Valentine's Day! And until next time, may all your days be filled with fairy dust!