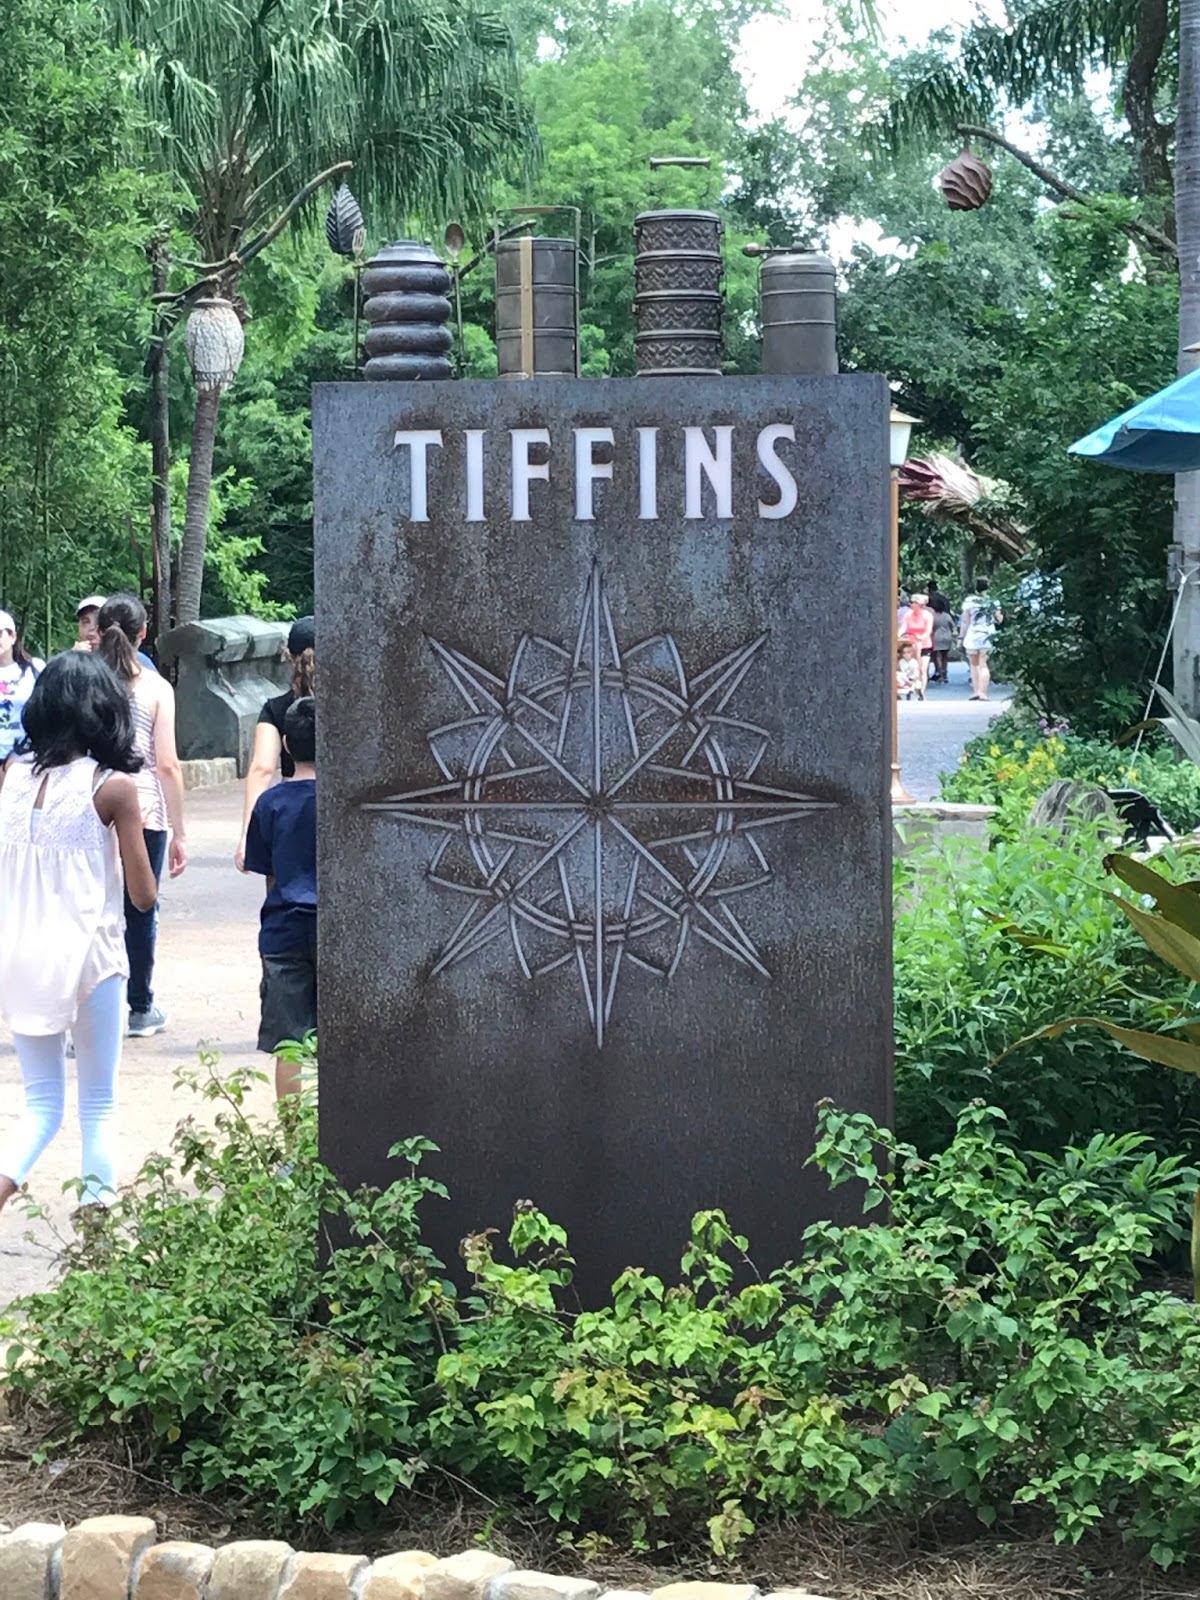
If you have not yet tried Tiffins in Animal Kingdom you really, really must. Our family takes food pretty seriously and we think it is currently the best restaurant on property barring Victoria and Albert's. The selections are interesting and not on your typical dining menu, the ingredients are fresh and delicious and the cocktails are inventive and satisfying. We think they truly live up to their claim to "set off on a culinary expedition of international cuisine inspired by exploration and adventure." We are in love with this new option.
Who Would Best Be Suited For This Location?
If your family likes ethnic cuisine, art and is ready to sit in the air conditioning for a while, this is the place for you. In fact, even if you have a couple picky eaters and a few adventurous souls, you will still be happy eating here. It is a signature dining location which means a.) you will be eating in a nice location, at a table with more than one server waiting on you = it's more expensive than other table service locations around the parks, and b.) you can expect there to be a wide selection of food and wines available, as well as a very accommodating kitchen.
What We Ordered:
You can reference the full menu here. It's full of fantastic selections! We arrived for lunch with a VERY picky kindergartener with food allergies, a somewhat adventurous preschooler, and 3 adult, self proclaimed foodies at our last dining experience at Tiffins. I had taken the time to email ahead (special diets) and ask specifically for chicken nuggets to be on the menu for the one who barely eats any other protein. They would not guarantee that they would be available, but lo and behold when we asked, they had them! In my experience, most signature dining locations will do this for you with a little planning ahead. Also, if you forgot to plan ahead, ask if they have them in the house. It's possible that they ordered a big bag of them at the request of someone else and still have some in the kitchen.
Our meal started with house made bread, and since I no longer eat gluten, I passed. As an alternative for me they brought out rice cracker "bread" made in house with the same olive oil and molasses combination to dip it in. Such a great alternative to the usual gluten free bread served elsewhere on property!
Preschooler:
Pasta Marinara followed by Caramel-Chocolate Cake
VERY picky Kindergartener:
Chicken Nuggets, Fries and Green Beans followed by Caramel-Chocolate Cake (chef made sure the cake was safe for his food allergies)
Foodie 1: Zinger Fizzie, Marinated Grilled Octopus, Pan-seared Duck Breast, Lime Cheesecake
Foodie 2: Jenn's Tattoo, Selection of Artisanal Cheeses, Berkshire Pork Tenderloin (no dessert)
Foodie 3: Annapurna Zing, Selection of Artisanal Cheeses, Duo of Venison, Sorbet Tasting
Suffice it to say, all meals were shared around our table and in all seriousness, the 3 foodies believed we had each ordered the best meal on the menu. All dishes were inspired and delicious. Nothing was over or under cooked. The only complaint at our table was from the VERY picky eater who asked our server, "why did you bring me these?" regarding his green beans.
And speaking of our server, we were delighted to meet someone from home who was very accommodating and just as tickled as we were regarding his complaint. Food allergies can be a pain to deal with but we never felt we were cause anyone any trouble. Our server's recommendations and advice were perfect. Our meal and experience were outstanding. We couldn't have asked for better.
And I can't wrap this up without a nod to the atmosphere at Tiffins. It is beautiful as well. It felt like an oasis (not just for the air conditioning). Tiffins is also an art gallery showing off a range of art that has inspired or become part of Disney's Animal Kingdom. It really is a feast for the eyes as well. And it kept our small tourists occupied as we waited for our meals to be ready.
In short, Tiffins will be part of our Animal Kingdom visits for many years to come. There was no wait for a table on a week day in the middle of June and we were over the moon with this perfect break in our hot and hectic theme park day. You really need to try this place if you haven't been. We can't wait to go back.
Showing posts with label Animal Kingdom. Show all posts
Wednesday, July 5, 2017
Thursday, August 4, 2016
Walt Disney World 101 | 10 Of Our Favorite Touring Tips

It's been 100% crazy here in the cottage this week with school starting, family visits and the planning of a super secret surprise trip to WDW! Even so, I still wanted to get a post out for today, so I thought I would share 10 WDW Touring Tips with you.
These are tried and true and used on every Walt Disney World vacation we take. Some are obvious, some are not. Some have taken us a while to realize, some have been with us from the very beginning (and I do mean from the VERY beginning!). I can still hear my dad shouting, "Left side, Amy!" I hope you enjoy them and they come in useful for you and your touring party too.
- Stay To The Left. This may be the single most important tip we have. Our American tendency is to stay to the right. And most tourists will choose the line or the attraction that is to their right. As we've continued to travel to WDW this rule has morphed somewhat into, take the path farthest from the door (or humanity). You'd be surprised how much faster you can get your burger and fries if you just move to the farthest line.
- Wait To Leave The Parks. It sounds a little nutty, but if you don't have toddlers having historic melt downs, then stay a bit after the fireworks and linger in the shops or buy one last sweet treat. Let the transportation crush happen without you. Waiting to leave the park (especially the Magic Kingdom) can make everyone's night much better.
- Arrive Early. If you can't manage the late nights, consider arriving for rope drop. The MK has a fun celebration prior to opening and all parks are clean and sparkling early in the morning; often you can get some nice photos with just your family in them.
- Make A Dining Reservation For The Hour Before Park Opening. Some character meals allow for early entry to the parks. You must have a reservation and all the members of your party before you can go in, but you can eat in the park before it is officially open. This has two advantages; obviously you can maximize your time in that first line or two and you can get some really great photos without the crush of humanity.
- Get A Haircut At The Harmony Barber Shop. This is strictly a Magic Kingdom experience, but I love doing this! Our first kid had the privilege of having his first haircut there. I HIGHLY recommend this! There was all sorts of kitsch and celebration and they are excellent with a wiggly kid.
- Watch The Parade From Frontierland. Again, this is specific to the Magic Kingdom, but we have had excellent luck finding a good spot for viewing the parade and it's usually much less hectic. This is not the best plan if you want to see the fireworks after the parade. And as an added bonus, we can hit the Pirates of the Caribbean on the way out!
- Hit Your Favorite Rides During the Evening Entertainment. If you are not watching the parade, the fireworks, or Illuminations, this is an excellent time to ride your favorite (usually crowded) rides. E-ticket rides were the most expensive and usually most desired rides when Disneyland and Walt Disney World opened. We still have a tendency to refer to them as such around the cottage.
- Use The Single Rider Lines. If you are not opposed to riding next to someone you don't know, the single rider line can be a great time saver. Usually Mr. Photos From The Parks and Doc can ride the same coaster, or consecutive coasters and come out beaming.
- Grab A Button At Guest Relations. Especially if you are celebrating a birthday, first visit, or anniversary, get a button! The cast members are wonderful at making a little extra magic happen. You can even request a birthday phone call at your resort when checking in!
- Talk To Cast Members. They are incredibly willing to help, share Disney trivia, tell jokes, trade pins, hand out stickers and trading cards, and just in general make your trip enjoyable. One of my favorite interactions was with a street sweeper in Animal Kingdom who kept my kids entertained with jokes as we were all headed to the exit together.
Remember to try and stay positive while you're touring and enjoy the time you have, even in the small moments. It's the happiest place on Earth, and you deserve a great vacation! Until next time, may all your days be filled with fairy dust!
Tuesday, June 14, 2016
Flag Day DIY inspired by Disney's Animal Kingdom
| DIY Tibetan Prayer Flags Inspired by Disney's Animal Kingdom |
I have always loved the themeing in the Animal Kingdom of Walt Disney World. Even as a new park (when it was not very fun for our family - and SUPER hot) the themed areas seemed superior to much of the rest of the Disney Resort. I have especially become a fan of the Tibetan prayer flags near Expedition Everest. I've always been a spiritual person, and drawn to these flags and their purpose wherever I see them. They are meant to be torn and impermanent items. If you want a little more information about them, you should check out The Peace Flag Project. I think they are just beautiful. So when I found this tutorial for making miniature prayer flags from Small World Land, I knew I had found a project for me.
For this project, I used the printable document supplied in the tutorial. I sized it to 150% and printed it directly only my fabric. If you've never printed on fabric, it's a very simple process. I used these instructions from Instructables. I didn't have any freezer paper, so I used Silhouette's Sewable Heat Transfer Fabric Interfacing. I'm glad I did. I was able to print on it with no problems. I was even able to iron two small strips of flags together to make them double sided. I then just cut them apart and strung them on button-hole thread. (It's thicker thread than what you usually sew with.) And I love the result! I have my own little string of prayers hanging in my studio. They are a lovely reminder of the prayers I wish to offer up to the universe.
Until next time, may all your days be filled with fairy dust!
Tuesday, May 10, 2016
DIY Disney Scrapbook Layout | Anatomy of a Disney Enthusiast
Rerunning one of my favorite scrapbook layouts with updated links for the brushes! Enjoy.

You all know I am a Disney scrapbooker, and I am absolutely in love with this Disney Enthusiast layout! Partially because I designed the entire thing; partially because Doc has never been scrapped so perfectly! My inspiration for this layout came from a very clever resume I saw via Pinterest. I knew that I wanted to do this for Doc at the very least, I am still hoping to get it done for all of us Disney fanatics in the cottage! Maybe I'll select one of us each trip for this treatment. It wasn't too hard to do and it's a fun surprise in the midst of my project life layouts.
Here's how I did it. I work in Photoshop CS5 (If you know a student who can purchase this for you, you can same a bundle!). I took a photo of Doc that showed his entire body and converted it to black and white. I then used the marquee tool to create the white boxes. Once I had them in place I used my custom shape tool and my brushed to create the smaller icons. You can find my Disney Mountain Range Digital Brushes here, free for personal use. You can find my Disney Snacks Digital Brushes here, also free for personal use. If you can't find the custom shape you are looking for, simply google "free custom shapes photoshop" and a whole host of options should come up.
If you decide to do this too, I'd love to see what you come up with. Send me and link, tag me on Instagram, or leave me a comment here. Until next time, may all your days be filled with fairy dust!
Saturday, June 13, 2015
What Are The Best FastPass+ Selections? | Wish With Amy
If you are headed to any of the Disney Parks, then you may be wondering about FastPasses and how to choose them. FastPasses are a reserved time slot for a particular ride or experience at one of the Disney Parks. If you are staying at a Disney Resort, you will be able to make your reservations 60 days in advance of your trip. If you are not staying at a Disney Resort, you can make your FastPass reservations 30 days in advance. This is another reason I highly recommend staying at a Disney Resort.
This is a question I get all the time: What are the best FastPass+ selections? And while the answer completely depends on your touring style, the ages and heights of the people you travel with and your personalities, there are a few ways to figure it out.
First: There are some rides that have wait times that consistently exceed the 60 minute mark no matter the time of day or time of year. If you are at all interested in them (and tall enough to ride them), these are the FastPasses to get first. Peter Pan's Flight (MK), Seven Dwarfs Mine Train (MK), Meet & Greet with Anna & Elsa (MK), Toy Story Midway Mania (DHS), Test Track (EP) and Soarin' (EP) are all in this category. If you want to do these things without spending and hour or two, a FastPass is your best option.
Secondly: If your children have high expectations and don't deal well with adjusting and/or being flexible, you might want to consider opting for their favorite(s) at the best time(s) for them (like making sure you are there after breakfast but before nap).
Third: Decide if you are willing to use one of these strategies to go without a FastPass:
- Use the single rider line; if you don't mind riding as a single rider, you can easily cut your wait time in half.
- Be at the park for rope drop; if you can get up early and walk in as the park opens, you can go straight to your favorite ride. This has worked for us at several of the biggies with less than a 30 minute wait.
- Utilize extra magic hours; as a resort guest you can often get into a park an hour before it opens to the public, or stay an hour (or more) after the park closes to the general public. This allows for much shorter lines, and wait times.
- simply wait in line; sometimes it's just what you need to do. Arm yourself with snacks and games and just wait. More and more queues are becoming interactive too, with things to do/games to play as you wait.
If you are trying to make your decisions for FastPass selections, feel free to use this FastPass+ Selection printable we give to our clients. And until next time, may all your days be filled with fairy dust!
Saturday, May 30, 2015
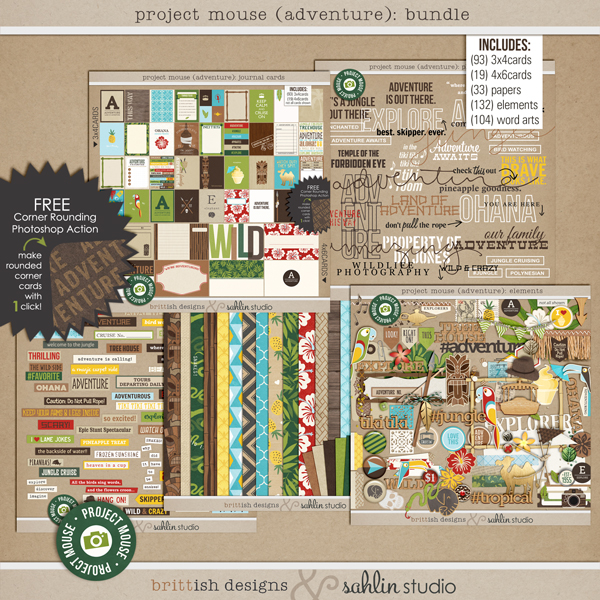
Scrapbooking WDW | NEW Project Mouse Adventure Bundle Released!
Just yesterday my favorite scrapbook designers brittish designs and sahlin studio released a new Project Mouse kit themed to Adventureland in Disney's Magic Kingdom! My regular readers will know how very excited I am to snap it up and add it to my ever growing collection of digital scrapbook supplies!
I think Disney scrappers will also be able to use parts of this kit for those Animal Kingdom layouts as well as some Animal Kingdom Lodge pictures! This one is definitely a keeper! And you don't have to be a digital scrapper to use the kit. It comes with print files if you want to print them and use them for your Project Life albums as well.
Be sure to stop by the sahlin studio blog and the brittish designs blog for inspiration and to grab the freebie that goes along with this kit! (There is a lot of scrolling through the post, but it's worth it!) And right now the whole kit and caboodle is on sale at The Lilypad! Up to 30% off!
I have no affiliation with Project Mouse, I just love this digital scrapbooking product and want to share all the Disney goodness with my readers. Until next time, may all your days be filled with fairy dust!
Thursday, August 14, 2014
Walt Disney World 101 | 10 Of Our Favorite Touring Tips
It's been 100% crazy here in the cottage this week with school starting, family visits and the ubiquitous potty alarm! (I am so hoping that the potty training will sink in soon!) But I still wanted to get a post out for today, so I thought I would share 10 WDW Touring Tips with you.
These are tried and true and used on every Walt Disney World vacation we take. Some are obvious, some are not. Some have taken us a while to realize, some have been with us from the very beginning (and I do mean from the VERY beginning!). I can still hear my dad shouting, "Left side, Amy!" I hope you enjoy them and they come in useful for you and your touring party too.
- Stay To The Left. This may be the single most important tip we have. Our American tendency is to stay to the right. And most tourists will choose the line or the attraction that is to their right. As we've continued to travel to WDW this rule has morphed somewhat into, take the path farthest from the door (or humanity). You'd be surprised how much faster you can get your burger and fries if you just move to the farthest line.
- Wait To Leave The Parks. It sounds a little nutty, but if you don't have toddlers having historic melt downs, then stay a bit after the fireworks and linger in the shops or buy one last sweet treat. Let the transportation crush happen without you. Waiting to leave the park (especially the Magic Kingdom) can make everyone's night much better.
- Arrive Early. If you can't manage the late nights, consider arriving for rope drop. The MK has a fun celebration prior to opening and all parks are clean and sparkling early in the morning; often you can get some nice photos with just your family in them.
- Make A Dining Reservation For The Hour Before Park Opening. Some character meals allow for early entry to the parks. You must have a reservation and all the members of your party before you can go in, but you can eat in the park before it is officially open. This has two advantages; obviously you can maximize your time in that first line or two and you can get some really great photos without the crush of humanity.
- Get A Haircut At The Harmony Barber Shop. This is strictly a Magic Kingdom experience, but I love doing this! Our first kid had the privilege of having his first haircut there. I HIGHLY recommend this! There was all sorts of kitsch and celebration and they are excellent with a wiggly kid.
- Watch The Parade From Frontierland. Again, this is specific to the Magic Kingdom, but we have had excellent luck finding a good spot for viewing the parade and it's usually much less hectic. This is not the best plan if you want to see the fireworks after the parade. And as an added bonus, we can hit the Pirates of the Caribbean on the way out!
- Hit Your Favorite Rides During the Evening Entertainment. If you are not watching the parade, the fireworks, or Illuminations, this is an excellent time to ride your favorite (usually crowded) rides. E-ticket rides were the most expensive and usually most desired rides when Disneyland and Walt Disney World opened. We still have a tendency to refer to them as such around the cottage.
- Use The Single Rider Lines. If you are not opposed to riding next to someone you don't know, the single rider line can be a great time saver. Usually Mr. Photos From The Parks and Doc can ride the same coaster, or consecutive coasters and come out beaming.
- Grab A Button At Guest Relations. Especially if you are celebrating a birthday, first visit, or anniversary, get a button! The cast members are wonderful at making a little extra magic happen. You can even request a birthday phone call at your resort when checking in!
- Talk To Cast Members. They are incredibly willing to help, share Disney trivia, tell jokes, trade pins, hand out stickers and trading cards, and just in general make your trip enjoyable. One of my favorite interactions was with a street sweeper in Animal Kingdom who kept my kids entertained with jokes as we were all headed to the exit together.
Remember to try and stay positive while you're touring and enjoy the time you have, even in the small moments. It's the happiest place on Earth, and you deserve a great vacation! Until next time, may all your days be filled with fairy dust!
Saturday, April 26, 2014
Scrapping Disney with Project Mouse - Digital Pocket Srapbooking
Obviously I've been doing a lot of scrapbooking lately! Do you find that you craft in spurts too? I get enthusiastic about something and sort of run with it. It's quite possible this is scrapbooking time as I have realized that I still have 2012 pictures to put in a book! Eep! I don't like having to remember that far back.
So to that end, I thought I would share with you my latest layouts of our 2012 Disney Trip. And I know I've said it a million times, but Project Mouse is saving my bacon on these layouts! It's so nice to have a Disney themed kit (or 4) to make the scrapping of these days quick and easy. It's like automatic inspiration! I love it. Here's a link to Britt-ish Designs blog where you can find all the information you need to get your own Digital Project Mouse kits. I know I can't get enough!!
For the Animal Kingdom layouts I adjusted the colors and added my own tree custom shape to make it really work for that park. And I noticed while doing this the HUGE difference between the iPhone 4 camera I was using then, and the iPhone 5 camera I am using now. WOW!
If you've used Project Mouse I would love to see your layouts too! Tag me on IG or leave me a comment here. Until next time, may all your days be filled with fairy dust!
Thursday, April 17, 2014
DIY Disney Scrapbook Layout | Anatomy of a Disney Enthusiast
You all know I am a Disney scrapbooker, and I am absolutely in love with this Disney Enthusiast layout! Partially because I designed the entire thing; partially because Doc has never been scrapped so perfectly! My inspiration for this layout came from a very clever resume I saw via Pinterest. I knew that I wanted to do this for Doc at the very least, I am still hoping to get it done for all of us Disney fanatics in the cottage! Maybe I'll select one of us each trip for this treatment. It wasn't too hard to do and it's a fun surprise in the midst of my project life layouts.
Here's how I did it. I work in Photoshop CS5 (If you know a student who can purchase this for you, you can same a bundle!). I took a photo of Doc that showed his entire body and converted it to black and white. I then used the marquee tool to create the white boxes. Once I had them in place I used my custom shape tool and my brushed to create the smaller icons. You can find my Disney Mountain Range Digital Brushes here, free for personal use. You can find my Disney Snacks Digital Brushes here, also free for personal use. If you can't find the custom shape you are looking for, simply google "free custom shapes photoshop" and a whole host of options should come up.
If you decide to do this too, I'd love to see what you come up with. Send me and link, tag me on Instagram, or leave me a comment here. Until next time, may all your days be filled with fairy dust!
Tuesday, August 20, 2013
From Belle's Library | Kingdom Keepers II: Disney at Dawn
This month's installment of From Belle's Library revisits the Kingdom Keepers series by Ridley Pearson. This month we look at Disney at Dawn. This is one of the first books I have read/listened to that was Whispersync enabled. As and audiobook listener, I really loved using this technology. It will definitely inform my book purchases in the future.
I am usually a huge fan of the first book in a series, feel it lags in the second book and then picks up again for me in book three. At least I felt that way about Harry Potter, Percy Jackson, and The Chronicles of Narnia. But I have to admit that this series surprised me. I actually thought the second book was better, smoother and all around more interesting to read than the first. And that's saying a lot, as this book takes place in my least favorite park: Disney's Animal Kingdom. Actually, the park is growing on me. I like it, it'll just never be Epcot or The Magic Kingdom. It just wasn't Disney enough when it first opened. First impressions last a long time, apparently.
As far as Kingdom Keepers goes, I liked the way the characters seemed to be more fully developed in this book, not as one-dimensional as in Disney After Dark. And perhaps with the first story under our belts, there was less explaining and more doing in this one. Always a plus if you have a reluctant reader. Also, the narrator for the audio book changed. I like the interpretation that this narrator, Christopher Lane, gives the characters, especially Wayne, the mysterious old imagineer that helps the kids on their expeditions. It was easier to listen to, to become immersed in. Finally, the story was totally believable, or at least for those of us who can believe in the Disney villains coming to life and trying to take over the parks. Not a far stretch if you ask me!
Overall, Disney at Dawn was a surprising improvement for me, a nice surprise. I will be excited to see what comes next for these precocious middle schoolers know as the DHIs or the Kingdom Keepers. I'd love to hear your thoughts as well. Until next time, may all your days be filled with fairy dust!
Tuesday, August 6, 2013
Easy DIY Disney Park Map Binder | Back to School
This is one of those fantastically easy projects that makes me think, "Why didn't I think of that?" But alas, I did not. This idea comes from a good friend, The Blue Fairy, who has the Disney Bug almost as bad as me! Thanks sister!I really like the way this turned out. I'm all about recycling last year's school supplies if possible, and this is an easy trick to do just that. You could even change it out throughout the year. It requires two park maps (the same or not) and some adhesive vinyl (or really big stickers). I cut each map (in this case Animal Kingdom) to 9" wide. The spine is the remainder of the map (in this case Expedition Everest), cut to a width of 1.25". At this width they slid in easily with no bunching up. I used dark red Silhouette adhesive vinyl and the free font Waltograph to create the name on this binder. I sized the name to 8.675" wide. I adhered the stickers to the outside of the binder so I could easily change out the maps if I wanted to later in the year.
This project took me all of 20 minutes from start to finish. That's a project anyone can do. And Jiminy Cricket would certainly give this one his seal of environmentality. Reduce, Reuse, Recycle!
Until next time, may all your days be filled with fairy dust!
Tuesday, July 9, 2013
Sitting with Grandmother Willow: Melissa & Meg

As part of our on-going series, Sitting with Grandmother Willow, I am happy to introduce Melissa and Meg, of MouseMaps, an Etsy shop. This series of blog posts highlights artists and bloggers of all stripes with one thing in common: a passion for Disney! I hope you will enjoy getting to know Melissa and Meg as much as I have.
Disney by the numbers (with apologies to Harpers):
# of trips you've made: I have made more than 25 (I have lost track), and Meg has been about 8 times.
Date of first trip: My first trip was at age 4 with my aunt, uncle and cousins, which I barely remember. The first I remember was at age 12, and just about every year since then. We started Meg at age 2!
Date of next trip: August 2013
# of Resorts stayed in: 12
Usual # in your travel party: Usually, it’s just me and Meg.
Pairs of mouse ears in your cottage: Meg has 2 pairs. Sadly, I have none!
WDW or Disneyland (or other)? WDW, although I would like to go back to Disneyland!
How do you usually travel to Disney? Mostly by plane, once by car from MA.
Do you have any tips for trips? My best tip would be to plan ahead! Make dining reservations, and don’t try to fit everything into one trip!
Do you have a favorite place to eat while in Disney? ‘Ohana, Be Our Guest, 50’s Prime Time CafĆ©
What is your absolute DON'T MISS attraction? We have to stick with the classics and say Haunted Mansion, and Carousel of Progress.
Stage shows, yes or no? Yes!
Parades, yes or no? Yes!!!
Best Fast Pass to get: Toy Story Midway Mania, and Soarin
Favorite park: Magic Kingdom
One piece of advice you'd give a novice about WDW/DL: Research beforehand, but while at the parks, “take time to stop and smell the roses”.
How do you create extra magic for your family? We have booked an Illuminations cruise, sat front row at the Hoop dee doo Revue, and on our next trip we’re going to try the Tomorrowland Terrace Dessert Party. There is always something new to try.
Tell us about your Etsy shop: I started out making one bracelet as a Christmas gift for Meg, then some for a Give Kids the World raffle at a Disunplugged event. So many people liked them! Finally, Meg talked me into opening an Etsy shop. Now you can take part of your 2nd home with you everywhere!
How can we connect with you? We are on Etsy at etsy.com/shop/mousemaps and on Twitter at @MouseMaps
Thursday, June 13, 2013
Flag Day DIY inspired by Disney's Animal Kingdom
| DIY Tibetan Prayer Flags Inspired by Disney's Animal Kingdom |
I have always loved the themeing in the Animal Kingdom of Walt Disney World. Even as a new park (when it was not very fun for our family - and SUPER hot) the themed areas seemed superior to much of the rest of the Disney Resort. I have especially become a fan of the Tibetan prayer flags near Expedition Everest. I've always been a spiritual person, and drawn to these flags and their purpose wherever I see them. They are meant to be torn and impermanent items. If you want a little more information about them, you should check out The Peace Flag Project. I think they are just beautiful. So when I found this tutorial for making miniature prayer flags from Small World Land, I knew I had found a project for me.
For this project, I used the printable document supplied in the tutorial. I sized it to 150% and printed it directly only my fabric. If you've never printed on fabric, it's a very simple process. I used these instructions from Instructables. I didn't have any freezer paper, so I used Silhouette's Sewable Heat Transfer Fabric Interfacing. I'm glad I did. I was able to print on it with no problems. I was even able to iron two small strips of flags together to make them double sided. I then just cut them apart and strung them on button-hole thread. (It's thicker thread than what you usually sew with.) And I love the result! I have my own little string of prayers hanging in my studio. They are a lovely reminder of the prayers I wish to offer up to the universe.
Until next time, may all your days be filled with fairy dust!
Thursday, June 6, 2013
DIY Disney Mountain Range Digital Scrapbooking Brushes
![]() |
| Disney Mountain Ranges Photoshop Brushes |
If you are a digital scrapbooker too, then you know how fantastic brushes can be. Brushes are shapes that can be customized with texture, pattern, and color so that they can look like stickers, chipboard, metal, or a host of other scrapbook elements. They can even become a frame for your photo! The thing is, brushes are not hard to make if you have a little knowledge of Photoshop. If you'd like to try it yourself, check out this helpful brush-making tutorial. I was able to make three of these brushes from Mr. Photos From The Parks's personal photos in less than 5 minutes each. (Space Mountain took me a little more time!) And now I have them to use in all my layouts! AND, so do you! I'm sharing my brushes with you as a FREE DOWNLOAD, for personal use only. Just click on the photo caption above to download these brushes now. For you Disneyland aficionados, I apologize for not having the Matterhorn available. Never having been to Disneyland, I am without my own photo of that attraction. Something for the Disney Bucket List!
I am working on an entire scrapbooking kit, but that will have to wait for another time. It's coming along though, so hopefully I'll be posting it sooner, rather than later! Until next time, may all your days be filled with fairy dust!
Saturday, June 1, 2013
DIY Upcycled Tigger Earbud Case
I love technology. I'll be the first to admit I have a crush on Apple. And I don't know WHAT I would do without my iPhone. Seriously. I'd be so lost without it. But I have a love/hate relationship with earbuds. Cute? Yes. Small? Most definitely. Uncomfortable? Almost every pair. A hot, tangled mess in the bottom of my handbag/diaperbag/minivan console? Always. That is, until now. I saw this idea on Pinterest (where else?), and was smitten. No more tangled mess? Count me in!
In this case, I already had this orange jewelry case (which held a beautiful turquoise bracelet around the time Minnie was born. Nice work Mr. Photos From The Parks!) I decided to use it instead of a glasses case. It was extremely easy to alter - I simply drew the tiger stripes on with a fine point brown Sharpie marker. I looked up images of tiger stripes on Google images to get an idea of what I wanted. It was seriously just that easy. Once I removed the cardboard jewelry insert, it was exactly the right size for the earbuds.I originally envisioned this as part of a Pooh & Friends gift basket of sorts, but as I was adding Tigger stripes to this case, I realized there are a couple other ways that this could be relative to Disney. If you have an Animal Kingdom lover in the house, this becomes a perfect accessory for them. Or, if you happen to have more of a Classics lover in the house, well, this could be part of a Jungle Book package, referencing Shere Khan. And finally, if you have a Princess Jasmine aficionado, then this is all about her Rajah. Plenty of ways to spin this DIY for Disney.
Most importantly, now I know where my earbuds are and that they are untangled and user friendly. And if you don't already know how to wind them up like this, check out this super easy tutorial. It's a little bit life-changing in itself. Until next time, may all your days be filled with fairy dust!
Tuesday, March 5, 2013
DIY Disney Digital Scrapbook Embellishments
There seems to be a wealth of Disney related scrapbooking products on the market, that is, until you start looking for something for your digital scrapbook. Perhaps it's the fear of copyright infringement, or the small market. Whatever the cause, I have difficulty finding new Disney embellishments for our annual trips. I decided to take matters into my own hands.
I happen to live with an incredible Disney photographer, who is well aware of my passion for scrapping. For years, he has been taking photos for his awesome blog, Photos From The Parks. (You should follow his blog. It'll get you through till your next trip.) I have been the lucky beneficiary of said photos for some amazing scrapbook pages. And when I was looking for something special for my Polynesian spread, I realized he had taken exactly the photo I needed to create my own page embellishment.
If you're a digital scrapbooker, chances are you are somewhat familiar with Photoshop (or Elements). I realize "familiar" has a wide spectrum. I'll try to make this as simple as I can. This tutorial uses CS5 on a Mac.
Tutorial:
I would recommend starting with a copy of a digital photo of an icon or sign that has very simple edges. Cleaning up an intricate image can be time consuming and a bit frustrating. Simple shapes are easier to use. I suggest a copy so that if the worst happens and you have to just delete and start over, you haven't lost your original. I speak from experience. And remember, you can always hit [Command+Z] to undo.
1. Open your image in Photoshop. Check to see if the image is locked (there will be a small padlock icon next to your image in the layers palette if it is). If it is locked, click on the image in the layers palette and drag it onto the paper icon (create a new layer) - circled in yellow in the picture below. This should create a duplicate image with no lock. You can now drag the locked layer into the trash (circled in red).
2. Using your quick selection tool (circled in red in the picture below), click on the image you want to use. You should see "marching ants" - a dotted moving line - around the image. If it didn't select all that you wanted, just continue clicking on the areas it should select until everything you want has been enclosed.
You will notice that the tool didn't select it perfectly and added a bit of white space I don't want (circled in yellow in the image above). That's fine. It will easily be edited out later. Don't worry about it.
3. To get rid of the rest of the image, use the shortcut [Command+Shift+I] - this will invert the marching ants and you should now see them around your selected image and the perimeter of the original image. Hit delete. You should now see just your selected image and a transparent background.
4. To get rid of the marching ants, click on the Marqee tool (circled in red below) and then click on your image. The marching ants should now be gone.
5. Now we need to clean up the edge of this image, specifically the part I've circled in yellow above.
6. Zoom in on your image until it reads 100% (in the image below, it's circled in yellow in the bottom left corner). Then select your eraser tool (circled in red in the image below). You may need to adjust the size of the eraser tool. To do this, pull down the menu circled in green. The number refers to pixels. If you want a larger eraser, slide the size slider to the right. For a smaller eraser, slide it to the left. Now you can begin erasing the part of your image you do not want. I recommend a smaller eraser near the edge of your image. It gives you more control.
7. Once you have an image you are happy with, go to "Save As" in your File menu and save as PNG. I like to reopen the PNG once I've saved it to make sure it looks like I want it to. When reopened it should look like this:
The bounding box shows you exactly what will come up when you are scrapbooking. And you're all set! The image is ready to be used as a scrapbooking embellishment.
Photoshop can be confusing, so let me know if you have any questions about this tutorial and I will try and clear things up as best I can. For those of you who need to know: this image was taken in the Polynesian room of It's A Small World. Until next time, may all your days be filled with fairy dust!
Labels:
Animal Kingdom,
at home magic,
Disney Cruise Line,
Disney Parks,
Disney Resorts,
Disney Studios,
DIY,
Epcot,
It's A Small World,
Magic Kingdom,
photoshop,
Polynesian Resort,
scrapbooking
Subscribe to:
Posts (Atom)