Showing posts with label Mickey Mouse. Show all posts

Thursday, September 8, 2016

DIY Disney Felt Luggage Tags

Are you headed to a Disney Destination for Fall Break this year? If so, this is the perfect little project to get you in the Disney spirit!

You know how excited you are to get to Disney, and then you get to the airport and everyone's bag looks pretty much the same? Even with those snazzy Disney luggage tags they send you, your bag still looks like everyone else's, because they got the same tags you did!

September is National Sewing Month and as such, I thought it would be fun to share this easy Disney luggage tag. You can make it in any color your choose, but it will make your bag stand out as your own. That's a particularly good thing when you have antsy, anxious children pulling your pant leg, ready to get to Disney!

You could hand stitch this project or machine stitch it. I chose to use the machine simply for the sake of time. I was able to whip this up in half an hour. That's well within our nap-time window here at the cottage!

I first did a Google search for a Mickey Mouse silhouette, printed it, and used it as a template for this tag. I then cut out my Mickey from black felt, used it to determine the size for the background and cut out two rectangles of felt. (I chose yellow for the other side of this tag because that's what I had, but get creative and let your tag be entirely yours.)

I then took the red felt, pinned the Mickey silhouette to that and used a zigzag stitch to appliqué it to the background. I then pinned the yellow felt to the back of the red felt and used the overlock stitch to sew them together. You could also play around with the decorative stitches on your machine for sewing the two rectangles together. I love using felt for this project, because even if you use a strait stitch to finish this project, your edges will look good.

I'd love to get several of these together for our next trip, each one themed to our favorite characters. Until next time, may all your days be filled with fairy dust!

Thursday, September 1, 2016

DIY Small Zippered Mickey Mouse Pouch

As you know, I'm a fan of little bags and pouches for travel. I saw this little beauty and thought it could be Disney-fied with a little alteration. And while I would work a bit on the shapes of the ears, this came together very easily and I would certainly do it again!

I found the original pattern from Dog Under My Desk on Pinterest. I had all the necessary supplies already in my stash, so this project was definitely budget friendly! If you don't already have what you need, I would say this can easily come in under $5.00 a pouch. Still well within my Tinkerbell Treasure limit. And wouldn't it be so cute for all your pressed pennies? Of course the author of the pattern, Erin, suggests using it as a housing for your earbuds. I also love this idea. Keeping those things from tangling with everything else in my bag is forever my mission! And a great solution for the kids! Especially since this isn't too girly - Doc would even use it.

I tried using different circle shapes for the ears, and in the end, went with this: 


As I mentioned before, I would probably choose to go with bigger circles next time. It's always a bit tricky sewing around circles, but over all, I was still pleased with the way this pouch turned out. It will definitely get used! And I can imagine an endless stream of variations for the fabrics and for making it fit different Disney characters.

Until next time, may all your days be filled with fairy dust!

Saturday, July 16, 2016

Vintage Mickey & Pluto Posters Now on Disney Rewards

Ok Disney DIY lovers! This is awesome! If you are not a Disney Movie Rewards member, you really need to sign up. I'm sure many of you, like us, have a large Disney movie collection. You may have noticed that in every Disney movie case, there is a little paper flyer that has a rewards code. We redeem all those codes at the Disney Movie Rewards site. Each movie gives you about 100-200 points! Even if you do this once, you can find all sorts of great rewards for your family and DIY needs.

There are so many great digital rewards for little to no points on this DMR site; I was able to download all these vintage prints from the DMR website yesterday for only 10 points. If you love DIY, you know that the possibilities with these images are endless! And if you need a little inspiration, check out these tote bags that I made for a trip a couple years ago:


And these notebooks from some Frozen themed posters (also downloaded from the DMR website):


Head over to the DMR site and see what you can find. And if you make something with those images, I would LOVE to see it! Tag me on Instagram, or leave a comment here. And until next time, may all your days be filled with fairy dust!

Saturday, July 2, 2016

DIY Disney Storybook Road Trip Magnet Game

DIY Disney Magnets

If you have ever been on the road with kids for any length of time, then you know that a variety of activities can save your sanity. And this my friends, is road trip season at the cottage! In preparation for our trips I have been scouting out activities on Pinterest that will keep our car entertained. When I ran across this one, I realized I already had all the supplies necessary to give it a try. I am so glad I did! If you ever played with colorforms as a child, this will feel familiar.

I found a couple of scribbled on, torn up Disney Readers in a garage sale this spring. I wasn't sure how I would use them, but I knew I could find a way. I took several of the salvageable pages and cut roughly around them. I then adhered them to some Adhes-a-mag I had hanging around the studio. You could certainly use any sticky-backed magnet sheets. I then went back around the illustrations with more precision to cut out the characters I was interested in.

It was a little bit time consuming, but I'm glad I did it. We'll take a small cookie sheet with us and use these to make up stories together on the way. There are a number of other magnet based games that can be played with a small cookie sheet in the car. I'll be investigating these as well and reporting back if there are any I plan on using this fall. If you've done something similar, I'd love to hear about it. We are always looking for fun car games to play!

Until next time, may all your days be filled with fairy dust!

Thursday, June 9, 2016

DIY Mickey's Kitchen Pot Holders

Some of us are a little more "out" with our Disney obsession than others. We have great friends with a Mickey themed kitchen. There are all sorts of gadgets and cookware that can give your kitchen a Disney feel. In fact, Disney has an entire store in Downtown Disney devoted to such things. And for those of us who can't get to said brick and mortar store, Disney has conveniently provided a virtual store for our every shopping need. Check it out here.

Today we feature a project that would be perfect for the Mickey's Kitchen devotees: pot holders. I love the size of these. They are perfect for holding a hot mug of soup or a bowl that's been zapped in the microwave. It's also the ideally sized for the tea kettle handle. And it's easy enough that older kids can help with this project.

You could customize this project for any Disney character's color scheme (red, white, blue & yellow for Donald; green, blue, orange & black for Goofy; etc.) - but since most of the Disney kitchen accessories are in a Mickey color scheme, we chose to stick with red, black, yellow & white.

If you don't already have a potholder loom, they are fairly inexpensive and easy to come by. I found mine at the local JoAnn's, but they are available online as well. Check out Amazon for a wide selection, or just google potholder loom & use the shopping link. I have had good luck finding the loops in the kid's crafting area of any major craft or education store. But if you are finding it difficult to locate some (or get out of the house!), you can purchase them here.

Experiment with color and pattern. Doc helped me weave these two patterns and we loved the way they turned out. After completing these two, we had a few helpful hints to pass along:

1. The last couple rows of weaving are tricky, as the loops will want to pop off the loom. Go slowly.
2. To finish edges we used an H crochet hook started in the top right hand corner. Pull first loop off and leave on your hook; pull the second loop off and single crochet. Continue around the entire loom, pulling the last loop all the way through so it sticks out.
3. The last edge of the potholder wanted to pull off the loom; try to prevent that by using your left hand to hold it down while you finish the edge (assuming you are right handed).

And that's it! We were able to make 2 of these in an hour. If it's your first attempt at using the loom, give yourself a bit more time. And most importantly have fun! Until next time, may all your days be filled with fairy dust!

Saturday, May 14, 2016

DIY Mickey Oreo Pops


These are a labor of love, and definitely not a nap-time friendly project. But if you are a fan of Oreo cookies, or know someone who is, then it's totally worth it. These pops tend to be a bit fragile, so traveling with them can be tricky. They may be best left to party favors and at home magic. Still, the impact is great, so I still say give them a try.

I was inspired to try this when I ran across this pin on Pinterest. I tried a couple of different ways of doing this. The first and foremost recommendation is that if you are putting them on sticks, definitely get the double stuffed Oreos. They are easy to get the stick into and unlikely to break. (Wilton brand sticks can be found at your local craft store, or here.)

Getting the mini Oreos to stick onto the big ones was a bit of a challenge. I melted Wilton's light cocoa candies and used that as the glue. In retrospect, I would use the dark cocoa next time as it matches the Oreo color better. I found that melting the chocolate so that it wasn't runny was the best bet, as it provided a nice paste-like texture: enough to stick the cookies together, but not so thin it was running all over the mat and not staying on the pops. I also found the ideal tool for applying the chocolate was a small spreader.

Although these look fun and taste great, I was not pleased with the fragility factor, as I wanted to take these with us to Disney. Even surviving airport security, let alone the flight, seemed a bit perilous. I tried covering them in chocolate, but the Wilton's didn't spread evenly and they looked lumpy. (Although Doc said they tasted great!) I also tried using magic shell, but that didn't set up properly. I might try melting chocolate chips next time.

If you give this idea a try, I'd love to hear how it worked for you! And if you have any tips on how to make these a bit more resilient, please, please, share. Until next time, may all your days be filled with fairy dust!

Saturday, April 9, 2016

DIY Disney Inspired Knitted To Go Cup Cozy

I like to advertise my love of Disney everywhere I go. Let's face it: it's good for business! I wanted to have a little something for when I am at meetings. I can't always wear my Disney Inspired T-shirts from my Redbubble shop! So this little guy was born. It's just about one of the simplest knit projects I've ever done. If you can knit and purl in the the round then you can do this. It took me 40 minutes from start to finish. I found these little buttons in my stash; they are 1/2" for those wanting to duplicate this look.

I posted the simple pattern for this on my Ravelry project page. Feel free to knit and modify it to your heart's content! It would be a terrific gift for fish extenders or as Tinkerbell Treasures! I'd love to see a picture of your completed cozy when you make one! Be sure to tag me if you do.

Until next time, may all your days be filled with fairy dust!

Saturday, March 5, 2016

DIY Disney Themed Toddler Pants

I have a passion for sewing. Baby and toddler sewing is so quick, it's almost irresistible for me. I also happen to have a kid with extremely sensitive skin, so souvenir clothes require washing before wearing, no ifs, ands, or buts about it. Making and taking our own is a perfect solution.

Here I used Anna Maria Horner's Quick Change Trousers pattern from Handmade Beginnings. I love this pattern because it's reversible. Those of us who have experience with kids in the parks know that sometimes, a reversible pant can save a photo op! Theme parks seem to have a way of throwing dirt on my kids without them even knowing it. This way, I don't have to carry multiple outfits into the park, and a mess truly is just a quick change to a clean pant. It's a win-win.

If you are an avid sewer, or fabric collector, these may even be a very budget friendly project. The smaller sizes requires under a yard for the main fabric, and the bottom patch can be made from less than 1/2  a yard easily. It was a great stash busting project for me!

I have had very good luck finding Disney licensed fabrics at JoAnn's, including what you see here, Winnie the Pooh, Phineas and Ferb, and Princess & Fairies galore! But don't think you have to spring for the licensed stuff. You can easily find fabric that calls to mind Disney without the branding (especially when those fabrics are in the parks). I have found fish/shark fabric in a Finding Nemo color scheme, generic pirate fabric (bottom right), little people dressed as you might find them in It's A Small World (top right), and non-Disney fairy tale illustrations. I've even used holiday fabric for the reverse when we were going to be in Disney over Halloween or Christmas. Use your imagination and take some time to browse. If you find it difficult to get to a store without a child nipping at your heels, Etsy has some terrific finds and you can browse those stores from the comfort of your own home. Etsy has it's own bonus as well: you can find fabrics there that aren't sold in the US (or wherever you're cottage is located). I love Japanese prints and there is definitely a Disney market in Japan. Sometimes you can find really unique fabric that's worth the time and cost of ordering.

And because some of you will ask, the licensed onsies were found at Walmart for under $5.00 each. The other two I made using the Silhouette SD. Stay tuned for tutorials on how to make your own Disney onsies. Until then, may all your days be filled with fairy dust!

Saturday, August 1, 2015

Disney DIY Paper Airplanes

Our littles recently went to the local library and stumbled upon a paper airplane demonstration. You would have thought it was the second coming! They loved it and showed everyone the airplanes they made. And ever since there has been some paper airplane madness here in the Cottage!

I remembered having pinned some Mickey airplanes on Pinterest and decided to look them up. Sure enough, there they were! And now I am sharing them with you. You can find the cut-outs to download on the Disney Family website. They are simple to make and loads of fun!

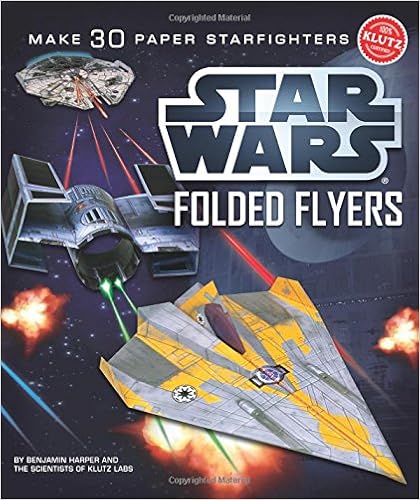
In fact, even the high-schooler got in on the action, remembering he had this Star Wars book of paper airplanes hanging out in his room. That was even more amazing to the little ones. Even to this mama, this book rocks. If you have a Star Wars kid (or adult!) in your house, you should seriously consider this for them! I would definitely recommend it for those with a good attention span and a command of scissors. The designs are complicated and one even frustrated the teenager to the point of balling it up and tossing it out! 

These were a great boredom buster for our family, and as summer drones on for some of you out there, maybe this will be a good diversion. Until next time, may all your days be filled with fairy dust!


Tuesday, March 3, 2015

Celebrating National Crochet Month Disney Style

If you don't crochet, you may not know that March is National Crochet Month. As such, I thought it would be fun to do a round up of all the Disney crochet projects I've done on the blog over the last two years! To get the story on how I made them and a link to the patterns, click on the caption. It will take you to the original post.

I hope you enjoy them, and may all your days be filled with fairy dust!

Tangled Passie Clip

Disney Dress Up Crowns

Amigurumi Squirt

Adult Sized Mickey Beanie

Princess Wrap

Tuesday, February 3, 2015

DIY Disney Bookmark Valentines

Last month I posted about this adorable and easy to make paper clip bookmark. Today, I'm going to show you how simple it is to turn these little handmade treasures into lovely, simple valentines. If you missed the tutorial on making these bookmarks, you can check it out here.

In order to turn these bookmarks into simple valentines, I used these great printable cards from Mique from Thirty Handmade Days. (That's pronounced Mickey - coincidence? I think not!) I simply printed the cards out on card stock, used my paper cutter to cut them out and make a small slit in each one, and attached the bookmark to it. That's it!

I happen to know a certain pre-school teacher at Little Chef's school who is about as Disney crazy as we are! I think this would be the perfect thing for her valentine this year! It's inexpensive, cute and functional. I know that was just the sort of thing I liked when I was teaching!

I hope you are enjoying this run up to Valentine's Day! And until next time, may all your days be filled with fairy dust!

Thursday, January 15, 2015

DIY Mickey Bookmarks/Tinkerbell Treasures

These little items were so quick to make I even surprised myself! I'd seen versions of this on Pinterest, and have been wanting to try it myself for a while. Piece of cake! I had all the supplies I needed right at home and if you are a crafter, I bet you do too! These would be a fun little Tinkerbell Treasure for any Disney trip, especially if you have an avid reader in your travel party! I'd totally pair this with one of the Peter And The Starcatchers books!

Here's how I did it:

Supplies:

black felt
large paper clips
embroidery floss (I used red and black)
needle
scissors


1. Cut out a pattern to use. I just hand drew this Mickey head. You could also print and use this one:

2. Fold your felt in half so you only cut once, but get 2 pieces.
3. Pin or trace your pattern to your folded felt and cut out.
4. Using your embroidery floss, stitch all the way around both silhouettes, stitching them together, starting one arrow and ending at the other arrow. Don't cut your thread!

5. Insert the paper clip at this point and continue to stitch around the silhouette completely. Make a knot and tie it off. Now you can cut your thread.
6. Your paper clip will probably still be loose. I took some black embroidery floss and secured the paper clip by sewing it right in the middle of the silhouette. You can barely see it!

And you're done! Simple as that. This was definitely a nap-time friendly project and I am certain I could make several of these in an hour while watching my favorite TV show! Until next time, may all your days be filled with fairy dust!

Thursday, December 11, 2014

12 Days of DIY Disney Holiday Goodies | Mickey's Strawberry Santa Hats


I found these delicious looking strawberry santa hats on the Disney Family website. And this is a direct lift from their page. These look great and I fully intended to make them, but Miss Minnie ate all my strawberries before I had the opportunity to give it a try! (She absolutely loves her berries!) I hope I will be able to get to it before the season is over, if not, we may have ourselves a little Christmas in July celebration this summer!

Enjoy this post from Family.Disney.com, and until next time, may all your days be filled with fairy dust!


What You’ll Need
•
Large fresh strawberries
•
White chocolate
•
Vanilla wafer cookies
•
Small chocolate disks or chocolate mints
How To Make It
  • 1
    Wash the strawberries with cool water, and carefully remove the hulls. Pat the fruit dry with a paper towel.
  • 2
    Melt some white chocolate in the microwave or on the stovetop, following the directions on the package.
  • 3
    Working with one wafer cookie at a time, dip the surface in the melted candy so that it is generously coated. If needed, dip it twice.
  • 4
    Place the dipped cookie on wax paper (coated side up), and immediately set a strawberry (hulled side down) on top. Quickly, but gently, push two small chocolate disks against the base of the berry for ears, holding them in place for a few seconds to make sure they stick. If they don’t hold, use a little more melted candy to attach them.
  • 5
    Repeat steps 3 and 4 to make as many more hats as you want, reserving some of the melted white chocolate for the pom-pom tops. When you’re ready to add the pom-poms, let the melted white chocolate cool slightly so that it will thicken a bit. Then spoon a small blob onto each strawberry tip.
  • 6
    Finally, add a little texture to the hat trim, if you like, by using a fork to gently “scramble” what’s left of the partially cooled white chocolate (it should resemble flaked coconut). Gently press some of the white chocolate flakes onto the candy hat brims while they are still warm so they will stick in place. Once the candy is completely set, arrange the finished hats on a plate to serve.

Tuesday, November 11, 2014

DIY Crocheted Adult Sized Mickey Beanie

Show your Disney Side by sporting this cool Mickey Mouse crocheted beanie! It's starting to get cold out there and this could be the perfect accessory for those missing the magic of Disney.

This pattern from Repeat Crafter Me was easy to follow and FREE. It makes a hat for a baby. I, of course, needed something a little larger for me, so I used the measurements from a basic crocheted beanie pattern that used the same needles and yarn sizes, the ears from this pattern and voila! A new adult sized hat was born! I can't remember if I increased the size of the ears from the original, but you could always add a few more rounds if they seem too small for your taste. And by the way, Mr. Photos from the Parks is a gem for posing for these pictures for me!

If you are interested in making your own Mickey beanie, just search "Mickey Hat" on Ravelry.com and you will find a wealth of patterns! Some are free and some you need to pay for, but I find that the patterns I pay for are generally easier to follow with extremely clear directions. Just something to consider.

Until next time, may all your days be filled with fairy dust!


Tuesday, August 26, 2014

DIY Mickey Mouse Serving Tray

I think this tray is one of the funniest and delightful things I've done in a long time! I love walking by it on the command center and seeing our ADRs for our next trip. Mickey just makes be smile every time. The ridiculousness is part of the charm! And for under $10 and a little time, it's totally worth it for me to have this fun little Maitre d, er, Mousetre D, at my next Disney themed event!

The last time we were in Walt Disney World, I stumbled upon these plastic, movable Mickey toys at the International Gateway Gift Shop in Epcot. This shop is right at the World Showcase entrance to the park. You may have walked right by it many times and never really noticed it if you haven't had occasion to use it, but it is where the boats dock from the Epcot resorts and Hollywood Studios, tucked in between the UK and France pavilions. It's one of my favorite little shops to check out.

When I saw these plastic Mickey toys for $7 each I decided to pick up two of them. Not only were they good bath toys for the little ones on that trip (which I never seem to remember to bring), it seemed to me they were perfect for some yet unthought of craft. And so they were.

This Mickey already separates at the waist, so all I had to do was pull him apart. I made sure both halves of him were level and would fit seamlessly on the tray. I found this lightweight silver tray at the dollar store in the party goods area. It was exactly the right size for this project. After that, I simply used gorilla glue to adhere both sides of Mickey to the tray. He was hollow inside, so I put a few marbles in his bottom half to weight him down. And since I used gorilla glue, I don't think I would use this for food unless I put a doily around it first or the food was individually wrapped, like candy or cupcakes. I think it's the perfect think for party favors or information though! I used this tutorial as an inspiration for this craft.

Until next time, may all your days be filled with fairy dust!


Tuesday, May 13, 2014

DIY Small Zippered Mickey Mouse Pouch

As you know, I'm a fan of little bags and pouches for travel. I saw this little beauty and thought it could be Disney-fied with a little alteration. And while I would work a bit on the shapes of the ears, this came together very easily and I would certainly do it again!

I found the original pattern from Dog Under My Desk on Pinterest. I had all the necessary supplies already in my stash, so this project was definitely budget friendly! If you don't already have what you need, I would say this can easily come in under $5.00 a pouch. Still well within my Tinkerbell Treasure limit. And wouldn't it be so cute for all your pressed pennies? Of course the author of the pattern, Erin, suggests using it as a housing for your earbuds. I also love this idea. Keeping those things from tangling with everything else in my bag is forever my mission! And a great solution for the kids! Especially since this isn't too girly - Doc would even use it.

I tried using different circle shapes for the ears, and in the end, went with this: 


As I mentioned before, I would probably choose to go with bigger circles next time. It's always a bit tricky sewing around circles, but over all, I was still pleased with the way this pouch turned out. It will definitely get used! And I can imagine an endless stream of variations for the fabrics and for making it fit different Disney characters.

Until next time, may all your days be filled with fairy dust!

Thursday, May 8, 2014

DIY Mickey Laundry Hamper Labels

This little project was supposed to be a quick and dirty nap-time project. In fact, it was a bit more time consuming than that. These hampers have been around a long time, and while I was sewing on yet another replacement strap, I remembered that I'd always wanted to mark them light and dark. And the idea of using a simple Mickey popped into my head. So a new project was inevitable!

I was able to whip up the Silhouette design in no time. If you'd like to download these silhouette files, you can do so right here: Mickey Dark Laundry Label, Mickey Light Laundry Label. Don't be surprised when you open them and the text is mirrored. Remember you need to do that so it will print the right way when you iron it on.

Getting the heat transfer material to adhere to the duck cloth, that was not so simple. I'm not exactly sure what happened with it, if it was old (it was) or if my iron couldn't get hot enough. I tried several variations of heat temps and cloth fabric on top; I even turned it inside out to iron these on. I spent about 30 minutes trying to get the first label to adhere. It was firmly adhered on the top part of the Mickey, and absolutely not on the rest. I finally decided to peel it off the transfer paper myself - stretching it a bit - and then adhering it without the transfer paper, but still using a cloth between it and the iron. That worked, but it's slightly wrinkled and warped in places. The second label did better, as I used the highest possible setting on my iron. I still had to pull out the center of the "g" myself and adhere it separately. I can't say I'd be very anxious to use this material on anything that would get any sort of wear and tear - or go through the laundry. But for this project, I can live with the imperfections. I'll just think of Mary Blair every time I use them, and her purposely imperfect 5-legged goat!

Until next time, may all your days be filled with fairy dust!

Tuesday, January 28, 2014

A Freezer Full of Mickey Waffles

If you've ever had the opportunity to breakfast in one of the Disney Resorts, you know how magical those Mickey waffles can be. There is something so delightful about sitting down to breakfast and seeing Mickey right there on your plate. You know the day is going to be a good one.

Here in the cottage, the days just got happier. We now have a Mickey Waffle Iron! The whole family is excited about it. In fact, Little Chef couldn't WAIT to get his hands on it. It helps that we love waffles any way you make them. So starting our days with a Mickey waffle seems like a bonus!

We also make our own freezer waffles; with our allergy issues, we make a lot of things at home. Plus it's SO much cheaper to make them ourselves and freeze them. It's really easy. We just make the waffles a little underdone, let them cool, and put them into gallon size ziplock bags. I like to put a piece of waxed paper between each waffle as it goes into the bag. It's just makes getting them out a lot easier. When it's breakfast time, we simply pop them into to the toaster to heat them up. Easy as can be. And now we will have Mickey waffles to make our mornings that much better.

Until next time, may all your days be filled with fairy dust!

Saturday, January 4, 2014

Mickey Mouse Fair Isle Sock Pattern & Chart


It's definitely been a cold winter for most of us so far. And I for one, like to battle that cold with hot tea, a warm fire and a toasty pair of warm wool socks, handmade socks if I can get them. In fact, sock knitting is one of my obsessions (when I don't have tiny people pulling on my yarn). I love a small project that I can take on the road. And these sweet socks were started on our last Disney vacation! The perfect sort of knitting for that road trip.

This is my original pattern and chart, available for personal use only. You can download a copy of my Mickey Mouse Sock Pattern if you'd like one. Fair warning though, I wrote the pattern for my own personal reference and I am the only one who has knit from it. It has not been "tested" so to speak and the details for kitting up the toe and several other small details seem to be off, but honestly, I don't have time to figure it out. Knit at your own risk!

It's a simple fair isle pattern and I like how the pattern is only at the top of the sock, so your toes don't have to battle the strings when you slip your foot into the rest of the sock. For those interested parties, I used Knit Pick's stroll in Barn and Black to complete this project. I'm hoping these little warm fuzzies will get me through to seed ordering time, when Spring becomes a reality and life abundant is not too far away.

Until next time, may all your days be filled with fairy dust!