Showing posts with label Walt Disney World. Show all posts

Saturday, August 19, 2017

Disney's Blizzard Beach Water Park Polar Patios


I may have mentioned (a lot!) that my family are high maintenance travelers. We like what we like and we require some special attention; we know it and are wiling to pay for it. It's one of the reasons we love Disney so much. They have options to accommodate travelers like us! As such, we decided to reserve a Polar Patio this summer at Disney's Blizzard Beach water park. The Polar Patios are a reserved area for just your travel party (up to 6 people). You can reserve them prior to your arrival (ask your travel agent to do this for you!), or you can check and see if they have any available the day you arrive. After you have checked in at the Beach Haus (a gift shop near the entrance of the water park), you are all given wristbands and your attendant takes you to your Polar Patio. Once there, they will orient you to your Polar Patio and the services available.

 I am always worried about having enough shade for my very fair skin, and having a place to settle with the kids. The added bonus of having someone available to bring us food and drinks sounded like an actual vacation to me! We managed to get a perfect location (Patio 1) for our family, right near the kid area, a snack shack, and directly across from the restrooms. I didn't request a specific location so I don't know if it was dumb luck or if Disney actually looked at the ages of our kids. When you rent a polar patio there is seating for 6, towels, a cooler stocked with ice and water bottles, refillable mugs for everyone in your party, plenty of towels for everyone, and a personal attendant who will bring you food and beverage all day long. We definitely felt pampered all day!


I will be honest here and say that your experience with these Patios may vary depending on the attendant assigned to you. You will be given a phone number so you can text your attendant throughout the day, and they will bring you just about anything you like. Menus are provided on the patio for food and drinks available in the water park. Keep in mind, It can take a while for your items to be delivered because your attendant is physically going from one place to another to get the food and drinks you are requesting. So plan ahead and be aware that you may be close enough to a food location to grab what you want without having to wait.


The food options at Blizzard Beach were different than we were used to, as they have family platters and salads that feed up to 4 guests. It was a perfect solution for our family. Three of us are all about the food and two just really want chicken strips and fries! And here, as with every other place we've been on property, they are able to handle any food allergies we throw at them.

The drink options were great! They had a nice selection of sweet and not sweet drinks. Something for everyone.

 You will have the option to have a running tab all day; if you choose this, be sure to check out with plenty of time to get to your next destination. We were pressed for time for our dinner reservation because it took SO LONG to check us out at the end of the day. We may have been one of the last families to leave the park! Just afford yourself enough time.

Overall it was a great experience and something special for our family to do. I might not do it again, but it was definitely worth doing once! I'd love to hear about your experiences renting a Polar Patio! Until next time, may all your days be filled with fairy dust!


Thursday, August 17, 2017

WDW Water Park Review: Blizzard Beach

On our last trip to Walt Disney World we enjoyed a day at Disney's Blizzard Beach, one of Disney's two water parks. If you don't already know this about Disney, they pride themselves on storytelling and there is a backstory to this water park. According to Disney "legend" (and wikipedia), a freak snowstorm in the area led to the development of Florida's first ski resort. Naturally, the snow did not last long. This left behind a collection of waterlogged but snow-less ski jumps and chair lifts. The operators were preparing to cut their losses and walk away. However, they were interrupted by an echoing "YAHHOOO!!!" coming from the mountain of melting snow. They looked up to see a blue alligator, wearing a red scarf and gold inner tube, careening down the mountain at top speed. Ice Gator, the mascot, then landed in a pool of melted snow at the base of the mountain with a thunderous splash. The ski resort operators suddenly saw the park's potential, and the mountain of snow became Blizzard Beach, "the most slushy, slippery, exhilarating water park anywhere!"

Our family has fallen in love with taking a day at the water parks during our Disney stays. Our little ones are water bugs and will swim in any old pool, but a day at the water parks has become a big treat! And since it's only $62/person (or less with a Disney Vacation Club or Annual Pass discount) it's a bargain day compared to the theme parks! There is something for all of us, including a lazy river, a wave pool, and lots of slides and attractions.

There are plenty of shelters throughout Blizzard Beach with shaded seating and chairs so, if you are like me, you won't burn to death while having fun! There are also lockers and changing rooms/showers near the front of the park for anyone needing a secure location for their valuables.

At the time of this writing, Disney was also providing the park rental towels free of charge for resort guests (they are also part of a polar patio reservation). Otherwise, you can either rent them for the day, or bring your own. Life vests are provided throughout the park for little ones free of charge.

And as evidenced by the photos above, PhotoPass photographers were all around the water park taking pictures and handing out PhotoPass card on a rubber band so we wouldn't lose them and could have some great pictures from our day! It was a really fun touch this year that wasn't available last year.

There are also plenty of places to get food and beverages (even the adult variety) so if you don't want to tote your own food, you have plenty of choices. There is even a refillable mug so that you can have unlimited fountain drinks while there. We didn't think that would be very appealing and yet we quickly realized it was exactly what our family needed. Also, don't try and take your resort dining plan mug; it won't work!

Another tip if you are staying at a Disney Resort, put your MagicBand in a secure location while in the water. They DO NOT float. We saw more than one person combing the lazy river and wave pool looking for their MagicBand.

We had a blast at Disney's Blizzard Beach this summer. The kids all gave it a 4 out of 5 stars. (Typhoon Lagoon has our heart for atmosphere - Blizzard Beach for activities.) And incase you are wondering, here is my list of essentials for your Blizzard Beach Bag:

  • goggles or snorkel mask
  • waterproof case for your phone (I like this one)
  • sunscreen!
  • water socks 
  • a small waterproof toy for the kiddie area
  • cover ups or dry clothes for the ride "home" (the busses are freezing!)
If you go to the water parks in Disney I would love to hear your feedback! And until next time, may all your days be filled with fairy dust!


Wednesday, July 5, 2017

Tiffins in Disney's Animal Kingdom; A Must Do

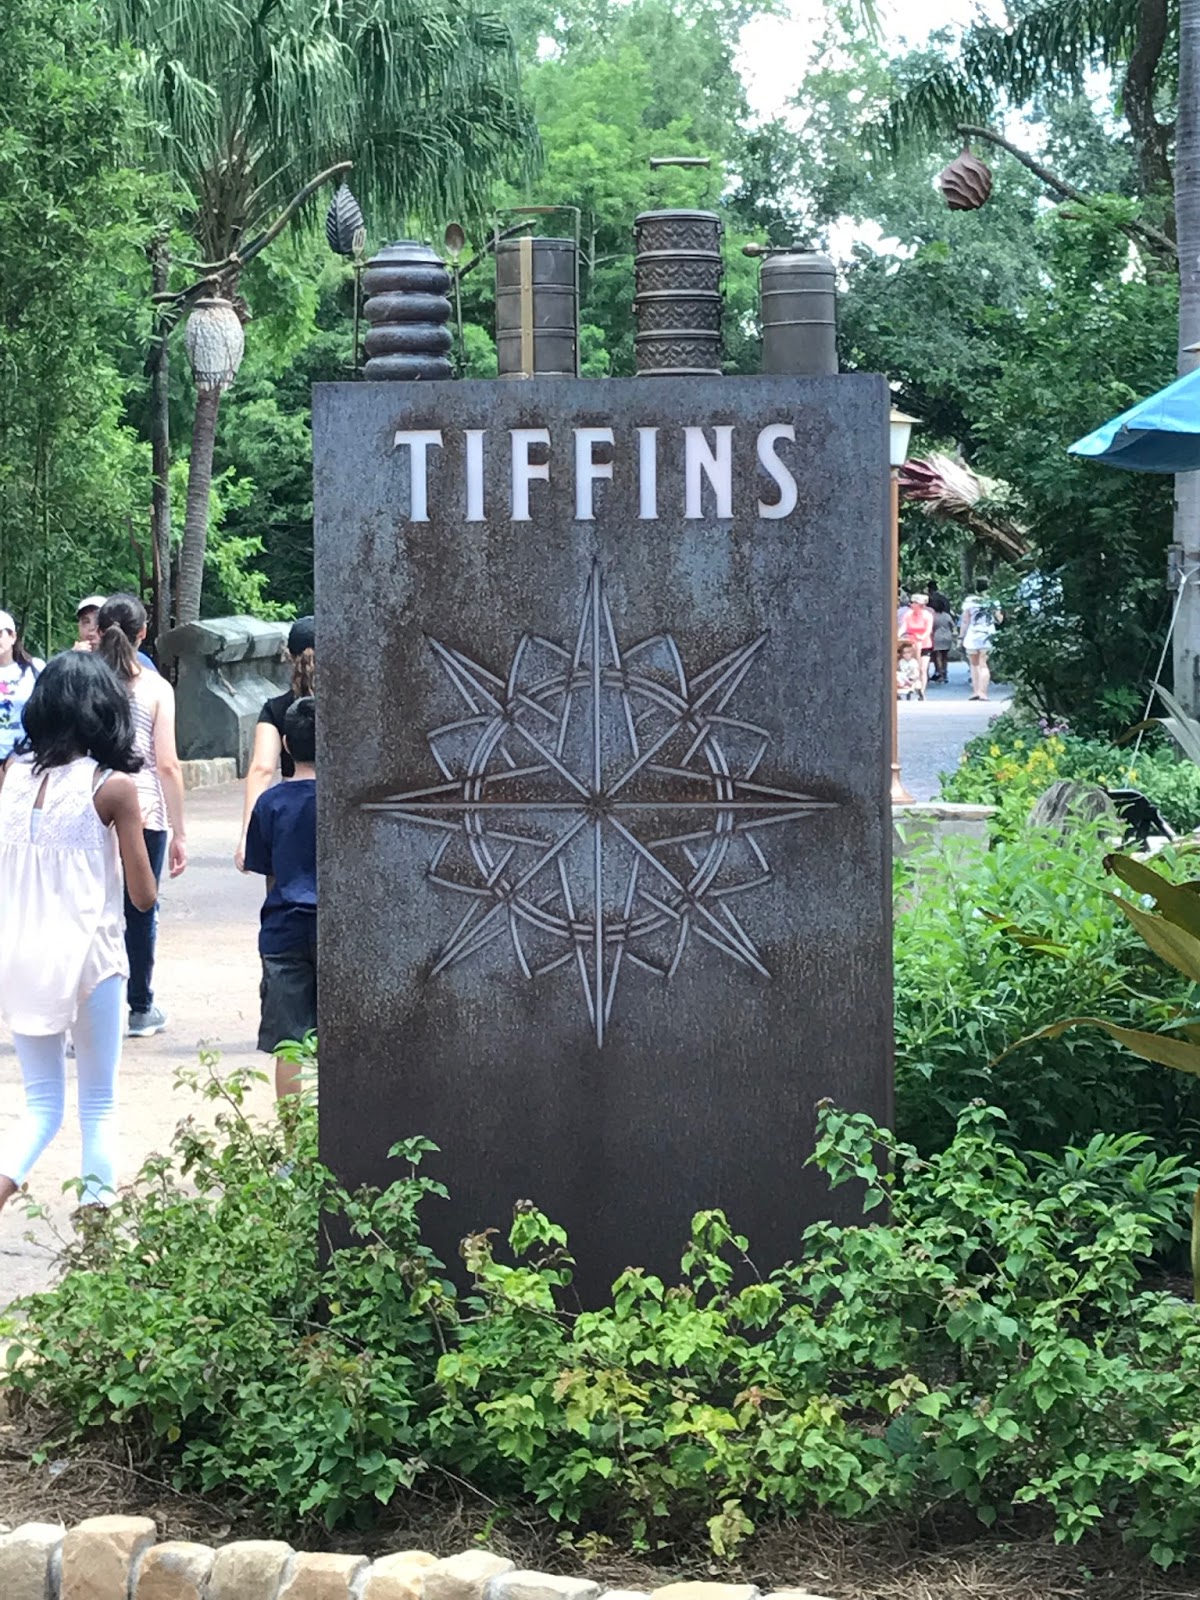
If you have not yet tried Tiffins in Animal Kingdom you really, really must. Our family takes food pretty seriously and we think it is currently the best restaurant on property barring Victoria and Albert's. The selections are interesting and not on your typical dining menu, the ingredients are fresh and delicious and the cocktails are inventive and satisfying. We think they truly live up to their claim to "set off on a culinary expedition of international cuisine inspired by exploration and adventure." We are in love with this new option.

Who Would Best Be Suited For This Location?

If your family likes ethnic cuisine, art and is ready to sit in the air conditioning for a while, this is the place for you. In fact, even if you have a couple picky eaters and a few adventurous souls, you will still be happy eating here. It is a signature dining location which means a.) you will be eating in a nice location, at a table with more than one server waiting on you = it's more expensive than other table service locations around the parks, and b.) you can expect there to be a wide selection of food and wines available, as well as a very accommodating kitchen.

What We Ordered:

You can reference the full menu here. It's full of fantastic selections! We arrived for lunch with a VERY picky kindergartener with food allergies, a somewhat adventurous preschooler, and 3 adult, self proclaimed foodies at our last dining experience at Tiffins. I had taken the time to email ahead (special diets) and ask specifically for chicken nuggets to be on the menu for the one who barely eats any other protein. They would not guarantee that they would be available, but lo and behold when we asked, they had them! In my experience, most signature dining locations will do this for you with a little planning ahead. Also, if you forgot to plan ahead, ask if they have them in the house. It's possible that they ordered a big bag of them at the request of someone else and still have some in the kitchen.

Our meal started with house made bread, and since I no longer eat gluten, I passed. As an alternative for me they brought out rice cracker "bread" made in house with the same olive oil and molasses combination to dip it in. Such a great alternative to the usual gluten free bread served elsewhere on property!

Preschooler:
Pasta Marinara followed by Caramel-Chocolate Cake

VERY picky Kindergartener:
Chicken Nuggets, Fries and Green Beans followed by Caramel-Chocolate Cake (chef made sure the cake was safe for his food allergies)

Foodie 1: Zinger Fizzie, Marinated Grilled Octopus, Pan-seared Duck Breast, Lime Cheesecake

Foodie 2: Jenn's Tattoo, Selection of Artisanal Cheeses, Berkshire Pork Tenderloin (no dessert)

Foodie 3: Annapurna Zing, Selection of Artisanal Cheeses, Duo of Venison, Sorbet Tasting

Suffice it to say, all meals were shared around our table and in all seriousness, the 3 foodies believed we had each ordered the best meal on the menu. All dishes were inspired and delicious. Nothing was over or under cooked. The only complaint at our table was from the VERY picky eater who asked our server, "why did you bring me these?" regarding his green beans.

And speaking of our server, we were delighted to meet someone from home who was very accommodating and just as tickled as we were regarding his complaint. Food allergies can be a pain to deal with but we never felt we were cause anyone any trouble. Our server's recommendations and advice were perfect. Our meal and experience were outstanding. We couldn't have asked for better.

And I can't wrap this up without a nod to the atmosphere at Tiffins. It is beautiful as well. It felt like an oasis (not just for the air conditioning). Tiffins is also an art gallery showing off a range of art that has inspired or become part of Disney's Animal Kingdom. It really is a feast for the eyes as well. And it kept our small tourists occupied as we waited for our meals to be ready.

In short, Tiffins will be part of our Animal Kingdom visits for many years to come. There was no wait for a table on a week day in the middle of June and we were over the moon with this perfect break in our hot and hectic theme park day. You really need to try this place if you haven't been. We can't wait to go back.

Wednesday, June 28, 2017

What's Your Favorite Candy Bar? Or Why Crowdsourcing Your Trip on FaceBook Is A Bad Call

You've seen it before; someone on your Facebook feed asks for recommendations for their upcoming trip to Walt Disney World. It's likely they have never been and are looking for tips and tricks to get them started. This post may or may not phase you. Maybe you get all excited and recommend all your favorite attractions, and where your favorite parade seats are, and where they just have to get dining reservations. Or you may just scroll right past thinking, that's a nightmare I don't want to get involved with. When I see those posts, I cringe. I cringe because not only will there be a ton of erroneous information, I cringe because their friends are cheerfully letting them know all the things they liked (and didn't) while in no way considering your family's needs and desires. They are telling you what their favorite candy bar is, not telling you where you can find your favorite.

Remember that jingle from Almond Joy and Mounds? Sometimes you feel like a nut; sometimes you don't. This is what a good travel planner can parse out for you. When you are considering a trip to Walt Disney World the last thing you need is the conflicting advice from your friends; some of them like nuts, some don't. What you really need is the help of a Disney travel planner. These people are trained in all things Disney. They have experience and knowledge your friends who went two years ago don't. You need to think about what it is your family likes, what your needs are, how you like to travel, and where you like to stay.

Consider this: Are you foodies, and if so, do you have food allergies? Are you the family that likes to go till you drop, or do you like a more leisurely pace? Does your family like to swim, or do you prefer a playground? Are you into broadway shows, or thrill rides, or both? Do you like a high level of convenience in your trip, or do you want to travel on a shoestring? Do you want autonomy, or do you like to have someone else handle the details? Maybe you want a resort with a lot of kitsch and activity, or maybe you like to stay in a quiet, out of the way place. These are not the questions your friends are considering when they recommend their favorite candy bars. They are assuming you like the same ones they do. Maybe you do, but odds are, there are some things that you like that they just don't.

So the next time you see a Facebook post asking for Disney recommendations, the best recommendation you can give is to refer them to a Disney travel planner, preferably one like me who has been over 50 times and can offer sound advice with up to date, accurate, information on all the policies and practices at Walt Disney World. I can't tell you the number of times I have seen downright incorrect information given by well meaning individuals. It's not that they are trying to sabotage your vacation, but if you listen to only the advice of friends, you are bound to be disappointed. Walt Disney World is constantly changing. They add and take away experiences on a regular basis. It's an amazing trip, but it can also be a disaster. It would be such a shame to think you are going to get one sort of candy bar and end up with your least favorite in return. Call a Disney travel planner. You will be so thankful you did.

Tuesday, February 21, 2017

Walt Disney World 101 | 10 Of Our Favorite Touring Tips

We are gearing up in the cottage for a Spring Break trip to Walt Disney World! It's been a while since we have braved the madness of a packed theme park. And a little refresher is always a good idea! So today I share my Top 10 WDW Touring Tips with you.

These are tried and true and used on every Walt Disney World vacation we take. Some are obvious, some are not. Some have taken us a while to realize, some have been with us from the very beginning (and I do mean from the VERY beginning!). I can still hear my dad shouting, "Left side, Amy!" I hope you enjoy them and they come in useful for you and your touring party too.


  1. Stay To The Left. This may be the single most important tip we have. Our American tendency is to stay to the right. And most tourists will choose the line or the attraction that is to their right. As we've continued to travel to WDW this rule has morphed somewhat into, take the path farthest from the door (or humanity). You'd be surprised how much faster you can get your burger and fries if you just move to the farthest line.
  2. Wait To Leave The Parks. It sounds a little nutty, but if you don't have toddlers having historic melt downs, then stay a bit after the fireworks and linger in the shops or buy one last sweet treat. Let the transportation crush happen without you. Waiting to leave the park (especially the Magic Kingdom) can make everyone's night much better.
  3. Arrive Early. If you can't manage the late nights, consider arriving for rope drop. The MK has a fun celebration prior to opening and all parks are clean and sparkling early in the morning; often you can get some nice photos with just your family in them.
  4. Make A Dining Reservation For The Hour Before Park Opening. Some character meals allow for early entry to the parks. You must have a reservation and all the members of your party before you can go in, but you can eat in the park before it is officially open. This has two advantages; obviously you can maximize your time in that first line or two and you can get some really great photos without the crush of humanity.
  5. Get A Haircut At The Harmony Barber Shop. This is strictly a Magic Kingdom experience, but I love doing this! Our first kid had the privilege of having his first haircut there. I HIGHLY recommend this! There was all sorts of kitsch and celebration and they are excellent with a wiggly kid.
  6. Watch The Parade From Frontierland. Again, this is specific to the Magic Kingdom, but we have had excellent luck finding a good spot for viewing the parade and it's usually much less hectic. This is not the best plan if you want to see the fireworks after the parade. And as an added bonus, we can hit the Pirates of the Caribbean on the way out!
  7. Hit Your Favorite Rides During the Evening Entertainment. If you are not watching the parade, the fireworks, or Illuminations, this is an excellent time to ride your favorite (usually crowded) rides. E-ticket rides were the most expensive and usually most desired rides when Disneyland and Walt Disney World opened. We still have a tendency to refer to them as such around the cottage.
  8. Use The Single Rider Lines. If you are not opposed to riding next to someone you don't know, the single rider line can be a great time saver. Usually Mr. Photos From The Parks and Doc can ride the same coaster, or consecutive coasters and come out beaming. 
  9. Grab A Button At Guest Relations. Especially if you are celebrating a birthday, first visit, or anniversary, get a button! The cast members are wonderful at making a little extra magic happen. You can even request a birthday phone call at your resort when checking in! 
  10. Talk To Cast Members. They are incredibly willing to help, share Disney trivia, tell jokes, trade pins, hand out stickers and trading cards, and just in general make your trip enjoyable. One of my favorite interactions was with a street sweeper in Animal Kingdom who kept my kids entertained with jokes as we were all headed to the exit together. 
Remember to try and stay positive while you're touring and enjoy the time you have, even in the small moments. It's the happiest place on Earth, and you deserve a great vacation! Until next time, may all your days be filled with fairy dust!

Tuesday, October 4, 2016

Sitting With Grandmother Willow | Erin of My Fantasy Bands

As part of our on-going series, Sitting with Grandmother Willow, I am happy to introduce Erin of My Fantasy Bands. This series of blog posts highlights artists and bloggers of all stripes with one thing in common: a passion for Disney!

Erin sells high quality, water-safe, vinyl decals for your MagicBands in a whole host of themes! Whatever your Disney passion, she has something that will make you squee! Our family and friends (and my travel clients) have been using these for over a year and we just love them! They are durable and adorable. I hope you will enjoy getting to know Erin as much as I have. A big thanks to her for taking the time to interview with us and offering a special coupon code exclusively for my readers! And be sure to visit her shop for a great selection of Disney themed decals for your MagicBands.

Disney By The Numbers (with apologies to Harper's)

# of trips you have made:  As an adult, four   I lived in Orlando for about 3 years as a child, and had a few day trips during that time.
Date of first trip:   February 2007, The Husband Unit and I were 28 and I was pregnant with our first daughter.  
Date of next trip:  Undecided, sometime in 2017 I hope!  
# of Resorts stayed in:  Five  (Pop, Art of Animation, All Star Music, French Quarter, Caribbean Beach ... my top 3 of these are AoA, French Quarter, and Pop)
Usual # in your travel party:  4 or 5, we had a neighbor friend who has come with us twice, but we have moved away from her now.  :(
Pairs of mouse ears in your cottage:  3 headband ears, 4 or 5 ear hats.

WDW or Disneyland (or other)?  I have never been to Disneyland  :(
How do you usually travel to Disney? We have driven twice and flown twice.  I prefer to fly!
Do you have any tips for trips?  Don't try to plan every moment of your trip.  Sometimes the best memories are ones that happen spontaneously.
Do you have a favorite place to eat while in Disney?  I love the Rose and Crown at Epcot, and Wolfgang Puck's Express at Disney Springs.  There are many table dining locations we have not experienced yet.  We usually have the Quick Service dining plan.  
What is your absolute DON'T MISS attraction?   Magic Kingdom is my favorite park, so all my favorites just happen to be there.  My top 3 rides are Peter Pan's Flight, Big Thunder Mountain Railroad, and oddly enough, the People Mover.  I could ride the People Mover all day. Some people think it's boring, but I find it relaxing and enjoy the vantage point of the park from the elevated track.  

My don't miss attractions for other parks:  In Epcot I love Test Track and SOARIN (although I have not experienced the new revamped SOARIN), and I enjoy the hydroponic tour ride at Living with the Land.  At Hollywood Studios I enjoy Toy Story Mania, and the Rockin Roller Coaster, and the Little Mermaid show.  At Animal Kingdom I love the Kilimanjaro Safaris, the Finding Nemo show, and the Kali River Rapids.  

Stage shows, yes or no?  
Parades, yes or no?  For both of these, it depends on crowds and weather.  If we are able get to a parade or stage show early with a good vantage point, we will.  We really play it by ear.  If the parks are crowded or the weather is hot, we avoid parades and try to stay on the move and hit more ride attractions.    Indoor stage shows are a great way to escape the heat. If crowds are lighter and weather is mild, we might slow down to watch a parade or outdoor stage show. We try to attend a fireworks show at least twice during our vacation, often more.  

Best Fast Pass to get:  SOARIN, Mine Train, Toy Story Mania.   
Favorite park:  Magic Kingdom!
One piece of advice you'd give a novice about WDW/DL:  Don't try to see and do EVERYTHING, it's impossible.  Make a list of your must-do attractions, and prioritize.  Also, be prepared for the unexpected, and try not to be too bummed at the end of your trip if something didn't happen.  Remember that you were at DISNEY WORLD and your trip was probably pretty amazing even if you didn't see that one show or ride that one ride.  
How do you create extra magic for your family:  I casually shop around for months ahead of time gathering little Disney-themed trinkets from clearance sales and dollar stores.  I pack them in a secret bag to give my girls gifts throughout our vacation, and also have left "Mickey Mail" in our resort room for them to find.  This saves on spending big bucks on park souvenirs.  Each family member has a gift card to spend on a few special items in the parks.  

How can we connect with you?  Email or Instagram!


Saturday, September 17, 2016

Customizing Your MagicBands with My Fantasy Bands

If you have been to Walt Disney World lately you will notice that the DIY and customized Disney experience is at an all time high! LOADS of us are sporting our special shirts, hats, bags and now MagicBands. Of course, we at the cottage are TOTALLY into that!

Today I wanted to introduce you to one of my favorite products for customizing your MagicBand: My Fantasy Bands. These decals are professionally printed and can withstand the abuse of my family! We are still using these same magic bands a year later. And they have all been in the pool and the shower/bath and remain on the bands with no peeling. I am really impressed with the quality of these decals. In fact, if you have booked a trip with me in the last few months, you may have received a surprise package of these for your very own MagicBands!

These decals were really easy to apply, and they come with instructions on how to make them last. Plus she has ALL SORTS of great themes, some seasonal, some Disney related, some just for fun! I can't recommend these highly enough. And if you are on Instagram, you can see lots of her designs modeled by actual guests by following @myfantasybands. Have fun perusing Erin's site! Until next time, may all your days be filled with fairy dust!

Thursday, September 15, 2016

The Chapeau | DIY Sleeping Beauty's Fairy Merryweather's Hat

In honor of Felt Hat Day (which is today for those of you unawares), I am rerunning this post about making my favorite fairy's fascinator! I hope you enjoy it!

I am in love with the hat shop on Main Street USA: The Chapeau. It's the place to find any hat your heart desires; as long as Disney makes it! I realize there are those who would never be caught dead in a Disney hat, and those of us who think they are AWESOME. If you fit into that latter category, then this post is for you!

I have an affinity with Merryweather, naturally, but she's not the easiest character to find in the parks. And neither is a Merryweather themed hat. So I put my DIY skills to use and created my very own Merryweather fascinator. This is my very first foray into the world of millinery, so I did a little research on hat making via YouTube. Just search for "how to make a fascinator" and you'll get plenty of videos to choose from! If you too are new to the hat making world, you'll want to become familiar with a product called sinamay. It's what the structure of the hat is made from. It helps it hold it's shape and gives it the body you need for it to stand up on it's own. The link will take you to several resources for purchasing sinamay.

I first created a pattern using scrapbooking paper (as it was large enough to experiment with, and I have TONS of it), a compass, and scotch tape. Once I had my basic shape together (which took several tries), I took it all apart and cut the pieces from the sinamay. I used a double layer of sinamay because I wasn't sure a single layer would hold the shape as well as I wanted it to. After all, that hat had to make it all the way to Florida without getting crushed!

After I had the sinamay cut out, I cut out felt about a 1/4" larger than the sinamay and machine stitched it to the sinamay. I then shaped the hat into it's 3-dimentional form and pinned it together. I hand sewed the hat together trying to hide my stitches where I could. Once it was together I realized it needed the organza on it to really make it work. What a difference that made! It went from ok, to cool. The devil is always in the details!

My hair is quite fine, so a comb was not going to work for me to wear this all day in the park. I decided to attach it to a thin, ribbon-covered headband I found at JoAnn's. It worked like a dream! The headband is small enough that it doesn't fight with my glasses for room behind my ears, is fairly well hidden in my hair, and comfortable enough to wear all day. For a first project, I couldn't be happier! I'd love to see any hats you may have altered or made for your trips to the Happiest Place On Earth.

Until next time, may all your days be filled with fairy dust!


Tuesday, September 13, 2016

DIY Disney's Haunted Mansion Halloween Decor | Madame Leota Candle

As I have mentioned many a time, we like to use the Haunted Mansion as our inspiration for Halloween decor. And since we leave for Disney in just a couple weeks (yes, again!), it certainly puts us in the mood! I created a candle for my favorite spider candle holder (which it appears, PartyLite no longer makes.) This candle has Madame Leota's incantation printed on it. For those of you who may not be as steeped in Disney tradition as we are in the cottage, Madame Leota is the talking head in the crystal ball in the seance room of the Haunted Mansion, just before the ballroom in the attraction. What you may not also realize, is that Madame Leota was modeled after a long-time Disney Imagineer, Leota Toombs Thomas. You can read a little more about her over at Magical School House, in a wonderful interview with her sister-in-law.

Making this candle was easier that I expected. In fact, this decorative candle tutorial from Heidi Swapp was incredibly easy to follow! I love the endless possibilities it offers! So first, here's the tutorial:


Secondly, here's the print for my candle. You can download my Madame Leota's Candle jpg for free if you'd like to use it. It's made for a 4.5" tall candle with a 9" diameter. This is what it looks like flat:


I could go a little crazy with this! So many great things could be done. I love the idea of three different sized candles, each with a hitchhiking ghost! I'll let you know if I try any more. And please let us know if you try this too! We'd love to see what you come up with. Remember to tag us on Instagram, or leave us a comment below. Until next time, may all your days be filled with fairy dust!

Saturday, September 10, 2016

Another Great DIY Disney Luggage Tag!

Thursday's post has inspired me to create another cute DIY felt luggage tag for our family's upcoming Fall Break Trip!

I give you Donald Duck. I was a little worried about sewing around a shape with a lot more definition than the simple three circles of the Mickey head in the last post. But it was not as difficult as I first thought. As long as I went slow it was fine! Here's the trick, I like to make the stitches in the zig-zag closer together. So if your machine can shorten the distance between stitches, I would recommend it. It looks a bit more uniform in the end. I also love how the yellow felt pops on the blue background. You will DEFINITELY be able to spot your luggage on that carousel!

If you want the full description on the how-to, check out my original post DIY Disney Felt Luggage Tags. Until next time, may all your days be filled with fairy dust!

Thursday, September 8, 2016

DIY Disney Felt Luggage Tags

Are you headed to a Disney Destination for Fall Break this year? If so, this is the perfect little project to get you in the Disney spirit!

You know how excited you are to get to Disney, and then you get to the airport and everyone's bag looks pretty much the same? Even with those snazzy Disney luggage tags they send you, your bag still looks like everyone else's, because they got the same tags you did!

September is National Sewing Month and as such, I thought it would be fun to share this easy Disney luggage tag. You can make it in any color your choose, but it will make your bag stand out as your own. That's a particularly good thing when you have antsy, anxious children pulling your pant leg, ready to get to Disney!

You could hand stitch this project or machine stitch it. I chose to use the machine simply for the sake of time. I was able to whip this up in half an hour. That's well within our nap-time window here at the cottage!

I first did a Google search for a Mickey Mouse silhouette, printed it, and used it as a template for this tag. I then cut out my Mickey from black felt, used it to determine the size for the background and cut out two rectangles of felt. (I chose yellow for the other side of this tag because that's what I had, but get creative and let your tag be entirely yours.)

I then took the red felt, pinned the Mickey silhouette to that and used a zigzag stitch to appliquƩ it to the background. I then pinned the yellow felt to the back of the red felt and used the overlock stitch to sew them together. You could also play around with the decorative stitches on your machine for sewing the two rectangles together. I love using felt for this project, because even if you use a strait stitch to finish this project, your edges will look good.

I'd love to get several of these together for our next trip, each one themed to our favorite characters. Until next time, may all your days be filled with fairy dust!

Thursday, August 25, 2016

WDW Abbreviations Cheat Sheet

Have you ever heard a Disney geek talk about going to Walt Disney World? It can sound like a foreign language! We can frequently be heard saying (or texting) that we are taking the ferry from the WL to the MK and hitting POTC first thing so we can make our ADR for BOG. It can make you wonder what in the world we were talking about!

Disney has gotten so big, and has so many special Disney experiences, that most of who deal with it on a daily basis have learned a sort of short cut language if you will. We speak in a lot of abbreviations, and I know I am as guilty as the next person when it comes to these coded messages

Well, for those of you newbies (or oldies who are struggling to remember!), here's a little cheat sheet for you.

So did you decode the original message? We were taking the ferry from the Wilderness Lodge to the Magic Kingdom to Pirates Of The Caribbean in order to make it to our Advanced Dining Reservation at Be Our Guest! You can see why the abbreviations come in so handy! I hope this helps you decode the Disney speak a little. Until next time, may all your days be filled with fairy dust!

Tuesday, August 23, 2016

Kid-Size Vacation Package Now Available at WDW

Hello friends! I know its time to start thinking about he holidays and crafting but of my goodness this offer is too good not to share! You can head to Walt Disney World with your little for just $1055.00! Here are all the details:


If this package is in your wheelhouse, please give me a call as soon as possible! I'll get you booked and on your way to a magical vacation! Until next time, may all your days be filled with fairy dust!


Saturday, August 20, 2016

Practical Princess Dress Tutorial

Mouskateers!! This is a guest post from an AMAZING friend of mine. It is beyond the best! She has figured out exactly what I would want to wear to the parks if I were going to dress up as a princess (which I still might do!) I hope you enjoy this post, I anticipate it being one of my most pinned projects!

Practical Princess Dress Tutorial


My daughter was thrilled when we told her about her very first trip to Disney World! She twirled around, singing and giggling. It was as if Tinkerbell had sprinkled fairy dust in our very living room.

In the midst of this happy dance, the sweet girl turned to me and said in her most excited voice, “OH! I can dress up as the princesses every day!”

It was as if beautiful music were playing, then someone yanked the needle across the record. RRRRRPPPPPP. Silence.

The girl is not very princess-y. She has only two store-bought princess dresses. They are, indeed, magical. But have you ever felt them? Hers are practically made out of plastic. Several layers of hot, scratchy, airless, long-sleeved, sharp-seamed plastic. Why don’t I just duct tape her into sparkly sandpaper and call it a day?

(Here I will take a moment to say that children who have worn their storebought dresses to Disney World are super troopers who are obviously superior to my child. I bow down to these fashionistas who are willing to put magic over comfort. Seriously – these kids are splendid, and I wish my kid were less sensitive. But she’s not. She can wear those dresses for about an hour. But an entire day in 100 degree heat? Nope nope nope. So – moving on here.)

You know what I wanted her to wear? A cap-sleeved breathable t-shirt to cover her shoulders from the glaring sun, and soft skirt that was short enough to stay cool and long enough to cover up her dignity (as my grandmother used to call it).

Then the beautiful music in my head started to play again slowly . . . .

I’m no seamstress. But surely I could make something that would fit both sets of requirements? And the practical princess dresses were born. Here’s the equation: T-Shirt + Circle Skirt + Decoration = Practical Princess.


Step One:  Choose Your Princesses 

We are going to Florida for eight days (five days of Disney World, plus two travel days and one “free” day), so I decided to make eight dresses. This is insane. One dress is more than enough. They are easy to make, but don’t lose your mind, OK? OK.

My sweet girl loves these princesses: Elsa (obviously), Anna, Rapunzel, Merida, Ariel, Aurora (Sleeping Beauty), and Snow White. I needed one more. What about the ultimate Disney princess . . . Minnie?! Then I came up with a plan for how to make each dress.

Princess
Top Tee
Bottom Fabric
Decoration
Elsa
aqua
aqua
shimmery rectangles on front, cape attached to back
Anna
dark green
royal blue
floral designs
Rapunzel
dark lavender
darker lavender
pink laces on the top and stripes on sleeves
Merida
dark teal
dark teal
gold belt
Ariel
green blue
green fish scales
floaty belt, purple seashell at neckline
Aurora
medium pink
same pink
pointy peplum in lighter pink
Snow White
royal blue
yellow
red teardrops on sleeves, yellow stripe down the front
Minnie 
red
Minnie pattern
ruffle underneath skirt

Step Two:  Choose Your Fabrics

I started with the tops. I wanted inexpensive, soft shirts that were part cotton for breathability and part polyester to wick moisture away. I bought mine from Amazon here. You may have to shop around a bit to find the colors and sizes you want. That’s what Google is for, am I right?

Once the shirts arrived in the mail, I took them to my local fabric store to choose the skirt material. I included my daughter in this part, which she loved. We held up each shirt to the lightweight cotton quilting fabrics, and she helped me choose just the right ones. Fun!

For my tall 5-year-old daughter, I bought 1.5 yards of each 40-44” wide fabric, which allowed me to cut a single circle skirt. The Ariel skirt had a directional fish scale pattern (that needed to go a certain way to look right), for which I needed 2.5 yards of fabric. I will explain more about this later.

If you plan ahead, you can also choose trims for the dress belts while you are at the fabric store. You can make these out of the skirt fabric if you like, but I wanted to add a little something extra at this stage. Here are the trims I chose:
Princess
Belt Trim
Elsa
blue and silver sparkle ribbon
Anna
gold ribbon
Rapunzel
light pink scalloped eyelet
Merida
gold belt from home – taken from outgrown merida dress
Ariel
green floaty fabric
Aurora
medium pink grosgrain
Snow White
royal blue satin (I had a little piece of this at home)
Minnie 
black and white polka dot grosgrain


I measured around her waist and added enough length for a knot and maybe a bow for each belt.  And then I used a coupon to buy it all.

Step Three:  Cut It Out

Wash and dry the shirts and fabrics. Then iron the fabrics so there are no wrinkles. I hate doing this part.

Try a shirt on your child and decide where you would like the waist to fall. Keep in mind that the knit fabric of the shirt stretches quite a bit when the skirt is attached, so mark where the waist would be, and then cut about an inch above that. Even with the seam allowance, you should be good. My five-year-old took this photo to show her "glass" slippers.

Now, measure the width of the cut part of your shirt, across the front. When you multiply that by two, you now have the circumference (the size of the waist) for your skirt fabric.

Next, you use geometry (circumference, radius, pi) to figure out how to cut out the waist. I’ll make it easy for you – the next measurement you need (the radius) is the circumference divided by 6.28 (aka 2 times pi). BUT! Round down here. You can always cut a little more to make the waist bigger, but you can’t add fabric back to make it smaller.

For my skirt, the measurements went like this: Across the front of the shirt was 12”. That means that my waist would be 24”. The radius for my next step would be 3.8”. I rounded down to 3.5” just to be safe, and it worked perfectly.

Take your washed and ironed fabric (a) and fold it in half (b), then in half again the other way (c).

 Go to the corner fold (where all the folds are together) and measure toward the shortest part of the fabric out the length of your radius.  While you have your tape measure on this line, go to the end of your fabric, and note that measurement.  That’s how long the skirt fabric will be all the way around.  You can make it shorter if you want, but my girl has crazy long legs.  And don't forget you will be hemming the skirt later, so it will be a little shorter for that reason, too.

Keeping the zero edge of your tape measure in line with the corner fold, move the tape measure end in an arc from one edge of the fabric to the other, marking the waist radius (shown in the pictures with my finger) and the skirt length radius (shown with a pencil) all the way along.
Connect the marks you made using a curved line. 

With the fabric still folded, cut along the two lines you made.  Your circle skirt is now cut out!

(Note:  the circle you cut out for the waist makes an excellent barbie skirt if you cut a little tiny circle out of the middle.  My daughter designed her own dresses while I was sewing.  Hours of fun using scraps.)

If you are using directional fabric, the process is harder.  If you make a circle using the instructions above, your pattern will be upside down on the back and sideways on each of the sides.  Let me just say this:  if you haven’t made a gored skirt before, I highly recommend you start with a non-directional fabric. 

To make Ariel’s skirt, I had to make a paper pattern for the skirt, which essentially involved making the same circle described above out of really big paper, then cutting it into one-eighths.  I pinned each piece of paper on the fabric in the direction I wanted for the skirt, and I remembered to cut about ¼” outside the two sides of each paper wedge for the seam allowance.  Then, pinning right sides together, I sewed the wedges together to make the skirt.

Step Four:  Sew the Dress

Back to the easier part. Turn the skirt inside out, and then tuck the right-side-out dress inside it. I’m using Ariel’s skirt now, in which you can see the wedges I discussed above:


Make sure that the right sides of your shirt and skirt are facing each other, but not facing you. (I did this wrong the first time. Grrrr.)

Pin the sides of the shirt to the sides of the skirt. I used my fold lines on the skirt fabric (from when I cut it) to line up the sides with the side seams of the shirt. Also pin the front center and back center of the shirt to the skirt (again, using the fold lines on the fabric, if they are visible). Pin in between those four pins until you are pinned all the way around.


Now, sew the pieces together using a ½” seam allowance, starting at one of the side seams. Take out the pins and turn it right side out.

Step Five: Add a Belt

 Now, sew on your belt. If you want to make it out of the skirt fabric, make a fabric tube, turn it inside out, and topstitch the ends to make a fabric ribbon. Or, use something bedazzled for the extra princess factor.

Pin the center of the belt ribbon to the center of the waist seam. Using thread that matches the belt ribbon and just a few tiny stitches, top stitch the belt in the center. I used two or three stitches forward and two or three stitches back.

Remove the center pin and try the dress on your kid. The twirl factor is fantastic! Tie the sash around her waist to see where you should stitch it down on the sides so it will lay flat. I put a pin in the belt ribbon to mark the spot (but not through the dress, because that would hurt when she takes the dress off!).

Have her take the dress off, and pin the marked places to the sides of the dress, lining up with the side seams on the shirt. Ariel's belt needs to look fluffy, so it's gathered a bit here. Topstitch the belt sides down.

Hem the skirt to the length you would like. I let my five-year-old help with this, so the hems are imperfect. But she participated in making her own dresses. So it’s all good.

Have her try it on again, tie the belt in back, and breathe a sigh of accomplishment. Good job, lady (or sir)! You have done the biggest part!

Step Six: Extra Magic 

Whew. Almost done! Now you get to add any extra decorations. The hardest dress by far was Anna’s which required intricate colored patterns. Fortunately, I had a friend with a cricut machine, iron-on vinyl, and a heart of gold. She helped me cut out these patterns and iron them on (being very careful to avoid the meltable belt). BUT! You can do it without this part if you want to freehand it or create your own stencil using the butcher paper method. You then use fabric paint to paint on the designs.

The other designs are MUCH easier – a few Xs on Rapunzel’s shirt, plus a few stripes on the sleeves. Two teardrops on Snow White’s sleeves and a line down the middle. Just enough to reference the princess for anyone who has a drop of imagination. For Merida, I carefully cut off the belt from a storebought dress and sewed in the front strip as I attached the skirt to the shirt. For Aurora, I made a peplum that mimicked her princess dress, and then sewed it in as I attached the skirt to the shirt. I put the belt over it using the belt instructions, above. For Minnie, I sewed white eyelet trim along the hemline. For Elsa’s bodice I painted some shimmery acrylic paint in narrow recangles, then heat set the paint by pressing with an iron by pressing through the inside of the shirt. ) I also attached the floaty sequined cape fabric with a ribbon at her neck. My daughter picked out the cape fabric, but she now thinks it's itchy, so it may be ditched early in the day, which is A-OK with me.

And that is how my daughter can dress as a princess for every single day of our summer Disney trip. Cue the “Jolly Holiday” song as we exit stage right.