Thursday, February 27, 2014

Ratatouille Birthday Party for Little Chef

As you regular readers will know, Little Chef is all about the cooking. Any time one of us is in the kitchen he demands a chair so he can be at the counter with us, no matter how small the task. So it was really a no brainer to have a Ratatouille themed birthday party for him this year! I'd be lying if I told you it wasn't a lot of work, but it was so much fun and Little Chef could not have been happier! It was worth every bit of time and effort putting this party together.

I had plans to use this adorable rolling pin invitation, but as it turns out, this busy mom just couldn't get it done. So instead I went with my old stand-by, Red Stamp. If you've never used this amazing app, I highly recommend it. It makes keeping up with birthdays and holidays a snap! We sent electronic invitations to keep it simple.

I was pleasantly surprised by how much Ratatouille themed party decor was available on Amazon. After all, it's been seven years since Ratatouille was released. (Can you believe it's been that long?) But we were able to find party hats (toques), balloons (which you can see in the photo above) and a backdrop with Linguini and Remy for our party. Perfect for those photo ops!


And remember these Gusteau's take out sacks from our back to school posts? Of course I printed them up and used them for goody bags!


The cooking part was a lot more like decorating, but the toddlers didn't seem to mind! I decided to have two different stations. Our table is pretty big, and we have a rule of thumb that we only invite as many kids as the age you are turning (in this case 3). So I set up each end of the table with "cooking stations."

The first thing we did was make chocolate fondue fruit kabobs. We had lots of fruit cut up (whatever looked fresh at the market) and I whipped up a chocolate sauce. This is so easy and a real hit with the kids!


The second station was a decorating station. I decided to make homemade marshmallows so we could decorate them, along with brownies. I had never made marshmallows from scratch, but I had heard they were to die for. I was shocked at how easy they were to make! Of course Little Chef helped me make them and the sensory experience and transformation was enough to make both of us giddy! I used Alton Brown's recipe to make them. If you try it, make sure you watch the video first. I was so glad I knew what to expect as I was working in the kitchen. I love the way these turned out. They were delicious and decorating them was new and different! I was concerned that the marshmallows would melt in the chocolate and frosting, but they held up beautifully! I used cake pop sticks to make them easy to handle.


I wanted everyone to have individual decorating supplies. I know the sorts of arguments that can break out over shared equipment! These mini muffin tins were the perfect solution. I filled each section with all natural colored sugars from India Tree. I would never have dreamed how much fun the kids had with these!


And see those aprons? I made one for each guest to take home as party favors. They were so easy I was able to whip up all three of them in one quick afternoon. I figured the mom's would appreciate it too! I made them from old pillowcases that needed repurposing. You can read all about them in Tuesday's post.

And then we sat around playing with all the great toys that Little Chef received for his birthday! It was a great party and so fun catching up with good friends! Until next time, may all your days be filled with fairy dust!


Tuesday, February 25, 2014

DIY Little Chef Aprons for a Ratatouille Themed Party

I found this wonderful child-sized apron pattern on line and decided I really needed one for my Little Chef. In fact, he had a fabulous cooking party earlier this month and we made one of these for each of the guests.

A few things about this pattern make me very happy:

  1. It attaches with velcro, so little hands can do it themselves.
  2. It has an elastic neckband so it fits easily over all size heads
  3. It takes very little fabric and requires only straight stitch sewing
I am all about repurposing, up cycling and the like (Jiminy Cricket would be so proud). I found two pillowcases that were in sore need of a new life. I was able to get TWO aprons from one king-size pillowcase! And since I had some elastic and velcro on hand, these were absolutely free to me! Now that's a project anyone can get behind! And not just that, but the pattern was so easy I was able to make three of these in one afternoon. That is time very well spent.

I decided to leave these white, with on embellishment on them at all, since they were part of a larger party theme. But these would be so easy to personalize with your Silhouette or even just different fabric and trims! I'd love to know if you decide to make these. And stay tuned for scenes from our big Ratatouille party coming up on Thursday! Until next time, may all your days be filled with fairy dust!

Saturday, February 22, 2014

From Belle's Library | Mary Poppins by P.L. Travers

I grew up watching Walt Disney's version of Mary Poppins. In fact, it was the first drive-in movie I ever went to. We dressed in our pjs and popped our popcorn and I sat on a Charles Chips can so I could see from the back seat. And I fell in love. My best friend and I would re-enact scenes from it in the back yard for months, singing the bits of songs that we remembered until my mom and dad bought us the LP soundtrack that we would memorize word for word. It was magic, that story.

When I stumbled upon the book, Mary Poppins, by P.L. Travers, while browsing Audible lately, I thought I should give it a try. And while I never saw "Saving Mr. Banks" in the theater (due to our inordinately snowy winter) I knew the basic story of P.L. Travers and her infamously touchy relationship with Mr. Disney. I was curious as to the original Mary Poppins stories and how they captured Walt Disney's heart enough to put up with so much grief from their author. And without a doubt, these stories did NOT disappoint.

I instantly recognized Mary Poppins from the movie. She was not terribly different in the the books. I thought she might have been sweetened up a bit from the reviews I read on line, but not at all to my way of thinking. And her magic was just as captivating as it was when I was 8-years-old! That, and the fact that there are other stories, not told in the movie version makes this even more fascinating for me. In fact, I may try this as a family read-aloud in a few more years, when Little Chef and Minnie are able to stay tuned in for more than 10 minutes. I think it would be ideal for a Disney road trip!

If you are at all captivated by Disney's version of Mary Poppins, I highly recommend this book. And what's more, there are several other books in this series, so if it catches fire in your household, there are many more stories to discover! I hope you enjoy it as much as I did. And until next time, may all your days be filled with fairy dust!

Thursday, February 20, 2014

DIY Disney Princess Tutu

I think by now we all know I love a good bargain! I do my fair share of hunting. I love checking out Tuesday Mornings for all things Disney. They are usually a good spot for Tinkerbell Treasures at a good price. The toy aisle is always promising. But I was surprised last time I was in to find this Disney Princess Tutu Kit from Simplicity in the crafting aisle! For $3.00 I was sold!

Now, this is not really a sewing project; it's more of a wrapping tulle around an elastic band project. If you wanted to sew the elastic band together, I'm sure you could; but in all honesty, I just tied it in a knot. I'm fairly certain it will be staying in the dress-up box, and the littles don't care about a bit of elastic showing. And even more exciting, this project was simple enough that I was able to polish it off during nap time! I also think it's a great addition to your dress-up box. It's not going to win any contests, but it is a boat-load of fun. I chose not to use the appliqué that came with it, but there is a cute little rose for a future project!

If you can't find this kit anywhere, I think it would be simple enough to make this yourself. There were roughly 45 tulle strips about 4"x 24", a piece of elastic big enough to go around your daughter's (or your!) waist, and 4 strips of coordinating ribbon of the same length. That's it. And I've often seen spools of tulle in the dollar bins at JoAnn's. You could do a green and yellow one for Tinkerbell, a blue one for Cinderella, a purple and pink one for Rapunzel, the sky's the limit! I don't know how comfortable it would be to wear, but it also strikes me as a cute RunDisney accessory. Let me know if you attempt to make one of these for your cottage, and until next time, may all your days be filled with fairy dust!

Tuesday, February 18, 2014

From Mrs. Potts' Cupboard | Belle's Frosted Rose Tea

This seemed like the perfect time to introduce Belle's Frosted Rose Tea. It's still chilly, Valentine's day has just passed, and a little tea time pick me up seems in order. When I created this tea I was thinking of the classic scene in Beauty and the Beast where Belle and the Beast are enjoying the snow and the castle staff begin to realize that they just might be falling in love despite themselves. And I do love this "tale as old as time." Perfect for a little post-valentine treat.

Silver Needle is a very mild white tea. It is best prepared with water that is just below boiling. I love theses flavors together. You get all the fullness of the roses, with a hint of spiciness from the cinnamon. I usually don't like a sweetened tea, but the small amount of honey used here is a real enhancement. Don't skip it even if you are tempted to. It really brings out the flavors in this cup.

I hope you enjoy a steaming cup of tea today. And until next time, may all your days be filled with fairy dust!

Saturday, February 15, 2014

DIY Disney's Love Bug T-shirt Belated Valentine & Silhouette Tutorial

I grew up with Disney, watching all the live-action movies on our VCR and laughing along with the very old fashioned humor. I have very fond memories of that. And this T-shirt is a reference to just that. My sister and I must have spent hours in front of that TV giggling at Herbie the Love Bug. I don't know why it was such great fun; it was probably my sister that made it so funny. We had a knack for that.  Well, that and Buddy Hackett. Who wouldn't love that guy? Whatever the case, that lovable VW comes back with this cute T-shirt.

I made this using my Silhouette machine, some adhesive/stencil vinyl, and some fabric paint. It was simple to do and I love an original design! I altered the car shape a little for this shirt and I wanted to share with you how I did that, so for those of you following along at home, here's a tutorial for altering a shape using the Shilhouette software.

First, I used Abadi MT Condensed Extra Bold for the font - it was close to the original movie font and already installed on my machine. I then used the echo park car shape for Herbie. I enlarged it to 7.075 inches. To enlarge it while preventing distortion, hold the shift key and then drag your shape to enlarge it.

Now I had to do a little editing to get it just right. First, I altered the lines on the hood to make them bigger so they would stand out on the t-shirt. To do this I first selected the shape and ungrouped the layer. This allows you to select just parts of a design and alter them. It looks like this on your screen:

I then selected the lines on the hood and used the same process to ungroup them. They should now be two separate lines. Move them apart just a little bit - one or two clicks of the arrow keys (on your keyboard) to the right or left. Once I had them separated, I selected both of them by clicking on one, holding the shift key down, and selecting the other. You should now have both of them in the bounding box. I then used the offset tool to enlarge them to .07 inches. Like this:

Once that was completed, I selected the original line and deleted it, so just the fat line was left. Like this:

I then used the circle tool to draw a circle 1.32" big. To get a perfect circle, hold down the shift key while you drag out the circle shape. I positioned it on top of the lines the I just altered, and then selected both lines and the circle; I went to the Modify menu and selected "subtract all." This is important if you want to use this as a stencil. This way you are not cutting lines through your circle.

Once I had that done, I added the number 53 to the circle in the same font and sized it to where it looked good. Lastly, I used a heart from another design I had (elephants) and placed it in the window. That's it! I sent it to my Silhouette and cut it out.

If you try this let me know! I'd love to know how it works for you. Until next time, may all your days be filled with fairy dust!

Thursday, February 13, 2014

DIY Disney Valentine's Day Onesie

It's almost Valentine's Day and I thought I would re-post this adorable onesie. We have a lot of new readers who may not have seen this post and honestly, I just love it so much I wanted to share it again! Have a very happy Valentine's Day.

We have a new little addition around the cottage these days, and I just couldn't resist whipping up a Bambi inspired Valentine onesie for her. It was so simple with the Silhouette SD and some fabric paint.

I used the baby deer shape (Design ID #5505 ), the hearts from the sheep card (Design ID #25095), and the font Coolvetica. The text is lifted from the main musical theme from Bambi, "Love Is A Song." I made sure that my design would fit a 4"x4" box, which was just right for a 0-3 month onesie. 

Once I had everything placed as I liked it, I cut out the shapes on stencil vinyl. This tutorial from the Silhouette blog was extremely helpful in getting it transferred to the fabric. From there, I painted the shirt with two coats of fabric paint and let it dry. Voila! A cute Disney themed valentine for our sweet new bundle of magic! I'm tempted to make one in an adult size for me. Happy Valentine's Day to you and your family. Until next time, may all your days be filled with fairy dust!

Tuesday, February 11, 2014

Sitting with Grandmother Willow: Evie of Pixie Dust & Skulls

Madame Daisy from Pixie Dust & Skulls
As part of our on-going series, Sitting with Grandmother Willow, I am happy to introduce Evie of Pixie Dust and Skulls, a lovely Etsy shop. This series of blog posts highlights artists and bloggers of all stripes with one thing in common: a passion for Disney! I hope you will enjoy getting to know Evie as much as I have. A big thanks to her for taking the time to interview with us! And be sure to visit her shop for a great selection of Disney themed accessories!


Disney by the numbers (with apologies to Harper's):

# of trips you have made: Wow I seriously wish more but I’d say around 10-15 times

Date of first trip: There’s a picture of my sister as a baby and myself, we are two years apart and she was barely walking, so I’d have to say I was about 3yrs so around 1984.

Date of next trip: My goal is next year when I visit my family in California; my last visit was around Christmas time so I’d like to experience Halloween festivities this time around.

# of Resorts stayed in: Someday it’ll happen. Dreams do come true in a Disney lovers mind LOL

Usual # in your travel party: It varies; it’s a party that always includes family and friends, last visit was apart of 5 but, it’s been as big as 15+ people

Pairs of mouse ears in your cottage: Currently chesire , gifted by my sisters BBF on my last trip to California.

WDW or Disneyland (or other)? Well I can’t compare if I haven’t been to WDW, so at the moment Disneyland.

How do you usually travel to Disney? We all meet at my parents’ house, mom makes breakfast, carpool in about 2-3 cars and head on out.

Do you have any tips for trips? If you want to make it out throughout the whole day at the park take comfortable shoes, or extra change of clothing (just in case you get soaked in Splashed Mountain ) I also take a messenger bag, and carry only necessities, don’t want to lose any valuable items. And most important, shop as soon as you get there to avoid the long lines before park closes. You can just rent a locker and put all the purchased items and collect at the end of the night.

Do you have a favorite place to eat while in Disney? Actually no, I’ve never been disappointed in any of their restaurants. Everything is delicious, but my Mom loved Hungry Bear so we went there a lot.
What is your absolute DON'T MISS attraction? Anything pretty much from Fantasyland but Alice in wonderland , Pirates of the Caribbean, Haunted Mansion, and Pinocchio’s ride.
Stage shows, yes or no? Yes most definitely, It such Joy to see kids happy.

Parades, yes or no? I don’t like parades but Disney parades it’s a must. I’ll never forget my parents taking us to see the Electrical parade which I thought it was out of this world LOL. But I think I fell in love with it even more when my High School participated in their Christmas parade, my last performance was to M-I-C-K-E-Y-M-O-U-S-E song, I was in colorguard and my prop was tall flags.

Best Fast Pass to get: I haven’t tried it yet, I know right LOL.

Favorite park: Fantasyland!

One piece of advice you'd give a novice about WDW/DL: Use your map, and if visiting with kids, always assign a spot to meet if one should go missing. And make it fun while on waiting lines, look for hidden Mickeys LOL.

How do you create extra magic for your family? Have dinner with family outdoors, sit down and enjoy the lighting of the park. We literally eat and just let all the beauty sink in. I think that is why she loved going to hungry bear. Take lots and lots of pictures, and be a kid, after all it is the happiest place on earth! And create something memorable, home made and gift everyone with it.

How can we connect with you?
www.etsy.com/shop/Pixiedustnskulls
Instagram: Pixiedustnskulls
pixiedustnskulls@yahoo.com

Saturday, February 8, 2014

DIY Upcycled Disney Nightshirt

Spring is eventually coming and Minnie is going to need some lighter sleep attire. And, as you may imagine, we have a plethora of old T-shirts from Disney. So when I saw this easy tutorial from It's Always Autumn I knew this was a project that would be perfect for us. And it was, both easy and perfect.

Minnie is currently wearing a size 12-18 months, so I used an adult size XS shirt. It was just what I was looking for. I don't know about you, but I find that the sizing of Disney clothes can be wildly different across the board. Especially kids clothes. I always get a size up if there's a question. So I was nervous about how this would fit; but there was no need. She fits it quite well. And in a year or so, I think it'll be cute with a pair of leggings and a hair bow; perfect resort wear!

Incidentally, if you don't have a plethora of Disney t-shirts hanging around your cottage, Goodwill (or your local donation center/thrift store) is a great place to find park merchandise for a steal! Especially t-shirts and hoodies. I found this one for $4.00. I was sad it wasn't in my size but I knew I'd find a way to use it. And here it is! Just the right thing for a growing girl. I also have dreams of a Disney t-shirt quilt...we'll have to wait and see if that materializes! So until next time, may all your days be filled with fairy dust!

Thursday, February 6, 2014

DIY Disney(ish) Winter Olympics Fun!

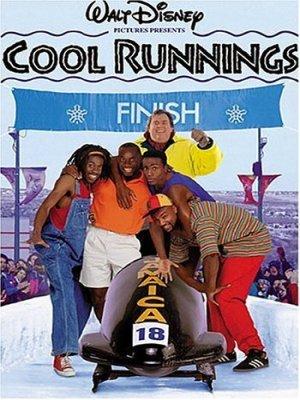
The Winter Olympics are starting and we have just the thing to help you enjoy the fun in a Disney sort of way. Cool Runnings was a family-friendly movie, released in the 1990s, about the very unlikely Jamaican bobsled team and their experience at the Winter Olympics. It's based on a true story and a lot of fun to watch. It had been years since we watched it and I have to say it's still a really fun movie. (I'll admit right up front, I'm a John Candy fan!)

And if you have little ones that are into crafting, One Pretty Thing has some really fun Winter Olympic crafts that are totally toddler friendly; like making your own torch, or your own medals, or even making your own olympic themed snacks! There are even links to some printable puzzles and coloring sheets. You're sure to find all sorts of great things to keep your kiddos busy during these long winter nights.

And if you are in need some more active activities, head on over to Zoom at PBS for some Winter Olympic themed games and activities. We hope you enjoy watching the olympics with your family. We will certainly be tuning in here at the cottage. So until next time, may all your days be filled with fairy dust!

Tuesday, February 4, 2014

Scrapbooking Disney | Be Our Guest

I've been working again with  Project Mouse (FANTASY edition) - a collaboration of Britt at britt-ish designs and sahlin studio. And I still love it! This is another layout from our trip last fall. We actually had the opportunity to dine with the Beast at Be Our Guest! Although I was under the impression that Beast and Belle would be circling around the dining rooms, as with most character meals. This is NOT a character meal; it is an opportunity to dine in the castle and eat a lovely meal. Then you may stand in line and get your picture taken with Beast. I just hadn't done my research on this (as the experience was still relatively new). I'll know better next time.

Getting an ADR for 16 was not easy - we had to arrange it through email with a special dining agent. But as is my way, we made it happen! And perhaps because of the early hour (4:30 pm) we were all seated at the same table, which was delightfully unexpected, and truly the Disney way. We had wonderful service. In fairness, Mr. Photos from the Parks and I can be rather tough dining critics, but the food was just so-so for us. We enjoyed our meal. Doc loved his lamb chops. But we payed the same for a meal that we could have had in Cinderella's Castle and had the added bonus of the Princesses joining us. I was disappointed. But I do think we will try the counter service next time. That is, if the line isn't beastly. (See what I did there?) I'd love to hear about your experience at Be Our Guest. Was it the same for you? Did we just have an off night?

Until next time, may all your days be filled with fairy dust!

Saturday, February 1, 2014

DIY Disney Park Maps Puzzle Blocks

We all love upcycling those Disney Park maps. This is a fun project for young Disney fans, or just those that are young at heart. We are big puzzlers around the cottage. Every Christmas my sister's family comes over with a jigsaw puzzle and we work the entire thing in one day. I LOVE a good puzzle. And now that the Disney park maps all look a lot more alike, this puzzle is a bit harder than I originally thought it would be! Still, it's fun.

I was able to find a set of 1.5" plain, wooden blocks from Pick Your Plum. If you don't know about them, it's worth checking them out. You never know what sort of thing is going to pop up there! I also used 5 different park maps (I needed 2 from Animal Kingdom), mod podge, fine grit sandpaper and a foam brush. I cut out the maps into 1.5" squares and roughed them up on the back side with the sandpaper. This just helped them adhere well to the blocks. I then adhered them with the mod podge to the wood. Once they had dried I sanded down the edges so they didn't peel up, and put a top coat of mod podge on them. Once they were dry they were ready to go!

The toddlers like to play with them as blocks, the older ones like to fiddle with them on the coffee table while we are watching TV or planning our next Disney vacation! These were fairly simple to put together, even if they were just a little time consuming. Worth it though, to have another reminder of our time together in Disney.

Until next time, may all your days be filled with fairy dust!