Showing posts with label party. Show all posts

Saturday, May 16, 2015

Mary Poppins DIY Movie Viewing Party

Sometimes, on a Tuesday, you just need a little something special to happen! I surprised our littles mid-week with a Mary Poppins Movie Party! They couldn't have been more excited!

There is an absolute WEALTH of information available on Pinterest if you happen to be planning for just such an occasion! I also used my Silhouette SD to great advantage. There are many pre-made shapes that work perfectly with the Mary Poppins theme. In addition, I have made my Poppins Party Pinboard available on Pinterest so you can see the ideas that inspired me, and perhaps try a few of these ideas with your friends and family.

Ok, let's get into the details!

Setting the Stage:

I used this Carousel Horse Hexi-box shape as my centerpiece for the table. I cut it from card stock using my Silhouette Portrait, and then used a dry adhesive and glue pen to assemble it; it went together quite easily. There is also a tutorial on how to assemble it if these things tend to frustrate you. The kids absolutely wanted to play with it from the moment they saw it!
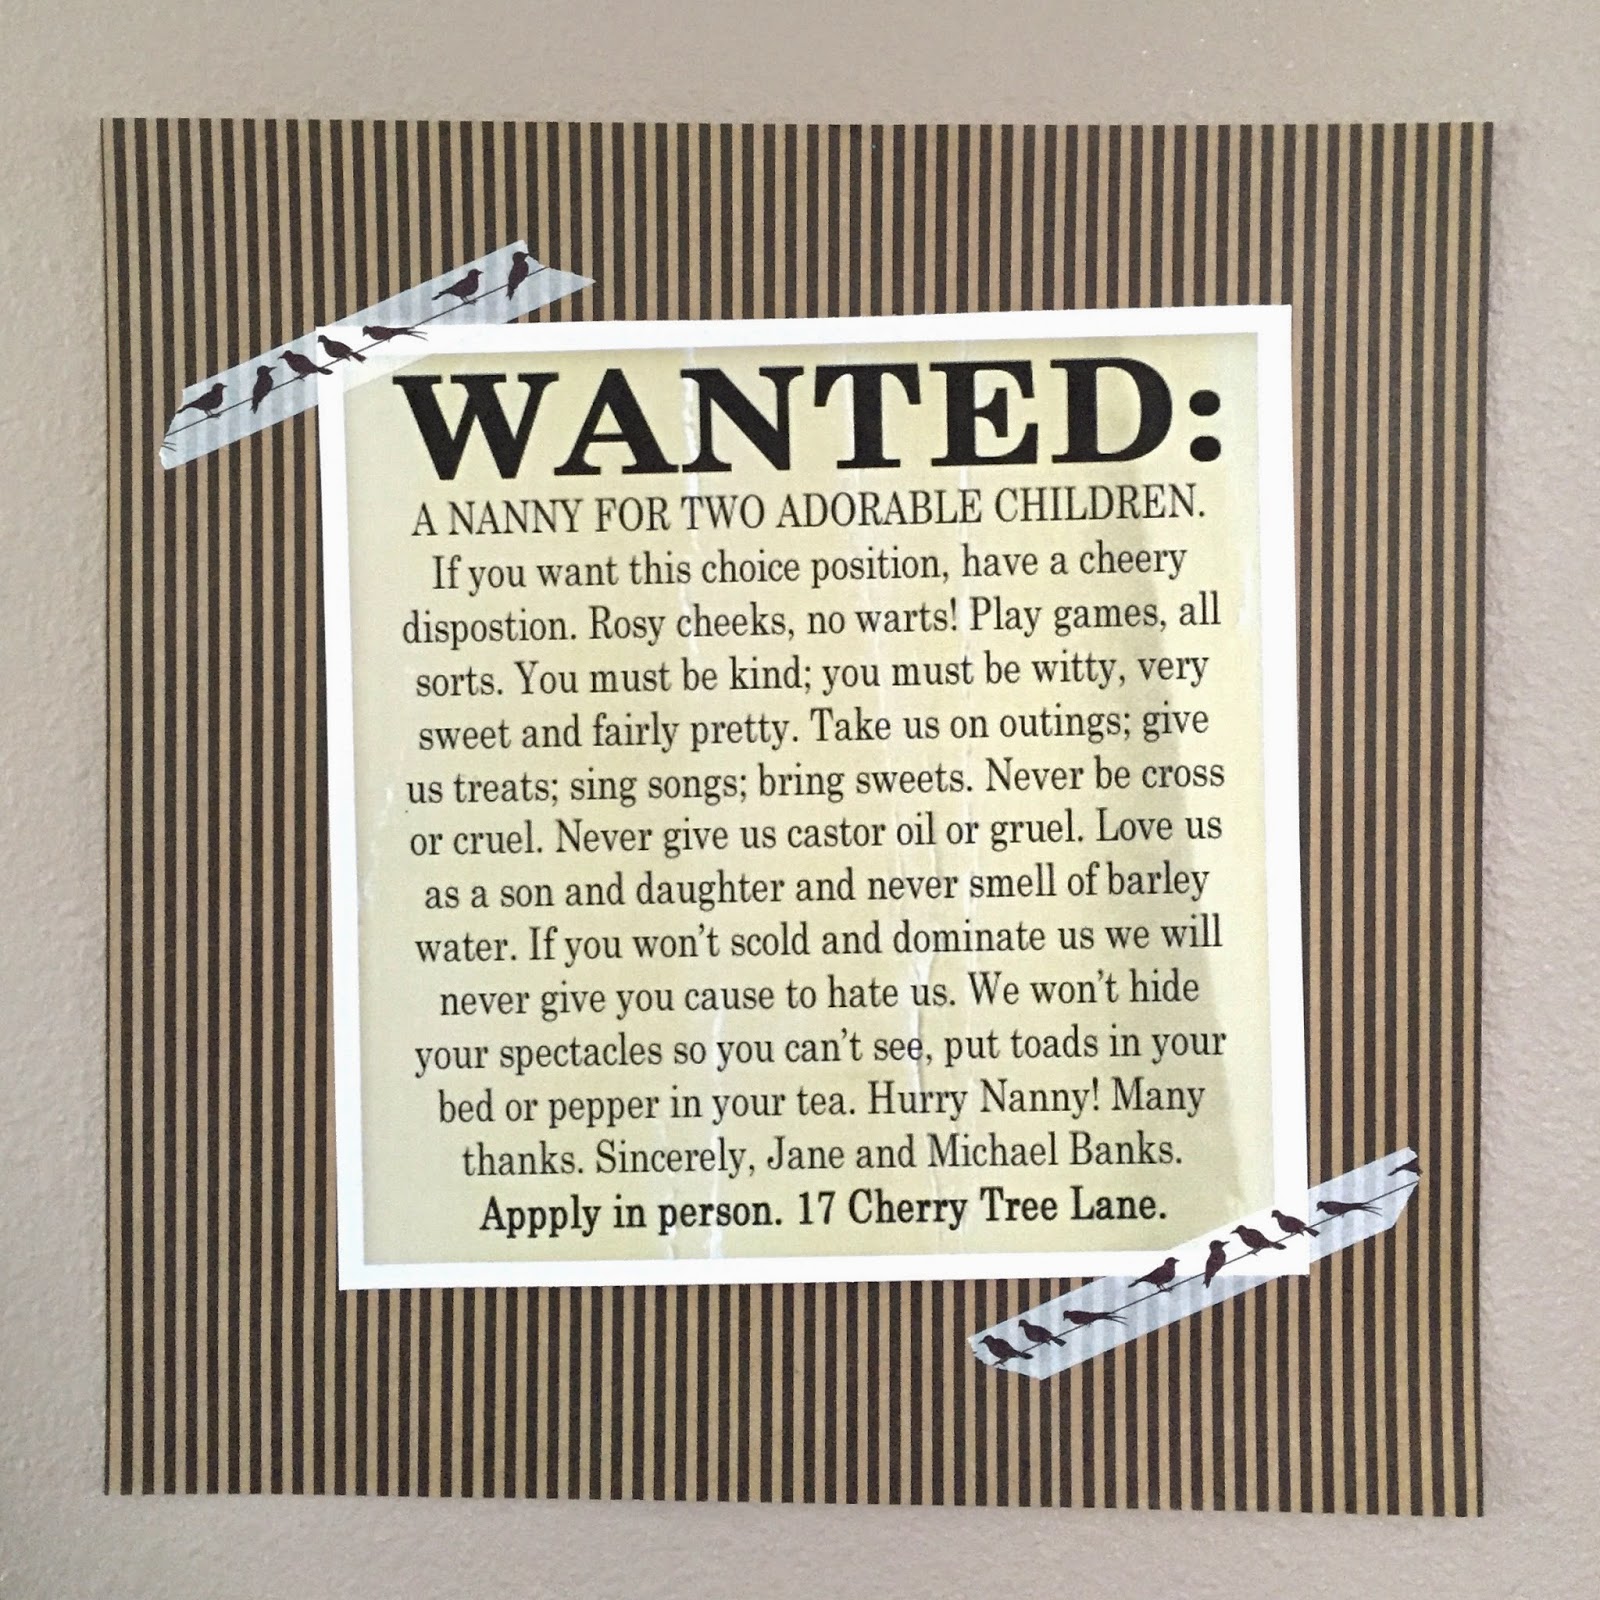
I wanted a backdrop of sorts for the table, but didn't want to do anything overwhelming (read time-consuming). So I hunted up some Mary Poppins printables. I simply printed them and adhered them to scrapbook paper to frame them up a bit. All of these were free, and I am including my own printable of Jane and Michael's advertisement for a nanny. If you would like to print your own you can find the Nanny Want Ad here to download, the Lucky printable, the Keep Calm printable, and the Spoonful of Sugar printable, here.

The Food:

I wanted all the food to be themed in one way or another to the movie. And I also wanted a solid variety of sweet, savory and salty. So we started with Kite Sandwiches. These were simple. Little Chef, ironically, loves to cook, but is not an adventurous eater. So these are simple ham and cheese with a little veggie cream cheese for good measure. I cut the crusts off a sandwich and trimmed each half into diamonds. I then used sliced cheese to cut out the crosses on the top of the sandwiches. (I just laid it on top.) Finally, I used some frilly 4-inch toothpicks to create the tails for the kites.

You can also see here the chocolate coins which were our Tuppence, and our Rum Punch (which we made without the rum for the kiddos!). For the punch I just mixed orange juice, pineapple juice and some La Croix Coconut sparkling water in a pitcher. The flamingo straw toppers were again from the Silhouette design shop. We don't have much juice here in the cottage, so this punch was a real treat for the littles! Also, the version with the coconut rum was a real treat for the adults!! Rum punch, delicious!

We added to the sweets with Raspberry Ice (store bought sorbet). If you really want to make some granita from scratch, I found a recipe for you. It looks pretty simple to make, but time intensive. And a little bit of time saving sounded great to me on a weeknight! I passed on the homemade raspberry ice.

And then it was time to move on to the salty snacks!

My kids adore goldfish crackers, but I was having a hard time making them fit into this Mary Poppins theme. And then I saw these umbrella party favors and I knew I had my solution! Here is a link to how to make them. Instead of a regular handle I wanted the classic Mary Poppins parrot head. So I found a .png image on line and imported it into the silhouette, traced it and cut it out. Voila! A Poppins umbrella full of goldfish! My littles loved them! (And so did I!)

We also had these adorable cream cheese and black olive penguins! Of all the food we made for this party, I loved these the most. They were a little bit of prep work, but nothing overwhelming. And the effect was well worth the effort!  I guarantee I will be making them again this Christmas! You only need cream cheese (we used the veggie kind), black olives, carrots and 4-inch toothpicks to create them. You can find the full tutorial here. I used the same frilly toothpicks as I did for the kite sandwiches. The effect was exactly as I hoped! And these are incredibly delicious little snacks! The toddlers were not as thrilled with them, but the adults were definitely pleased.

And because no movie party is complete without popcorn, I made these themed popcorn boxes! I used the Let's Go Fly A Kite Tile and the popcorn box shape with my Silhouette Portrait. These, surprisingly, took the longest time to assemble. The Fly A Kite tile has a LOT of intricate pieces cut from several different colors of card stock. I love the overall effect, but I'm not sure how many of these I could do. I'm glad I was only working on three.

A word about popcorn here (because I can); I am a huge fan of popcorn made on the stove. None of that chemical infused microwave popcorn for this family! It's so simple and much less expensive too. Plus, our family prefers the taste and smell to the microwave variety.

And there it is: the recipe for your very own DIY Mary Poppins movie viewing party. Of course, you could do the same thing for a Saving Mr. Banks viewing party as well.

Until next time, may all your days be filled with fairy dust!

Saturday, March 14, 2015

From Mrs. Potts' Cupboard | Esmerelda's Gypsy Blend

The littles recently unearthed our copy of The Hunchback of Notre Dame. I eagerly put it in the DVD player and then shortly there-after remembered this is not such a happy story! Lots of bad behavior before justice rights the scales. But while we were watching I realized that Esmerelda was the perfect character for a new tea blend I've been working on.

I like a tea with some weight behind it. Herbal teas just aren't my think. So I tend to use a lot of black tea as the base for my blends. This tea is a little unpredictable, a little spicy and very full bodied (ahem). You might be surprised by what's in it. Just like Esmerelda. It's the sort of tea you might drink in a gypsy wagon and then have the tea leaves read to you. It's a blend of black tea and peppermint with a hint of fennel and black pepper. It's bright and smooth and very aromatic. I'm absolutely in love with it right now. I hope you enjoy it too.

Until next time, may all your days be filled with fairy dust!

Saturday, February 21, 2015

Toy Story DIY Birthday Party Report


We had a rootin' tootin' good time at our party! I had a blast creating this party for Little Chef! There were so many amazing ideas on Pinterest (my party idea pinboard can be seen here)! Little Chef and I took some time looking at all the ideas and he told me what he wanted to do and I filled in the rest with my ideas. Here's what we did:

The Photo Booth

I love the fun photo booths I see at special events! I'm a big time picture taker and its a way to dress up and have fun without everyone looking at you like your crazy! This one was super easy to construct. I found an empty wall, covered it with light blue wrapping paper and taped it down with painters tape. I then cut out the toy story cloud with my Silhouette. I cut 5 of the small and 5 of the large clouds and adhered them with scotch tape. I then used a couple of hats I found through Amazon, and these adorable (and free!) cut-outs from Merriment Design for the props. Easy and lots of fun!

Snacks

Little ones don't need a lot of snacks during the party if you schedule it before lunch. We went with cheese crunches (ala Al in Toy Story 2) and "snakes in a boot" - my own idea. I used plastic boot shot glasses and organic gummy worms. Two worms fit exactly in one boot! And they were the hit of the party! I loved hearing kids and adults alike say they needed another snake in their boot!

Decor

This was so easy. I used the barrel of monkeys design from the Silhouette shop and cut dozens of them from primary colored card stock scraps. And since I used to be a paper scrapbooker, I had a whole bunch of Memory Makers snaps to use up. I just attached the hand of one monkey to the other with the snaps and it was done. You could easily use brads, but the backs might show.

Little Chef also fell in love with some directional arrows to all the fictional places in the Toy Story movies that we had seen on Pinterest. I just downloaded some images I found on the internet and cut arrows from them. The arrow shape was already in my Silhouette library! I used painters tape to adhere them to the wall for the party.

And you've already seen the Luxo Ball Boxes that held all the goodies! To this I added loads of balloons. I bought a helium tank at the party store and in 30 minutes I had 40 balloons blown up and tied down all over the house. They made everything just a little more festive. And of course, we set up our Toy Story toys around the house as well, ready for a play date with destiny!

Activities

I cut out these rocket shapes from card stock using my Silhouette. I gathered up some craft supplies in the dollar bins from the local craft store, put out the glue and crayons and let the kids go for it! It was really fun. And then they played in the photo booth and with the toys we already had out and the ones we unwrapped. It was just enough for these 4 year olds.

I can't say enough how much fun this was to put together and how much fun the kids had! I'd love to see what you do for your Toy Story party! Until next time, may all your days be filled with fairy dust!

Thursday, February 12, 2015

DIY Disney Pixar's Toy Story Birthday Party | Creating A Digital Invitation

There are a lot of invitations available on Etsy if you are not so inclined as to create your own. But I love creating this sort of thing, AND I wanted something that could be used in a text message. I don't know about you, but texting is a huge part of my life and seems easier for moms in my circle to use than anything else. I also seem to get an RSVP from most everyone. And since we all send a very informal "save the date" message via text anyway, it seemed logical to just have the invite be a text and let that be that!

If you are inclined to want to do this, here is how I created this invitation.

Start with a 4" x 5" canvas in photoshop.

I used a selection of scrapbooking supplies from two sources: Papelland's Toy Story Collection and Frontier from Project Mouse. Select the plaid paper and size it to your background. Remember it's going to be on a digital screen, so don't make it so small the checkers go all funny on your eyes.

Select a custom shape; I chose this 8-pointed star frame. In a new layer, create the frame in any color. Move the cow print paper onto the shape and reduce the size the same way you did for the background. Then group the paper to the shape (paper layer on top of the shape layer). Your shape should now be filled with this cow print. To outline it, use the stroke function.

To create the inner star, I selected the same custom shape, but the solid version, and made it in white. Then I layered on the cloud paper and changed the opacity to about 30%.

Making the script was fairly simple. I already had the Gill Sans font. Bump it up to Extra Bold and use the stroke function to create the blue border. Then use the emboss function to make it stand out. I then drew a red rectangle behind the word "turns" and used the skew function in the transform menu to shape it like the Toy Story logo.

And that pretty well sums it up! I love having something so easy and it will transition to the scrapbook with no trouble at all! Until next time, may all your days be filled with fairy dust!


Saturday, November 29, 2014

12 Days of DIY Disney Holiday Goodies | Snow's Perfect Apple Punch

True confession time: I made this one up. You won't find it on any menu in the parks or the resorts; but when the wind is howling and the fire is crackling lively in the fireplace, (or you just need a warm and lovely pick me up!) this little beauty is exactly what you need to warm your winter's night!

I like a recipe for which you can make just one glass at a time, or an entire batch for a party. I've included both recipes for you here! You could certainly use this recipe without the brandy, but I think it's a marvelous addition!

And of course you can skip the garnish if you wish, but do yourself a favor and don't skip it. A pretty drink always makes me feel a little more special. And who couldn't use that, especially at such a busy time of the year! Cheers to a yummy winter warm up! Until next time, may all your days be filled with fairy dust!

Snow's Perfect Apple Punch

For one glass:
pour 2/3 C cider into mug, heat in microwave until steaming hot
add 1 jigger brandy, stir well
sprinkle with cinnamon and cloves to taste
garnish glass with one apple wheel, a cinnamon stick

For one punch bowl:
pour one gallon cider into pot
add several tablespoons of mulling spices
Bring to a boil, turn heat down and simmer for about 20 minutes
remove from heat and allow to cool slightly
add 3 cups brandy
Pour into punch bowl and float apple slices on top

Tuesday, September 2, 2014

From Mrs. Potts' Cupboard | Jane's Cuppa

We have been on a crazy Tarzan kick around here these days. The two littles are constantly requesting it and the soundtrack seems to always be playing. So with being immersed in all things Tarzan, I decided Jane needed her own tea. Even though she's not technically recognized as one of the Disney Princesses, I think she qualifies as being the queen of the jungle, so to speak.

I know that at first glance this tea seems a little unconventional. In truth, it is; just like Jane! Trust me when I say you need to try it before you decide about the flavor. I was not at all sure this was going to work, but it seemed like the perfect combinations of ingredients for Jane. The Golden Monkey Tea was an obvious choice, and the coconut flavor inspired by the jungle. But there there are the typically British flavor of lavender, as well as the spices that would have been streaming in from all sorts of British colonies at the time. It doesn't seem like it should come together well, but I was very pleasantly surprised by this one! I have to say I like it.

I'd love to know if you give this one a try. And until next time, may all your days be filled with fairy dust!

Tuesday, August 26, 2014

DIY Mickey Mouse Serving Tray

I think this tray is one of the funniest and delightful things I've done in a long time! I love walking by it on the command center and seeing our ADRs for our next trip. Mickey just makes be smile every time. The ridiculousness is part of the charm! And for under $10 and a little time, it's totally worth it for me to have this fun little Maitre d, er, Mousetre D, at my next Disney themed event!

The last time we were in Walt Disney World, I stumbled upon these plastic, movable Mickey toys at the International Gateway Gift Shop in Epcot. This shop is right at the World Showcase entrance to the park. You may have walked right by it many times and never really noticed it if you haven't had occasion to use it, but it is where the boats dock from the Epcot resorts and Hollywood Studios, tucked in between the UK and France pavilions. It's one of my favorite little shops to check out.

When I saw these plastic Mickey toys for $7 each I decided to pick up two of them. Not only were they good bath toys for the little ones on that trip (which I never seem to remember to bring), it seemed to me they were perfect for some yet unthought of craft. And so they were.

This Mickey already separates at the waist, so all I had to do was pull him apart. I made sure both halves of him were level and would fit seamlessly on the tray. I found this lightweight silver tray at the dollar store in the party goods area. It was exactly the right size for this project. After that, I simply used gorilla glue to adhere both sides of Mickey to the tray. He was hollow inside, so I put a few marbles in his bottom half to weight him down. And since I used gorilla glue, I don't think I would use this for food unless I put a doily around it first or the food was individually wrapped, like candy or cupcakes. I think it's the perfect think for party favors or information though! I used this tutorial as an inspiration for this craft.

Until next time, may all your days be filled with fairy dust!


Tuesday, June 17, 2014

DIY Disney's Frozen Take-Out Sacks

I recently posted about the Disney Movie Reward site where you can download all manner of cool Disney printables. In that selection of things there is a PDF bundle of Frozen Travel Posters (they also have a bundle of Planes travel posters!). I LOVE this sort of thing and knew I needed to find a way (or several ways) to use these gorgeous graphics. As I was looking at this poster for the Arendelle Chocolatier, I realized it would look great printed on my take-out sacks!

If you missed the earlier back-to-school posts (can you believe it's almost time for that again?), we have printable designs for Gousteau's, and Tiana's Place. These chocolatier bags will fit right in! I also think they would make a great presentation for some lovely chocolates (and maybe some wine!) for a Disney fan. And if you are throwing a Frozen party in the near future (perhaps to bring back summer?), these would be great as goodie bags!

In order to print these on white kraft bags (mine are 6x11"), I had to turn the image upside down. Once you have downloaded your PDF files, open them in Acrobat reader. Once you have it open, select "view" and then "rotate view" until your image is upside down. Load the bags in the printer, centered, and right side up with flap facing back. I printed "current page" at 50%. I love the way these came out. So simple and budget friendly! Just a reminder that if you are printing for the first time, I would recommend doing a test run on paper before loading your sacks to see if the layout is the way you want it.

Have fun with this idea! Until next time, may all your days be filled with fairy dust!

Thursday, February 27, 2014

Ratatouille Birthday Party for Little Chef

As you regular readers will know, Little Chef is all about the cooking. Any time one of us is in the kitchen he demands a chair so he can be at the counter with us, no matter how small the task. So it was really a no brainer to have a Ratatouille themed birthday party for him this year! I'd be lying if I told you it wasn't a lot of work, but it was so much fun and Little Chef could not have been happier! It was worth every bit of time and effort putting this party together.

I had plans to use this adorable rolling pin invitation, but as it turns out, this busy mom just couldn't get it done. So instead I went with my old stand-by, Red Stamp. If you've never used this amazing app, I highly recommend it. It makes keeping up with birthdays and holidays a snap! We sent electronic invitations to keep it simple.

I was pleasantly surprised by how much Ratatouille themed party decor was available on Amazon. After all, it's been seven years since Ratatouille was released. (Can you believe it's been that long?) But we were able to find party hats (toques), balloons (which you can see in the photo above) and a backdrop with Linguini and Remy for our party. Perfect for those photo ops!


And remember these Gusteau's take out sacks from our back to school posts? Of course I printed them up and used them for goody bags!


The cooking part was a lot more like decorating, but the toddlers didn't seem to mind! I decided to have two different stations. Our table is pretty big, and we have a rule of thumb that we only invite as many kids as the age you are turning (in this case 3). So I set up each end of the table with "cooking stations."

The first thing we did was make chocolate fondue fruit kabobs. We had lots of fruit cut up (whatever looked fresh at the market) and I whipped up a chocolate sauce. This is so easy and a real hit with the kids!


The second station was a decorating station. I decided to make homemade marshmallows so we could decorate them, along with brownies. I had never made marshmallows from scratch, but I had heard they were to die for. I was shocked at how easy they were to make! Of course Little Chef helped me make them and the sensory experience and transformation was enough to make both of us giddy! I used Alton Brown's recipe to make them. If you try it, make sure you watch the video first. I was so glad I knew what to expect as I was working in the kitchen. I love the way these turned out. They were delicious and decorating them was new and different! I was concerned that the marshmallows would melt in the chocolate and frosting, but they held up beautifully! I used cake pop sticks to make them easy to handle.


I wanted everyone to have individual decorating supplies. I know the sorts of arguments that can break out over shared equipment! These mini muffin tins were the perfect solution. I filled each section with all natural colored sugars from India Tree. I would never have dreamed how much fun the kids had with these!


And see those aprons? I made one for each guest to take home as party favors. They were so easy I was able to whip up all three of them in one quick afternoon. I figured the mom's would appreciate it too! I made them from old pillowcases that needed repurposing. You can read all about them in Tuesday's post.

And then we sat around playing with all the great toys that Little Chef received for his birthday! It was a great party and so fun catching up with good friends! Until next time, may all your days be filled with fairy dust!


Tuesday, January 14, 2014

Mulan Chinese New Year Viewing Party


Chinese New Year is about to begin (January 31st) and it's the Year of the Horse! What better way to ring in the new year than with a Mulan viewing party? Thanks to Pinterest, I had no trouble putting together a Year of the Horse snack bar for our viewing pleasure. Because a good movie deserves good snacks!

We started with these Khan horse cookies, using a new chocolate sugar cookie recipe that I love! The dough was really messy to work with; Little Chef and I had chocolate everywhere! Still, they are well worth the effort. I used my Silhouette portrait to cut out these adorable take out boxes. I used regular scrapbooking paper that I already had on hand to make them, not card stock. I was a little tentative about how sturdy they would be, but they held up really well.

I then cut out these popcorn boxes on the silhouette. I sized them so they were as big as the portrait could take, about 6" wide per side. I had some old China themed Jolee's embellishments that I used to decorate the boxes, but you could always use a horse or lantern cut from the silhouette too.

We rounded out the snack bar with these awesome horseshoe donuts (which we made from scratch using this wonderful recipe; and substituting our left over egg nog for the buttermilk), and "tea" which was really apple juice. I just love this tea pot my sister found while antiquing! So perfect for our party (not to mention my It's A Small World obsession)!

And for those of you looking for a comfy way to enjoy Mulan, check out these adorable cozy socks and satin robe from Hot Topic:


We had a great time watching Mulan and kickstarting the New Year. Until next time, may all your days be filled with fairy dust!


Saturday, January 11, 2014

Make Your Own Vintage Disney Cocktails | Monorail Yellow

Growing up Disney meant that I watched the adults head off on their "Monorail Tour" many a time wish, longing to go with them. For you new readers, the adults in our travel party always took one night and did a traditional tour of the bars on the monorail: The Tambu Lounge at the Polynesian, and The Top Of The World at the Contemporary (neither of which exist as such anymore). Disney in the 70's was a simpler place! And I remember the first year I was able to go with the adults! It was better than turning 21 (at that time, you could be 18 and get into bars in Florida). I knew I had arrived!

One of the signature drinks back then was the Monorail Yellow. You can still find bar tenders who know how to make it, and it's worth asking. I LOVE this drink. It's rum based and definitely tropical in flavor. And this is when it pays to have a vintage cookbook - we have the recipe! At our latest get together with our former traveling buddies, we busted out the pitcher of Monorail Yellows to great cheers. We just can't help ourselves!

And just for you, dear readers, I have included the recipe here. Enjoy it! Until next time, may all your days be filled with fairy dust!

Monorail Yellow Cocktail

1.5 oz Rum
3 oz Orange Juice (We have also used an Orange Banana Juice)
2.5 oz Pineapple Juice
.75 oz Coconut Cream
3/4 C Crushed Ice
Maraschino Cherry

Combine rum, oj, pineapple juice, coconut cream and ice in blender. Blend thoroughly until there are no ice chunks. Pour into tall glasses and garnish with maraschino cherry.

Tuesday, January 7, 2014

DIY Disney Character Party Cups with Temporary Tattoos


Disney Princess Cups
You may have seen this idea on Pinterest: take a temporary tattoo and adhere it to a plastic cup. I know I've seen it several times. And I've wondered if it works. So when we had our annual get together at the beginning of the new year I decided I would give it a try. After all, we are all big Disney buffs. If it did work, I knew people would be charmed by it.

Winnie the Pooh Cups
These little gems were a hit! Believe me, they worked. And were so simple to do. I had three packages of tattoos: Princesses, Winnie the Pooh, and Cars. The kids we usually travel with share our sensitivity to synthetic dyes, so these were right out as their traditional use. But they were perfect for this! I could totally see using them for a party setting! I simply followed the directions on the back of the package to adhere them to the plastic. I did nothing special to them and they lasted quite well through the party. None of them came off on anyone's hands and they even rinsed out well when we wanted to change up drinks.

I would definitely try this again. And even with 20 some cups, it only took me about 10-15 minutes to do them all. Tune in Saturday to find out what vintage cocktail recipe we used to fill these up! Until next time, may all your days be filled with fairy dust!

Thursday, January 2, 2014

DIY Back To School Mickey Mouse Rice Krispie Treats

Mickey Mouse Rice Krispie Treats
I am a fan of sweets, especially those sweets you find in Walt Disney World. And for my money, they shops in Disney's Hollywood Studios and the Starring Rolls Cafe are the best places on property to get those Disney themed treats. (If you are looking for the best bakery on property, however, it is without a doubt Le Halles Boulangerie & Patisserie, in the French pavilion in Epcot -- in my humble opinion.)

When we are at home, however, and the sweets from WDW are far, far away, we make do with our own version of Rice Krispie Treats. We follow the recipe on the Rice Krispie box with one exception: we put caramel bits into ours. You can find them in most stores next to the chocolate chips. You won't believe the difference these make!

Now if you've ever made Rice Krispie Treats, you will know that there is a reason they are cut into squares. They are incredibly sticky! In order to cut them into Mickey's I used cooking oil, lots of cooking oil! I slicked up the cookie cutter with it, and my hands so that I would get the shapes to come off of the cutter as easily as it went in. You have to work at it a bit, but the end result is so worth it! You could also take a Disney twist on them and frost them or dip the ears in chocolate. So much fun for lunches as school starts back up.

Enjoy these sweet treats, and until next time, may all your days be filled with fairy dust!


Tuesday, December 31, 2013

Quick New Year's Eve Disney Printables

Spoonful's Mickey Glitter Ball Printable
Can you believe it's New Year's Eve already? We have a local celebration for the kids at noon today, so the party for them will end well before midnight. But I wanted to offer a few fun activities for them while the grown ups get ready for our annual hors d'ouvers and TV viewing celebration.

Spoonful to the rescue! If you've never visited, Spoonful is Disney's DIY blog with tons of fun and clever ideas. For tonight's celebration they have some cute and quick printables to make your evening fun! I love the Mickey's New Year Wishlist. We don't do resolutions around here, but we do set intentions and I love how this would work right into that. And the Mickey Mouse Glitter Ball Mobile is too cute! I can see that dangling from the light over our dining table. Perfect for the kids. There's a lot more on the Spoonful website, including all manner of hats and crowns, a celebration banner and even some recipe ideas. And all the decorations can be printed right from home! Easy for a last minute party.

Happy New Year, Mousekateers! Until next time, may your new year be filled with fairy dust!

Tuesday, November 5, 2013

DIY Disney Princess Candies

I've been wanting to try my hand at making hard candy for a while now. Last Easter we were living in our nut-free, dye-free world and I decided to make all our Easter candy from scratch. I was really floored by how easy some candy making can be. And I remember long ago in my childhood making hard candies - it was either a women's circle project at church, or a 4-H project. I can't exactly remember; except I do remember feeling like the process was magical. There were only a few ingredients and at the end of the day, they transformed into something truly beautiful. The same thing happened this time too.

Our local JoAnn's recently started carrying LorAnn candy making supplies and I decided it was time to give it a try. We don't do artificial colors and try to steer clear of artificial flavors so I went with the Lemon Oil. The recipe on the back of the box makes a lot more candy than I was prepared for! I had one lollipop tray and one hard candy tray ready to go. As it turned out, I could have used twice that. So I quickly pulled out some additional candy making molds (stars and lego men) to use up what I could. Next time I'll be prepared with more candy trays than I think I'll need. I was also pleased to learn that my Wilton candy making trays worked just as well as the LorAnn trays even though they look like they are made from different material. I lightly oiled the Wilton trays and poured in the candy syrup with the same great results as the LorAnn trays.

If you try this I highly recommend a good candy thermometer. Ours has been used so much that the numbers have scrubbed off and is no longer good for showing temperatures. The old school way of dropping syrup in cold water worked for me, but I couldn't get a good hard crack in the syrup, hence my candy is a bit stickier than I would have liked.  I dusted them in confectioners sugar to keep them from growing too sticky. Nevertheless the candy is very tasty and looks very appropriate for a Disney princess, like glass. The roses reminded me of Belle and the hard candy are shaped like gems. Wouldn't these be adorable at a princess tea party? I'm delighted with how well the first batch came out!

If you are looking for a unique Tinkerbell Treasure, these would certainly fit the bill - and your friends will think you are simply amazing to create something so difficult as candy! No one else has to know how easy it really is. I won't tell them if you don't! Until next time, may all your days be filled with fairy dust!


Tuesday, October 15, 2013

DIY Disney's Pocahontas/Wilderness Themed Treat Bags

So we are finally in our happy place: Walt Disney World! This year we decided to bunk at the Wilderness Lodge. We've stayed here before and loved it. This time around we are trying out the Villas. Will give a full report once we are back!

As most of you know, I try and do a little welcome to Disney package for the kids (and sometimes the adults!) upon our arrival at the resort. We call them Tinkerbell Treasures. Most of the kids are older now, but once upon a time, Tinkerbell actually visited our rooms every night and left a surprise for each kid! You can read more about that experience in this blog post. I think on our next trip, Tink will start visiting again. Happy will be the perfect age for that and Doc will LOVE promoting that vision!

That being said, the goodies this year were all themed (if rather loosely) to our Wilderness stay. These little treat bags were the first things to strike my fancy. I found this adorable Hedgehog Treat Holder (design id #40511) in the Silhouette store. It was simple to cut out and assemble. Instead of cutting out the eyes and nose - sometimes those little cuts drive me crazy!- I used Candy Dots from Stampin' Up. I found the Wilton treat bags at JoAnn's. They are just the right size to hold a few small candies. If you are thinking about a stay at Fort Wilderness, these would also be themed perfectly!

I have a few more ideas for our Wilderness baskets, but I don't want to give away everything before all has been revealed to the kids! So you'll have to wait too. Until next time, (and from the most magical place on earth!) may all your days be filled with fairy dust!