Showing posts with label paper crafts. Show all posts

Tuesday, August 16, 2016

DIY Disney Incredible Superhero Cuffs

With Halloween on the horizon (I like to plan ahead!), I thought this would be a great rerun for today. Enjoy!

Both of our littles have been very into playing dress up lately; especially pretending they have super powers! It's something the big one never really liked. So we were a little sparse in the costume/superhero department. When I started scouring the inter-webs for some quick and dirty costumes and accessories, I found these incredibly easy (pardon the pun!) superhero cuffs from Kate's Creative Space. How could I say no?

When I say easy, I mean it. This fits well into the department of nap-time friendly crafts. Kate has the tutorial and the printables all on her blog. All you need is a couple of empty toilet paper tubes and some glue, and you're all set. She shows you how to embellish them a bit too, if you're so inclined. I just love how these turned out. And talk about budget friendly too! I don't care what Happy decides to do with them. I didn't invest much time and they didn't cost me a dime. It's hard to beat that kind of Disney magic. It might even make you feel a little Super.

Until next time, may all your days be filled with fairy dust!

Tuesday, July 5, 2016

DIY Disney Travel Game

When I saw this idea on Pinterest, I knew I wanted to recreate it using the Disney ephemera I had collected over the years. I tend to be a pack rat - every now and again, this winds up being a good thing. It's nice when that happens! If you are a pack rat too, then this project is free to create. I know I love a budget friendly DIY.
I had an old sturdy tube from some Silhouette stencil vinyl that was just right for this project, perfect for outlining the shapes of some old Disney stickers I had lying around. (I believe these are from the 90s - when I was still paper scrapbooking. Disney had a terrific scrapbooking store back then; I'm not sure if it's still around today.) If you don't have any stickers, they are very easily obtained from the Dollar Store, or a craft store. And they are usually fairly inexpensive, especially if you have a coupon.

The idea here is simple. I removed the outer edge of the sticker paper, leaving the actual stickers on the page. Then I used the "blanks" as a stencil to trace the shapes of the stickers onto the paper tube. I used a fat Sharpie to trace them and then a fine point Sharpie to label the shapes. (I have a bit of a pen addiction as well. I love my Sharpies!) Happy isn't quite able to read yet, and I wanted Poppins or Doc to be able to help him if I wasn't available.  So now there are several Disney shapes and characters to match to the shapes on the tube. I figure this could last him a good 20 minutes if he takes to it! Stickers are generally a favorite for him. For our family, the trick is finding new and different things to keep the little ones occupied on our drive. It's a LONG way to Orlando from our cottage in the midwest! I'll let you know if this works for us. And if you try it, let us know how it worked for you!

Until next time, may all your days be filled with fairy dust!

Thursday, June 30, 2016

DIY Disney's Mary Poppins Spoonful of Sugar Chore Chart

Mary Poppins' Spoonful of Sugar Chore Chart
I know there are many of us out there who love the Disney Classics. Mary Poppins most certainly qualifies on that score! I can remember going to the drive-in as a little girl with my best friend, both of us propped up on Charles Chips cans in the back seat watching Mary Poppins and Burt traipse across the rooftops of London. It was magical! (I'm certain I am aging myself here: Drive-in? Charles Chips?! Does anyone even know what that is anymore??)

As I was rummaging around in my craft supplies recently, I ran across these adorable spoons from 7Gypsies (hard to find now, but Ebay might be a good place to search). I had been playing around with the idea of a Disney themed chore chart and immediately had the inspiration that these "spoonfuls" would be perfect on a chore chart featuring everyone's favorite nanny!

I wanted to make this simple for Happy - he's only 2, so we are working on a morning and evening routine right now. I designed this Mary Poppins printable chart which I am happy to share with you for free! All you need to do is print it on regular paper - not cardstock - and adhere it to some pretty Poppins-themed scrapbook paper. I pulled this out of the bottom of the stack, but I liked how the butterflies reminded me of Mary's bouquet of flowers/butterflies on her Jolly Holiday with Burt. You remember that, right?

To create the spoon magnets, I used some magnet strip I had on hand. I adhered it to the bowl of the spoon, and the handle end. I first tried some magnetic dots, but they were not strong enough to hold the spoon through 2 pieces of paper (this is why I recommend using regular paper when printing the chart).   I also curled the handle of the spoon just a little to get the handle end to touch the paper and adhere to the fridge. Of course, you could always just make some paper spoon magnets, or use other magnets altogether. (What about those pressed pennies?) You could even cover it with contact paper and make it a write-on, wipe-off board! Make it your own.

Let me know if you use this idea at your cottage. And until next time, may all your days be filled with fairy dust!

Tuesday, June 7, 2016

DIY Disney Map Coasters

 Perhaps you've seen this lovely tutorial on Pinterest. I've been eyeing it for a while and finally tackled it. I love the way these coasters turned out and the best part is they cost under $1.00 each to make! These would be a great gift to make for your fellow Disney geeks.

Of course, Jimminy Cricket would also be pleased that we are upcycling more of those park maps we all bring home as souvenirs.

I followed this tutorial with a few minor adjustments. I like to use Golden's Gel Medium instead of Mod Podge. It's more expensive, but I like the way it dries better. And I've been using it for years, so my comfort level is there. This also meant I had it on hand and didn't have the mod podge. One additional benefit to using the Gel Medium, it can handle hot liquids within a couple of days. No need to wait a month!

I applied one coat of Gel Medium to the top of the naked tile and adhered the cut out map piece to it. Try to smooth it out really well. The slick nature of the map makes it want to bubble up. You could use a credit card or bone folder - gently! - to get all the bubbles out. I let that dry. Then I came back and applied two more thin coats of Gel Medium, letting each tile dry thoroughly between coats. I made sure to brush the Gel all around the edges of the paper, making sure it was not going to peel up.

And instead of using rubber cement for adhering the felt, I used a spray adhesive. (If you are ever in doubt as to which glue to use, This To That is a fantastic resource!) I used an old box as my "spray zone" so as not to make my whole work space tacky. And that's it! My total cost for this project was $3.00 for the tile. Now THAT'S a bargain! If you try this project be sure to send us a photo; until next time, may all your days be filled with fairy dust!

Saturday, June 4, 2016

DIY Disney Closet Divider Tags

DIY Disney Closet Tags
When I saw these shapes in the Silhouette store, I knew I would need them. I am an organizer, a planner and I prepare. And this is never more true than when we are going to Walt Disney World. When I pack, I pack in outfits. I like to know that I'll have everything I need to look put together all in one place. It all gets laid out by day, and then put together in the suitcase as one. Ziplock baggies are especially helpful in this department and come in handy if you have wet bathing suits to bring home. And I love not having to think about things like what to wear when we are at the parks.

As an aside, I highly recommend unpacking your suitcase when you arrive at your resort. There is nothing worse than trying to decipher which clothes are dirty and which are clean when you are running late to your ADR. (And we are always running late. I assure you.) Also, I always designate an empty bag or drawer for dirty clothes. That way we are not tripping over one another's ish in a tiny space.

With these tags, I can easily mark which outfits are to be worn on what days; no more arguing with the kids. Even better, I can see at a glance if I have packed enough clothing, or not. Once it's all together, it goes in a big ziplock bag, tag included. When we arrive at the resort I simply hang the entire outfit together on a hanger and pop the tag over it. Done! Everyone knows which outfit is for which day. I can even plan an outfit for a special character meal that I know will look good in the photos later on. So no matter who is helping Happy get dressed, they know what he should wear and I don't have to interrupt what I'm doing to pull out clothes. Let's foster independence where we can, shall we?

I used my basic scrapbooking supplies to create these tags; mostly using paper and ribbon. I themed them to the Classic Disney Characters, but you could do these for any set of characters that mean something to your family. I may try and do a set based on Phineas and Ferb for Doc; his clothes will be in a separate room from ours. These tags represent, Sunday - Minnie, Monday - Mickey, Tuesday - Donald, Wednesday - Goofy, Thursday - Pluto, and Friday - Daisy. I know, I don't have Saturday; won't be needing that one on this trip. Too bad. We'll just have to remedy that another time!

And for those who may need to know, the design ID numbers for these Hanger Tags are: 32018, 32017, 32016, 32015, 32014, 32012, 32011. Until next time, may all your days be filled with fairy dust!

Thursday, May 26, 2016

DIY Disney Road Trip Travel Clips

Happy Memorial Day Weekend Musketeers! In honor of the long road trip we have ahead of us, I'm running this great road trip idea! I hope you enjoy it and have a beautiful holiday weekend wherever you are.


Say Hello To Good Behavior!
We have traveled to Walt Disney World in just about every way possible, although I'm still holding out for the auto train. When I was younger, we rode down in our MT Motorhome. In my opinion, there is no better way to go! Of course, I wasn't driving, so that may have something to do with that. We've gone by airplane, driven through the night, even taken a conversion van and tents. Our next trip will be in our new minivan. I'm not exactly dreading the trip; in fact, there are several things I am looking forward to about it (not the least of which is that our own Mary Poppins will be able to come with us!) But we all know that a long road trip can wear on the best of us, so I've taken some precautionary measures. When your traveling from a cottage in the Midwest to Florida, it pays to have every advantage you can get!

This was an inspired idea from Julie at Less Than Perfect Life of Bliss. I took it and Disney-fied it. I used our blog names and created a tag for each of us -- yes, even the adults. The idea here is that everyone starts with his or her clip on the visor. Good behavior = clip stays up. Bad behavior = clip comes down. (Your elementary teacher probably had a similar system.) It's up to you how you enforce this, but we give the opportunity to earn your clip going back on the visor, by being helpful, polite, etc. Just make sure everyone is clear on the rules at the start. At the next stop (gas, rest area, restaurant) whoever has a clip still on the visor gets a goodie. (This is where that Tinkerbell Treasure hunting can come in handy!) I'm all for bribery - especially in the case when 6 people are trapped in a van for 18 hours, two of whom are strapped into carseats.

One caveat, our visor was too thick for the clothespins to clip onto it. I took some elastic and made a band that fit over the visor. We clipped the clothespins to that. If you need to do the same, make sure you subtract a couple inches from the band measurement; you want it to be nice and tight against the visor. Those clips can get heavy!

I love this idea. Simple and cute! Until next time, may all your days be filled with fairy dust!

Thursday, May 19, 2016

Tinkerbell Treasures: Coin Rolls

I saw this idea on pinterest, via Martha Stewart, as a stocking stuffer and thought it would be great for a Tinkerbell Treasure! I love the pressed penny machines in Disney. I think they are a great way to spend your waiting time -- waiting for a dinner reservation, waiting for the taller kiddos to finish their thrill rides, waiting for mom to check out at the shops. I'll buy that kind of patience for 50¢ any day of the week! Plus, there are all sorts of games you can play with the pressed pennies once you've collected a few (more on that in a later post).


For these coin rolls I decided to just wrap them in scrapbook paper scraps, but you could certainly decide to use a solid paper and ribbons that match your child's favorite Disney character, or specifically Disney paper. And I was tempted to skip the cellophane, but it really makes a big difference in keeping the ends of the rolls together and adding a sweet touch. A roll of quarters ($10) and a roll of pennies (50¢) should keep two kids busy for at least a couple of days (that's 10 pressed pennies each), that is, if they don't develop an obsession for collecting pressed pennies!

If you want to make these for the pressed penny lover in your life, I have a downloadable page of tags for you to use. Just click here, or click on the thumbnail below to download. Until next time, may all your days be filled with fairy dust!

Saturday, May 7, 2016

Tinkerbell Treasures: Disney Door Hanger DIY

As I have mentioned, I LOVE giving Tinkerbell Treasures while in Disney. There is something so magical about the idea of Tink delivering a little something while you sleep. I can't resist it.

These door hangers would be so fantastic for those little giftees that need a special presentation. I like to use them on the bedroom doors in our villa. It's a sure-fire way to get the kids' day started off right. This would be an especially good way to tell the kiddos what's on the agenda for the day. You could fill them with a map of the park you are headed to (these are free and always available at the front desk), a new pair of shades, a snack, a new trading pin, a few Disney Dollars, a gift card to the arcade, the possibilities are endless. We always try to schedule a non-park day while in Walt Disney World, and this is a great way to add a little excitement to those less intense days. (I can also see them used as sleepover party favors, or birthday morning goodie bags.)

I used my Silhouette SD to make these. It was SO simple. I used design shapes 3d Door Hanger (id #21330) and House of 3: Dream Scallop Seal (id# 6821). I resized the door hanger so the box portion was as large as I could make it:


I had to then move the hanger shape to another page. After that I just cut and put it together. Easy peasy! I would recommend using the heaviest card stock you have if you plan on filling this with anything heavier than a map and some Disney Dollars. It wants to come off the handle fairly easily. You could also solve this problem by taping it together once it's on the door.

I hope you find lots of ways to use these versatile door hangers. Until next time, may all your days be filled with fairy dust!

Thursday, April 21, 2016

DIY Disney Gift Bag from Upcycled Park Map

Every now and then you need emergency gift wrapping while in Disney: someone in the party reveals it's their birthday, you find the perfect just-because gift, or you remembered the gift and the occasion, but forgot to pack wrapping paper. Whatever the situation, I know I've had need before. Well, here is your solution.

Every park, every resort and many other places around Walt Disney World have free maps available. I always grab two or three when we enter a park because I know my family, and they have a tough time keeping track of theirs. This means I usually come back to the hotel with extras. Even if you don't, just stop by the check-in desk. They always have them. This map is your new gift bag - it just needs to be folded. You may need to stop at guest services and ask if they have a glue stick (or tape) and a ruler you can borrow - or scope out the gift shop. It's Disney. Someone is bound to help a guest in need.

I'll save you the double post and simply direct you over to How About Orange's awesome tutorial on how to make a gift bag from a newspaper. The steps are easy to follow. The only change you will want to make is in the folding dimensions. The Disney maps are a bit bigger than the rectangle she uses. Instead of the sides of the bag measuring 4 1/2", you will want to make them 6 5/8". Everything else is the same.

Viola! You have the perfect wrapping for the perfect Disney gift, and it was upcycled to boot. Wouldn't Jiminy Cricket be proud? Until next time, may all your days be filled with fairy dust.

Thursday, April 14, 2016

DIY Disney Monorail Scavenger Hunt Cards

I've always had a love-affair with the monorail system in Walt Disney World. It's magical in it's own right, and such a cool way to travel! As a kid I longed to stay in the Contemporary Resort so we could see the monorail swishing through the concourse on a regular basis.

And as a kid, we always played a monorail version of the license plate game, keeping track of the different colors we'd seen. Today there are twelve monorails operating in WDW. Rarely are they all on-line at once. But if you are lucky, you could see most of the following: Red, Orange, Yellow, Gold, Peach, Coral, Green, Lime, Blue, Teal, Silver and Black.

In the spirit of making the most of our wait time (there can be A LOT of wait time in Disney, depending on your travel dates), I created these scratch-off cards for the kids in our party. I used a heavy card stock to print these, and I would recommend making several extras as you may need them for those adults kids who tend to lose theirs in the parks, or for a learning curve with the scratch-off paint.

Then, I used this tutorial from Artmind to make scratch-off paint. A couple of tips regarding the scratch-off paint: 1.) It bubbled up when I applied it, but most of the bubbles went away as it dried. The more you agitate the paint, the more bubbles you will get. 2.) A lighter color of paint is recommended. I used copper and it didn't scratch off cleanly - as you can see in the photo below. The gold was much better.

To create the actual card, I used a scanned image of the monorail from a promotional Disney flyer. You may want to clean up the edges of the image in Photoshop. To create the different colored monorails, I selected the color stripe so it could be changed to the different colors I needed. Due to copyright laws, I can do this for my own personal use, but not, I am sorry to say, to distribute it to others. Therefore, I cannot offer you a PDF as I would like to. I can, however, refer you to my March 5th post about how to select an image and create a PNG from your own photo, and this tutorial on how to select an area of a scanned image in Photoshop and change its color. It was much easier than it sounds. Give it a try. And remember that if you are scaling down your image significantly, you will not have to be so worried about little detail areas that don't look right on a larger scale. Some of them just disappear. Don't stress yourself out about the little things.

Of course, it was only logical that each kid got a pressed penny to use as a scratch-off tool! The edge was perfect for removing the paint. I hope you give this scavenger hunt a try. We had a blast using them. Until next time, may all your days be filled with fairy dust.

Tuesday, April 5, 2016

Easy Upcycled DIY Disney Travel Game

When I saw this idea on Pinterest, I knew I wanted to recreate it using the Disney ephemera I had collected over the years. I tend to be a pack rat - every now and again, this winds up being a good thing. It's nice when that happens! If you are a pack rat too, then this project is free to create. I know I love a budget friendly DIY.
I had an old sturdy tube from some Silhouette stencil vinyl that was just right for this project, perfect for outlining the shapes of some old Disney stickers I had lying around. (I believe these are from the 90s - when I was still paper scrapbooking. Disney had a terrific scrapbooking store back then; I'm not sure if it's still around today.) If you don't have any stickers, they are very easily obtained from the Dollar Store, or a craft store. And they are usually fairly inexpensive, especially if you have a coupon.

The idea here is simple. I removed the outer edge of the sticker paper, leaving the actual stickers on the page. Then I used the "blanks" as a stencil to trace the shapes of the stickers onto the paper tube. I used a fat Sharpie to trace them and then a fine point Sharpie to label the shapes. (I have a bit of a pen addiction as well. I love my Sharpies!) Happy isn't quite able to read yet, and I wanted Poppins or Doc to be able to help him if I wasn't available.  So now there are several Disney shapes and characters to match to the shapes on the tube. I figure this could last him a good 20 minutes if he takes to it! Stickers are generally a favorite for him. For our family, the trick is finding new and different things to keep the little ones occupied on our drive. It's a LONG way to Orlando from our cottage in the midwest! I'll let you know if this works for us. And if you try it, let us know how it worked for you!

Until next time, may all your days be filled with fairy dust!

Saturday, August 1, 2015

Disney DIY Paper Airplanes

Our littles recently went to the local library and stumbled upon a paper airplane demonstration. You would have thought it was the second coming! They loved it and showed everyone the airplanes they made. And ever since there has been some paper airplane madness here in the Cottage!

I remembered having pinned some Mickey airplanes on Pinterest and decided to look them up. Sure enough, there they were! And now I am sharing them with you. You can find the cut-outs to download on the Disney Family website. They are simple to make and loads of fun!

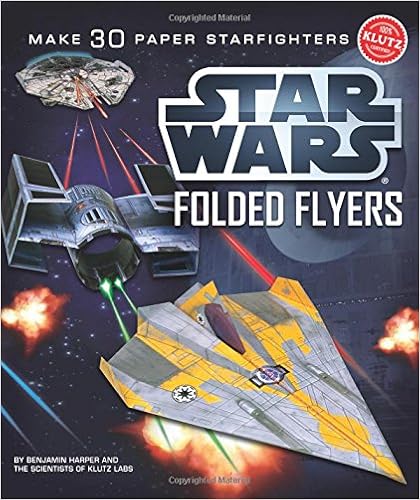
In fact, even the high-schooler got in on the action, remembering he had this Star Wars book of paper airplanes hanging out in his room. That was even more amazing to the little ones. Even to this mama, this book rocks. If you have a Star Wars kid (or adult!) in your house, you should seriously consider this for them! I would definitely recommend it for those with a good attention span and a command of scissors. The designs are complicated and one even frustrated the teenager to the point of balling it up and tossing it out! 

These were a great boredom buster for our family, and as summer drones on for some of you out there, maybe this will be a good diversion. Until next time, may all your days be filled with fairy dust!


Saturday, February 21, 2015

Toy Story DIY Birthday Party Report


We had a rootin' tootin' good time at our party! I had a blast creating this party for Little Chef! There were so many amazing ideas on Pinterest (my party idea pinboard can be seen here)! Little Chef and I took some time looking at all the ideas and he told me what he wanted to do and I filled in the rest with my ideas. Here's what we did:

The Photo Booth

I love the fun photo booths I see at special events! I'm a big time picture taker and its a way to dress up and have fun without everyone looking at you like your crazy! This one was super easy to construct. I found an empty wall, covered it with light blue wrapping paper and taped it down with painters tape. I then cut out the toy story cloud with my Silhouette. I cut 5 of the small and 5 of the large clouds and adhered them with scotch tape. I then used a couple of hats I found through Amazon, and these adorable (and free!) cut-outs from Merriment Design for the props. Easy and lots of fun!

Snacks

Little ones don't need a lot of snacks during the party if you schedule it before lunch. We went with cheese crunches (ala Al in Toy Story 2) and "snakes in a boot" - my own idea. I used plastic boot shot glasses and organic gummy worms. Two worms fit exactly in one boot! And they were the hit of the party! I loved hearing kids and adults alike say they needed another snake in their boot!

Decor

This was so easy. I used the barrel of monkeys design from the Silhouette shop and cut dozens of them from primary colored card stock scraps. And since I used to be a paper scrapbooker, I had a whole bunch of Memory Makers snaps to use up. I just attached the hand of one monkey to the other with the snaps and it was done. You could easily use brads, but the backs might show.

Little Chef also fell in love with some directional arrows to all the fictional places in the Toy Story movies that we had seen on Pinterest. I just downloaded some images I found on the internet and cut arrows from them. The arrow shape was already in my Silhouette library! I used painters tape to adhere them to the wall for the party.

And you've already seen the Luxo Ball Boxes that held all the goodies! To this I added loads of balloons. I bought a helium tank at the party store and in 30 minutes I had 40 balloons blown up and tied down all over the house. They made everything just a little more festive. And of course, we set up our Toy Story toys around the house as well, ready for a play date with destiny!

Activities

I cut out these rocket shapes from card stock using my Silhouette. I gathered up some craft supplies in the dollar bins from the local craft store, put out the glue and crayons and let the kids go for it! It was really fun. And then they played in the photo booth and with the toys we already had out and the ones we unwrapped. It was just enough for these 4 year olds.

I can't say enough how much fun this was to put together and how much fun the kids had! I'd love to see what you do for your Toy Story party! Until next time, may all your days be filled with fairy dust!

Thursday, February 19, 2015

DIY Disney Pixar Toy Story Birthday | Luxo Ball Party Favor Boxes


I had a hard time deciding what we would do for goody bags for the Toy Story birthday party. I thought about making lunch sacks with the Pizza Planet logo on them, but that wasn't really what I had in mind. Pinterest is chock full of ideas, but they just weren't as exciting as I hoped. Then, I stumbled upon this 3D bowling ball box in the Silhouette design store and I had a great idea! I wanted to turn it into the famous Luxo ball from Pixar!

How did I do it? Here's the skinny:

1. I downloaded the 3D Bowling Ball Box shape ID 57679, and used a generic star shape that was already in my library.

2. Once opened in Silhouette software I resized the box to be as big as my Portrait will allow, 16.5" x 25.15" on the full design. Then I separated (or ungrouped) the pieces of the design in order to cut them out in different colors of card stock, base blue and lid yellow.

3. I sized the star shape to the lid (4.865"x4.635") and cut it out of red card stock.

4. I created the names on each one by using the Gill Sans Ultra Bold font and adjusting the kerning (or character spacing) until I had the look I wanted. I then used the offset function to create the red background for each name. Each name was approximately 1" tall.

That's it! It was easy to assemble, although time consuming. I spent one day's nap-time cutting and another day's nap-time assembling. And it used a fair amount of paper! I needed 3, 8.5"x11" sheets of card stock for each lid and each base. And it was TOTALLY worth it! I love the look of these and it's not just another goody bag like every other birthday party!

Most of my readers will probably know that the short film, Luxo Jr., was one of the two shorts that really catapulted Pixar into computer animation leadership, in as much as it relates to animated films. Here it is:


This Luxo ball shows up in all the Toy Story films and shorts and many other Pixar films. It's exactly the sort of thing Pixar likes to do. So when I realized I could use it at the party, I knew I needed to! Until next time, may all your days be filled with fairy dust!

Saturday, February 14, 2015

Simple Paperman Inspired Valentine


Happy Valentines Day Disney lovers! If you have never seen the short film, Paperman, by Walt Disney Studios, it's absolutely worth a moment of your time. It won two Oscars and absolutely makes you want to believe in love. It's perfect for this Valentines Day (or any other Valentines Day).

And this Paperman inspired valentine has to be the easiest valentine ever. Seriously. I know I say that a lot, but this is truly so simple. All you need is some sort of official looking paper (I used an old Analysis Pad), some bright red lipstick and you are set! Fold your paper into an airplane, give it a kiss and viola! A super quick and easy valentine for your favorite Disney lover.

Of course, if you have the time, you could go crazy and make a whole flock of them. Be inspired! Until next time, may all your days be filled with fairy dust!


Saturday, February 7, 2015

DIY Pixar's Toy Story Inspired Gift Tags with Silhouette

We are about to have the Rootin-ist, Tootin-ist party this 4-year-old has ever seen! Pixar's Toy Story has become an obsession in the cottage. There are days when we frequently view the Toy Story trilogy in a day. We are, in fact, still watching the Toy Story That Time Forgot (thank heaven for DVRs!) and calling it "the new Toy Story". That said, there will be some Toy Story toys joining our toy box soon. Wrapping them has been fun, knowing Little Chef is going to be so excited to see them.

I've been having some fun with gift tags too, using my Silhouette machine. I rounded up some of the shapes from the silhouette store that reminded me of Toy Story. Here's a list (with links!) of the designs I used for the gift tags:


Cowboy Hats (ID 30733)
Sheriff Badge (ID 29056)
*Dinosaur (ID 6784)
*3D Army Envelope (ID 58554)
Rocket Ship (ID 16622)

Some of them needed an offset (background), so I used the little offset operation at the bottom of the screen to quickly create the background shape. (It's the one that looks like a bullseye.) I put an asterisk next to the design shapes for which I needed that function. In all it was a quick and easy way to add a little Toy Story magic to our gifts. I'll be posting more great Toy Story ideas this month that we used for our party. So stay tuned! Until next time, may all your days be filled with fairy dust!


Thursday, January 22, 2015

DIY Upcycled Disney Resort Map Bucket

You know, I'm always surprised at how the easiest map projects become my favorites! This little bucket is no exception. And honestly, it was really easy to do! All you need is a paper cutter, a map and a tape runner.

I started with a bucket of Ghirardelli chocolates (minis) that we picked up at Downtown Disney this fall. They are not nut free, so I liked that Doc still have them as a treat, yet could keep them up on a high shelf away from Little Chef (and his nut allergy) in this handy bucket. Once the candy was gone I rescued the bucket from the recycle bin, not yet sure what I would do, but certain it would be useful in the future.

And yesterday, inspiration hit! I grabbed an Epcot map from my stash and cut it in two strips to cover the entire bucket. Future World for the front of the bucket and World Showcase for the back! I just used my tape runner (dry adhesive) to adhere the map to the plastic bucket and voila! I have the perfect little catch-all for my desk area! I am in constant need of another container for pens, colored pencils, googly eyes, colorful elastic, you name it! I love the way this looks. And wouldn't Jiminy Cricket be proud? We've upcycled this into something wonderful!

Until next time, dear readers, may all your days be filled with fairy dust!

Tuesday, January 20, 2015

DIY Disney Resort Map Pinwheels

Sometimes a girl just needs a breath of fresh air. This project was that little breath for me. It's starting to feel like winter is going to be here, in the midwest, for ever. I always start to sense it around this time, and last year it was even earlier with our crazy weather! I needed a reminder that spring is really coming. So I decided to dig into my map stash and make some whimsical, spring-inspired pinwheels for my studio cabinets!

These were fairly simple to do and in about an hour I had a fun new addition for my studio! It had been a while since I had made any pinwheels of my own, so I used this pinwheel tutorial from See Kate Create. It was very simple and easy to follow. I did one or two from the maps and realized I really wanted to see the map on both sides of the pinwheel, so I just cut out two map squares of the same size and used my tape runner to adhere one map to the other. The darker pinwheels are made from flyers introducing the New Fantasyland and all it's attractions.

I hope you have fun with this idea! I'd love to see what you do with it. Until next time, may all your days be filled with fairy dust!


Tuesday, April 22, 2014

Disney Park Map Project Round Up for Earth Day

Since it's Earth Day, I thought it would be nice to do a round up of all the Disney Park Map posts I've done in the last year or so. As we all know, Jimminy Cricket wants us all to be responsible with our resources and think about our environment! These projects are a fun Disney way to incorporate the three Rs into your Disney trips: reduce, reuse and recycle!

First up, make a Disney park map gift bag!

Or you could make some fun coasters from ceramic tiles and your Disney park maps.

You could use them as an insert for an insulated travel mug, so you always have a little Disney with you.

You could also insert a Disney park map into a three-ring binder for an instant Disney boost at work or at school!

You could decoupage an ornament for the holidays, or create this orb ornament.

You could decoupage a candle for your home (or a gift!) with Disney park maps too.

And finally, you could use your Disney park maps to make a block puzzle suitable for your coffee table or your next road trip box.

What ever you decide to do, we hope you remember to reduce, reuse and recycle those maps. Until next time, may all your days be filled with fairy dust!

Saturday, March 15, 2014

DIY Disney Popsicle Stick Magnet Puzzles


I first saw this idea on the Silhouette America Blog. It captured my attention as we are getting ready to road trip to Disney's Hilton Head Island Resort for spring break and I am always on the lookout for car-friendly activities. I especially like anything that will work on a magnet board (i.e. cookie sheet from the dollar store)! And this was easily converted. With two toddlers, keeping it fresh is the name of the game! Well, that and snacks. Lots and lots of snacks.

This is possibly one of the easiest crafts I've done. I first found pictures of Disney characters my kids are fond of by searching Google images. I then printed them out on regular copy paper. I even used one of my own pictures of Cinderella's Castle! The possibilities are endless here. You could use pictures of family members, the states you are traveling through, favorite rides at the parks, you name it! I think it's a fun and easy way to generate a little interest and excitement about the final destination while trapped in the car.

Once I had everything printed I used my tape runner to make the entire back of the picture sticky. I imagine you could use craft glue too, but I didn't want to deal with goop and bubbles. I then placed my popsicle sticks on the sticky paper and used an exacto knife to cut around them. It was just that simple! I'm not too worried about them getting torn up. I figure we can use them in the car, use them on the fridge in the villa, and then use them in the car again. If they last longer than that, bonus! If not, and the kids fall in love with them, I can always make more. After all, they were fast to assemble. I was able to whip up two of these in about 20 minutes. Simple and sweet!

May all your road trips be short, and until next time, may all your days be filled with fairy dust!