Thursday, July 31, 2014

DIY Disney Back To School Lunch Ideas

It's hard to believe it's that time again! We are all headed back to school this week here in our neck of the woods. And because, apparently, I need a certain level of chaos in my life to be fulfilled, we are also heavily into potty training right now. In lieu of all this, I thought I'd run a few of our back to school posts from last year. Enjoy them!

Lunch Box Notes


 It's back to school time and those first few weeks can be rough getting back into the routine! If you have a student (or frankly, a teacher) in your life you know how hard it can be. These sweet lunch box notes are a perfect mid-day pick-me-up. There are lots of these out there but these are my favorites. Add a little magic to your loved one's lunch.

Disney Family has a cute selection, both boy and girl themed. These are the boy selection.

Disney Stationery has lots of great notes including these wonderful Wall-E notes. Check out the link for more from Mickey and the gang, your favorite princesses, a pirate and a few dwarfs.

And finally, if your kids are a bit older and enjoy trivia from the parks (*cough*, Doc, *cough*), then here are 6 from the cottage. We hope you enjoy them. Simply click here to download them for yourself. Special thanks to Disney Trivia for the questions and answers!

Until next time, may all your days be filled with fairy dust!

Tuesday, July 29, 2014

Disney DIY Back To School Lunch Ideas

It's hard to believe it's that time again! We are all headed back to school this week here in our neck of the woods. And because, apparently, I need a certain level of chaos in my life to be fulfilled, we are also heavily into potty training right now. In lieu of all this, I thought I'd run a few of our back to school posts from last year. Enjoy them!

Lunch Sacks


I think one of the best things that Disney (and especially Pixar) does is create an entire world you can believe exists. I love the detail that goes into these movies. And one of my particular obsessions is Disney's fictional brands: Lightyear Tires, BnL, Dinoco, etc. So for this particular project I thought it would be fun to make take-out sacks for those lunches that require disposable packaging. (Our field trip days are always like that!)

These are two of my favorite fictional restaurants, Tiana's Palace, from The Princess and the Frog, and Gusteau's from Ratatouille. I created a couple of PDFs using some custom shapes and Adobe creative suite. The font for Tiana's Palace is Edwardian Script. You probably already have it on your computer. The font for Gusteau's is Futura. It's one of my favorites. If you would like to download these free PDFs, you are welcome to use them! You can find Gusteau's here, and Tiana's Palace here. And to find the info on the Arendelle Chocolatier bag, head on over to this post for all the details.

To print, simply load the bag into the left side of the printer bottom down, bottom fold facing away from you. Don't worry about it looking upside down, it should be. Also, ignore any cropping warnings you get. It should print out properly, but I would recommend running a test copy on paper before putting your bag through. And if you need more visual instructions for printing the bags, check out Geeky Paper Ideas. There was a small learning curve with loading the bags for me. One went in flawlessly, the other was eaten. Ah well. Not everything is sprinkled with fairy dust!

I'd like to design a few more of these in the future, but until then, may all your days be filled with fairy dust!

Saturday, July 26, 2014

DIY Hand Knit Pocahontas Riverbend Socks

Love how simple and easy these socks are to knit up. I have made them twice before and just love them. The pattern is inspired by the Kalajoki River in Finland and it reminded me of one of my favorite songs from Disney's Pocahontas: Just Around The Riverbend. I found my perfect river colored yarn from Madelinetosh and I was off and running, or uh, knitting.

The pattern is only worked over a series of 16 stitches, and and rest is stockinette. I can't tell you how quickly this knit up! And even better, the toes are not grafted! I may, in fact, be the world's worst grafter. I cannot keep straight where I am in the that god-forsaken Kirchner stitch! But with this pattern, I didn't have to! All the better. And finally, it's a nice pattern for self-striping or variegated yarns. Sometimes the patterns don't show up too well on those, but this pattern is big enough that it works with these yarns. If you do decide to knit it, realize that it won't look this pretty on the needles; in needs to stretch out to really reveal itself. It's just a little bit magic that way!

If you want all the knitty-gritty details, hop on over to my Ravelry page. You can also find a link to the pattern there. If you're not registered, don't worry. It's totally free and they are excellent about not spamming the inbox! It's absolutely my favorite knitting and crocheting resource.

Until next time, may all your days be filled with fairy dust!

Thursday, July 24, 2014

From Mrs. Potts' Cupboard | Aurora's Sleepytime Tea

It's summer time here at the cottage and we always have some crazy travel schedules during the summers. Sometimes we get so out of our routine, and find ourselves on the far western boarder of the time zone and we just can't sleep! It's hard when the sun isn't setting until 10 p.m.! We feel like Anna in Frozen: the sky's awake, so we're awake.

We have Aurora's Sleepytime tea recipe to the rescue. In point of fact, there is no actual tea in it, as we don't want to add any extra caffeine into the mix. This tea helps us settle our bodies and our minds and smells lovely while doing it. Sometimes, just the act of sitting with a warm mug of tea in a quiet place helps settle our family down.

I will sometimes leave out the peppermint, and so should you if you find it peps you up instead of calming you down. But I like it for the digestive properties it brings to this tea. If you would like to download a PDF of this recipe, I am happy to share it here with you.

Enjoy this one friends. Until next time, may all your days be filled with fairy dust!

Tuesday, July 22, 2014

From Belle's Library | From Dreamer to Dreamfinder

Ron Schneider's book, From Dreamer To Dreamfinder is an interesting read for anyone who grew up in the 80s and 90s going to Disney. As I have  mentioned in earlier posts, I am a fan of the audiobook. In fact, I'm fairly certain it's the only way I can read a book these days and not fall asleep!

The narration of this book is by the author, which I usually enjoy and felt so-so about on this one. But nevertheless, the content, for me was interesting. If you have ever wondered what it would be like to work as an entertainer for Disney, or as a cast member in general, this is definitely worth reading. And if you have an intense nostalgic attachment to Figment and The Dreamfinder, then there are some chapters in this book that you absolutely MUST read!

Rob Schneider worked in theme parks and entertainment for 40 years at the time of writing this book. He has a wealth of onsite into the differences and similarities of working at Disney and Universal. I liked his frank approach and his observations about management styles. And even without saying overtly what he thought of Michael Eisner, I think we may share a similar opinion! I'm always a fan of looking behind the curtain to see how things are done and this book is a fun peak into what it takes to entertain the masses. Overall, I think it's an interesting read. It's not going to change your world, but it just might enlighten you on how things are done.

Until next time, may all your days be filled with fairy dust!

Saturday, July 19, 2014

Disney Road Trip 101 | DIY Magnet Puzzles

I recently found several Disney products at the Dollar Store (I'm always on the lookout!), one of which were these great Disney Jr. cardboard puzzles. I was able to convert this regular puzzle into one we could easily take on the road without worrying about losing all the pieces. Here's how it works.

I found small cookie sheets at the dollar store and picked up one for each toddler. Trust me, you want new, clean and small cookie sheets for this purpose! I also purchased 3 of these cardboard puzzles, one in each design they had. Variety is a key to staying busy (and tear-free!) on the road.

I brought them home and took the pieces off the cardboard frame. I put a little adhesive magnet dot on the back of each puzzle piece. (Once you do this, you won't be able to put them back in the frame.) Now, each piece adheres to the cookie sheet and won't spill off as the kiddos are putting the puzzles together! I also whipped up a few of my upcycled t-shirt drawstring bags to hold the pieces of the puzzles and keep them separated from the other puzzle pieces. I don't need the hassle of sorting out which pieces go with which puzzle from the front seat of the van!

I think these are going to be a fun addition to the other magnet puzzles we already have. And bonus - when we get to the resort, we can use them in our villa on the fridge! I'm all about the 2-for-1! Until next time, may all your days be filled with fairy dust!

Thursday, July 17, 2014

DIY Disney Daily Agenda for Your Room

I found some adorable Disney-themed magnetic picture frames at the dollar store and an idea dawned on me for how to use them. As the planner-in-cheif, I am constantly being asked by the kids what we are doing each day - what's the agenda. With two of these little frames I can keep the kids informed about our daily plan and stop them from asking me every 10 minutes what we are doing! Must be the former teacher in me, but anything to make them just a little more independent is a good thing for me.

I made sure to get two frames. In our case this is one for today, one for tomorrow. If you like to park hop, you could always use one frame for the morning agenda and one for the afternoon. For each frame, I created a 4x6 daily agenda (with picture for the little ones) to let them know the plan for the day. I simply printed them out on card stock and put them in the frames. Easy and effective!

As I mentioned, these frames are magnetic, so you could put them on your refrigerator in the villas. But they also have a traditional easel back, so you could prop them up anywhere in your room. This is how it looks on my lockers in the studio. We're big Phineas and Ferb fans in the cottage!

If you'd like to download these agendas to print out, they are available right here. I created two for each park, the "start in" and the "go to" versions, for those of you who park hop, you can print out the "start in" for your morning park and then the "go to" for your second park. And those of you who stay all day in one park, simply use the "go to" version in your frame.

I hope you enjoy these simple and easy daily agendas. Until next time, may all your days be filled with fairy dust!


Tuesday, July 15, 2014

Disney Roadtrip 101| Organizing your DVD/Blu-Ray Collection

We have a rather large Disney movie collection here at the cottage. In fact, we have been replacing our outdated DVDs with Blu-Rays. The thing is, the Blu-Rays are great at home, but in the van, we need the DVDs. And most of the Disney Blu-Rays come with a DVD. It gets to be a hassle when the kids want to watch Frozen, but the case with the Blu-Ray is in the van, or vice-versa.

To solve this problem, I decided to put all the DVDs in old CD jewel cases and keep them all in the van. This way, the movies are available in the house and on the road as well. Less arguing and disappointment all around. And that is something we can ALL get behind! And as it turns out, they take up less space in the van this way too. Win!

Our littles aren't readers just yet, so we rely on the picture on the cover to remind them what each movie is about. So, for each movie, I did a google image search for the movie poster. I then printed it on card stock and cut it down to 4.75"x4.75" to fit the jewel case cover. This way we can still show them the picture. I also took apart the back of the jewel case, turned the paper inside out and wrote the title of the movie on the spine. This way it will be easy for me as I am driving (or co-piloting) to get the movie they want. It's not exactly what you'd get in the store, but it's functional, and that's what matters to me.


I hope this trick helps make your Disney road trips a little easier. Until next time, may all your days be filled with fairy dust!

Saturday, July 12, 2014

DIY Disney Inspired Hand-Knit Lumiére Socks

I will confess, I use a lot of road tripping time for knitting. The littles are strapped into seats and cannot abuse my knitting basket and what else is there to do on such a long ride? And socks are the perfect summer knitting project: light weight and small (meaning easy to travel with).

I finished these Lumiére inspired socks on our latest trip to northern Michigan. They were a very quick knit - I finished them up in just two weeks! That's fast for me! And the pattern, Candlepower, was charted and very easy to follow along. If you can knit and purl, you can do this. There is no cabling involved. The flame pattern definitely put me in mind of Lumiére and I intentionally knit these up in a color that reminded me of him and of Belle.

I like that these could be knit for a man as well. The pattern is not at all lacy or feminine, but still very interesting. If you want the details, you can check them out on my Ravelry page. You can find the pattern, yarn and a link to other knitters' projects.

Until next time, may all your days be filled with fairy dust!

Thursday, July 10, 2014

DIY Disney Scrapbook Inspiration | Project Mouse & Walt Disney World, Installment 2

Some of my favorite memories have been made in Walt Disney World. This vacation was no exception. And so while everyone is busy with summer plans and vacations I thought this would be a great time to showcase a few more Project Life style pages that I completed from our 2012 trip.

During this particular trip we had the pleasure of dining with an Imagineer! If you've never done this and you are a Disney Geek, I HIGHLY recommend it! We loved the experience! And there was a lot of swag that came with that experience. I scanned as much of it as possible for my pages. You can see a bit of that here.

 Kit information and links are at the bottom of this post. Enjoy!


I keep saying how much I love using the Project Mouse kits by Sahlin Studios and Britt-ish Designs, but it's the best product out there for my money. For these pages I used Project Mouse Bundles 1, 2, & 4, plus the Days & Washi Tape Bundle, the Halloween Bundle, and the Fantasy Bundle. I also used the Stuffed with Fluff kit from Britt-ish Designs, and the Now Showing Mini Kit from Tickled Pink Studios. Until next time, may all your days be filled with fairy dust!

Tuesday, July 8, 2014

Sitting with Grandmother Willow | Samantha from Walter and Rosie

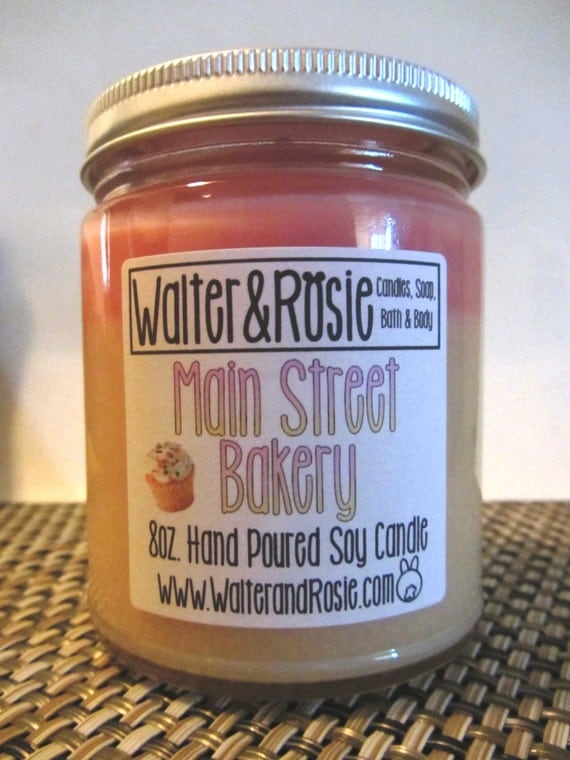
As part of our on-going series, Sitting with Grandmother Willow, I am happy to introduce Sam of Walter and Rosie, a unique Etsy shop bringing the scent of Disney into your home. I can personally vouch for the Soarin' and Yacht & Beach Club candles. You'll love experiencing these aromas in your home. I know our cottage is in love with them!

This series of blog posts highlights artists and bloggers of all stripes with one thing in common: a passion for Disney! I hope you will enjoy getting to know Sam as much as I have. Her one-of-a-kind take on bringing a little Disney magic into your home is brilliant! A big thanks to her for taking the time to interview with us! She's got a fantastic blog. And be sure to visit her shop for a great selection of Disney inspired candles and scents for your home!


Disney By The Numbers (apologies to Harper's)


# of trips you have made: 5 total, 3 as an adult (moving there is a month!)
Date of first trip: 1991 I believe
Date of next trip: Moving to Orlando March 23rd!
# of Resorts stayed in: only 2 :(
Usual # in your travel party: Currently 2
Pairs of mouse ears in your cottage: 2

WDW or Disneyland (or other)? WDW
How do you usually travel to Disney? Plane and soon to be a 5 minute drive!
Do you have any tips for trips? Too many! Travel during non peak seasons, eat as much Disney food as you can, get a dole whip float, watch parades and fireworks, Mickey premium ice cream bars are scary good and slow down!
Do you have a favorite place to eat while in Disney? Not really, I have tons of favorite food items!
What is your absolute DON'T MISS attraction? Tower of Terror, Rock n Roller Coaster, Test Track, Space Mountain, Haunted Mansion
Stage shows, yes or no? Yes
Parades, yes or no? YES!!
Best Fast Pass to get: Soarin, Toy Story, Rock N Roller Coaster
Favorite park: Probably Magic Kingdom
One piece of advice you'd give a novice about WDW: Slow down and take in the details, every inch of the parks have meaning
How do you create extra magic for your family? By making Disney inspired candles of course
How can we connect with you? 

Saturday, July 5, 2014

Disney's Onion Tart from Citricos

I have long been a fan of the onion tart, ever since I went to Paris for the first time and tasted it. Americans tend not to use onions as a main ingredient. We are missing the boat, friends.

When I saw this recipe in our Delicious Disney cookbook, I knew I needed to try it. And all the credit goes to Mr. Photos From the Parks for creating this delicious meal. It was incredible! I don't love blue cheese, but this was just enough for me.

I did find that this is an exceptionally rich dish. We agreed that it would be an excellent first course. Mr. Photos served it will a sautéed roasted corn and asparagus that was a superb compliment. This will definitely show up on a dinner party menu in the future!

There is a walnut dressing that we opted out of as we are a nut-free household. I am sure it would be just as delicious as the tart itself. Enjoy making this bit of Disney magic at home. Until next time, may all your days be filled with fairy dust!


The Recipe:


Serves 4

2 tablespoons olive oil
1 large onion, halved and thinly sliced
1 bay leaf
2 eggs
2 tablespoons heavy cream
2 tablespoons milk
1 clove garlic, minced
Coarse salt, white pepper, to taste
1 package refrigerated pie dough
1/2 cup crumbled blue cheese
4 3 1/2- inch tart pans (for individual tarts)

1. Preheat over to 375 degrees F.
2. Heat olive oil in a large skillet over medium heat. Add the onion and bay leaf and sauté until soft and lightly browned, about 10 to 15 minutes. Remove to a plate to cool.
3. In a mixing bowl, beat together eggs, cream, milk, and garlic. Season with salt and white pepper and set aside.
4. On a work surface with a rolling pin, roll out the dough to 1/8-inch thick. Cut into circles about 4 inches in diameter. Place in tart pans so that they fit in the bottom and up the sides. Trim off the portion over the top if necessary.
5. Prick the dough with the tines of a fork and bake for 5 minutes.
6. Remove from oven and place a teaspoon of sautéed onions in each tart, spreading evenly.
7. Spoon 1 1/2 tablespoons of egg mixture on top of onions in each tart, then top each with 2 tablespoons blue cheese.
8. Bake at 400 degrees F for 8 to 10 minutes.
9. Remove from tart pans and place on serving plates with a drizzle of walnut dressing. Serve warm or at room temperature.


Thursday, July 3, 2014

DIY Crocheted Disney Princess Wrap

This curtsy wrap pattern instantly reminded me of princess Belle when I saw it. I was actually researching another inspiration when I stumbled upon this pattern. And I had a wild sort of novelty yarn in my stash that I thought might be just what I was looking for. I have to say, it worked! I snatched up a bunch of this crazy fuzzy yarn from Yarn Bee at Hobby Lobby when it was on super sale. I had a plan, and then I had two babies, and I tossed that plan right out the window! So I'm not sure you can even find this yarn anymore. But I am sure you could crochet this wrap in one or two sittings. I worked it up during what I'm certain was our 479th viewing of Frozen. It required very little concentration.

I read in the pattern notes of several other crocheters on Ravelry that this patten runs big. Although I did work it in a yarn larger than that suggested by the pattern, and I went down a hook size to compensate it was still big on me; and I have very broad shoulders (so much so that I often have trouble finding a tailored shirt that works for me). So choose your gauge accordingly. I might even suggest crocheting in the round so you can try it on before the whole thing is completed and it falls off your shoulders.

I think this wrap it just the sort of thing you might need on a chilly night at the Magic Kingdom. Not too much, but just enough to warm you up. And it could be themed for several of the Disney princesses, depending on the one you like best. In fact, you should check out this beautiful wrap that TicTacTo whipped up. It reminds me of Tangled!

If you crochet this wrap I'd love to see it! Until next time, may all your days be filled with fairy dust!

Tuesday, July 1, 2014

DIY Disney Parks Flair Game | Tinkerbell Treasure

This idea came to me before one of our largest group trips to Walt Disney World. For this trip we were surprising the kids and several families were going to be staying together. I wanted our Tinkerbell Treasures to capture that magical quality for the kids. So I invented this game that we played while in the parks. The beauty of it is that it can be played in any of the parks, and by just about anyone. Our youngest player was 5.

Here's how it works. Each person draws out a button at the beginning of the day. (We usually throw them in Doc's hat and draw.) That player may get a special treat, or a task to perform. Around lunch time, we all put our buttons back in the hat and redraw them for the rest of the day. What do they say?


  • "I Can Fly" - line leader for the group that day
  • "Great Mouse Detective" - spotting Hidden Mickey's in the park
  • "The Collector" - collecting human things: stickers, transportation cards or pressed pennies
  • "Warm Hugs Challenge" - gather as many character hugs as you can
  • "Wild Carpet Ride" - once today you call out an attraction you want and we all go there, no matter what!
  • "Mad as a Hatter" - trade as many pins as you can today
  • "Snack Time" - you get to pick the snack of your choice
  • "Jack Pot" - I found Disney Dollars!
I made sure to pick up some Disney Dollars (remember to get extra if you are going to switch flair buttons midway through your day!) at Guest Relations, and a couple cheap pins at a pin kiosk before introducing the game to our players. It's fairly self explanatory and as long as you have a willing helper for the little ones it can add a whole new dimension to your day in the parks! And all the players will have a fun little souvenir to take home with them.

As a former teacher, I have the luxury of owning a button maker. If you don't happen to have one, you can purchase a set of these buttons in my Etsy shop! Or, if you want to print them out on sticker paper, I have a downloadable template (for free!) to use with Avery round stickers #5294

I hope you have fun with this idea. Until next time, may all your days be filled with fairy dust!