Thursday's post has inspired me to create another cute DIY felt luggage tag for our family's upcoming Fall Break Trip!
I give you Donald Duck. I was a little worried about sewing around a shape with a lot more definition than the simple three circles of the Mickey head in the last post. But it was not as difficult as I first thought. As long as I went slow it was fine! Here's the trick, I like to make the stitches in the zig-zag closer together. So if your machine can shorten the distance between stitches, I would recommend it. It looks a bit more uniform in the end. I also love how the yellow felt pops on the blue background. You will DEFINITELY be able to spot your luggage on that carousel!
If you want the full description on the how-to, check out my original post DIY Disney Felt Luggage Tags. Until next time, may all your days be filled with fairy dust!
Showing posts with label Donald Duck. Show all posts
Saturday, September 10, 2016
Saturday, August 1, 2015
Disney DIY Paper Airplanes
Our littles recently went to the local library and stumbled upon a paper airplane demonstration. You would have thought it was the second coming! They loved it and showed everyone the airplanes they made. And ever since there has been some paper airplane madness here in the Cottage!
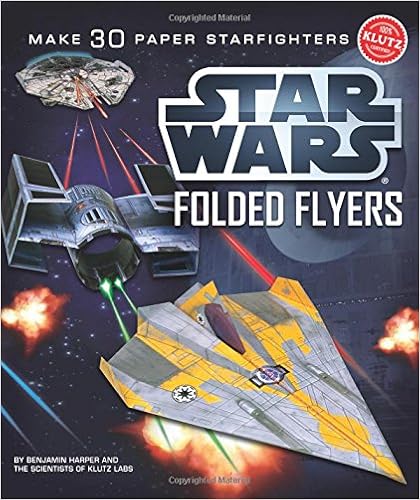
In fact, even the high-schooler got in on the action, remembering he had this Star Wars book of paper airplanes hanging out in his room. That was even more amazing to the little ones. Even to this mama, this book rocks. If you have a Star Wars kid (or adult!) in your house, you should seriously consider this for them! I would definitely recommend it for those with a good attention span and a command of scissors. The designs are complicated and one even frustrated the teenager to the point of balling it up and tossing it out!
I remembered having pinned some Mickey airplanes on Pinterest and decided to look them up. Sure enough, there they were! And now I am sharing them with you. You can find the cut-outs to download on the Disney Family website. They are simple to make and loads of fun!
In fact, even the high-schooler got in on the action, remembering he had this Star Wars book of paper airplanes hanging out in his room. That was even more amazing to the little ones. Even to this mama, this book rocks. If you have a Star Wars kid (or adult!) in your house, you should seriously consider this for them! I would definitely recommend it for those with a good attention span and a command of scissors. The designs are complicated and one even frustrated the teenager to the point of balling it up and tossing it out!
These were a great boredom buster for our family, and as summer drones on for some of you out there, maybe this will be a good diversion. Until next time, may all your days be filled with fairy dust!
Saturday, June 20, 2015
DIY Disney Upcycled T-shirt Dress
This dress came about on a whim. Millie loves her dress that this was copied from, and it too is made from jersey knit fabric. Her favorite dress is from Christmas and has long sleeves and matching leggings. It's beyond cute, but we needed an alternative for our sweltering summers here in the midwest. Especially since she was insisting on continuing to wear said Christmas dress!
So I traced the pieces of her favorite Christmas dress, adding a half-inch seam allowance to the pieces and made this little sleeveless number from two old t-shirts that were begging for new life!
The Donald Duck t-shirt wasn't quite wide enough for this pattern, so I had to use an additional T. This one was actually from my alma mater, but it didn't really matter since you couldn't see the design. I used the overlock stitch on my machine to create the rough edges of the ruffle you see here. I completely made this up and won't even attempt to explain how it was done. I'm not even sure myself! But I love that we gave new life to a grumpy old Donald shirt and a this girl seems pretty happy with it.
Until next time, may all your days be filled with fairy dust!
So I traced the pieces of her favorite Christmas dress, adding a half-inch seam allowance to the pieces and made this little sleeveless number from two old t-shirts that were begging for new life!
The Donald Duck t-shirt wasn't quite wide enough for this pattern, so I had to use an additional T. This one was actually from my alma mater, but it didn't really matter since you couldn't see the design. I used the overlock stitch on my machine to create the rough edges of the ruffle you see here. I completely made this up and won't even attempt to explain how it was done. I'm not even sure myself! But I love that we gave new life to a grumpy old Donald shirt and a this girl seems pretty happy with it.
Until next time, may all your days be filled with fairy dust!
Thursday, December 19, 2013
DIY Disney 12 Days of Christmas Ornaments | From Toys to Ornaments
You've probably seen this idea on Pinterest, at least some version of it. It's so simple, yet I love the idea, especially if you do a kid tree. Especially if you've collected a bunch of random Disney toys. Especially if you live in a household where it's so hard to throw anything away!
I thought I would paint all the toys, but as I was looking at Rexie from Toy Story, I realized he's much more recognizable without the paint. So I left him alone. Donald was already discolored and having a little trouble, so he was the perfect candidate to be gilded! I am certain that spray paint would have been a much easier choice, but I didn't have any gold spray paint on hand and didn't want to buy an entire can of it just for this little toy. I'm all about trying to use what I already have. So I decided to give brush painting a try. And I'm quite pleased with the result! He looks much better than he did, and as I've said before, I love a sparkly Christmas tree!This was extremely easy to do. I used 3/16" Screw Eye Rings to attach the hanger. I would recommend finding a smaller size if possible; these are just a little too big for my taste. Perhaps these 12mm ones would be better, although I haven't used them. You can tie thread to the eyes, or use traditional ornament hooks to hang them from the tree (or anywhere else you may have in mind!). I think these would be darling attached to a gift for a child, as well.
And that brings our 12 Days of DIY Disney Ornaments to a close! I've had so much fun putting this together this holiday season. I hope to bring you another 12 Days of Disney Christmas next year. Until next time, may all your holidays be filled with fairy dust!
Thursday, July 4, 2013
Subscribe to:
Posts (Atom)