Showing posts with label kitchen. Show all posts

Friday, February 24, 2017

Celebrate Flag Day with Margaritas!

Hello readers! Did you know it's flag day in Mexico today? I think a little margarita celebration is in order, don't you? Let's take a look back at one of my favorite Cinco de Mayo posts ever!


In honor of Cinco de Mayo, we decided to do our own Disney Margarita Tour. If you are a margarita fan, you will no doubt know that La Cava del Tequila is THE place to go for some of the best and most inventive margaritas on property. But it's not the ONLY place. We chose to recreate some new and some vintage recipes to celebrate Cinco de Mayo with some of the the old crew. What a blast!

And special thanks to the hubs for the incredible food!

Here are the recipes we tried. We salted all of our glasses with pink Himalayan salt. Enjoy them! And until next time, may all your days be filled with fairy dust!

Sun-Kissed Margarita
From Mickey's Gourmet Cookbook
(Outer Rim, Contemporary - which is no longer there)

Lemon Rind
Kosher salt
1.5 oz 80 percent oak-aged tequila
3/4 oz brandy-based orange liqueur
3/4 orange liqueur
4 oz sour mix
crushed ice
lime wheel
1 oz orange juice

Rub the rim of the cocktail glass with lemon rind & dip into kosher salt. Combine tequila, liqueurs & sour mix in a shaker filled with ice. Shake well and strain into salt-rimmed cocktail glass. Top with orange juice. Garnish with lime wheel.

Seven Seas Sunset -- same as above, but substitute cranberry juice for the orange juice.


Avocado Margarita 

La cava del Tequila - Epcot's Mexico Pavillion
(recipe from Disney Food Blog)

1/2 ripe Haas avocado
2 oz white 100% agave Tequila
1 oz Midori melon liquor
juice of one lime
1 oz. Agave syrup
Ice

Blend all ingredients in a blender until very smooth and creamy. Serve in salt rimmed glass. (use Hibiscus salt if you can. Look for it at the market next time you're in the Mexico pavilion in Epcot!)

Habanero Lime Margarita
available at any resort lounge
(Recipe from Party Through The Parks)

1 part Patron Silver tequila
3 parts Mr. & Mrs. T's sweet & sour
pour ingrédients over ice and add a good drizzle of Monin habanero lime syrup and the juice from half a lime


Agave Nectar Margarita
available at any resort lounge
(from Party Through The Parks)

1 part Tierras Organic Blanco tequila
3 parts simple syrup made with agave nectar (50% agave/50% water)
Pour ingrédients over ice and add the juice from 1/2 a lime


Jalapeño Margarita Recipe
(Cava del Tequila - Mexico pavilion, Epcot)

1/4 fresh cucumber (peeled and seeded and then cut into 1.5" pieces)
2" piece green bell pepper (seeded)
1/2 of 1 small jalapeño (seeded and cut into 1.5" pieces)
1 shot Silver tequila
Fresh lime juice
Triple Sec - orange flavor
Simple Syrup / agave nectar

Method: place fruit in the bottom of your glass and muddle to release some of the juices. Don't go crazy here, muddling shouldn't create a mush of fruit, just sufficiently bruise them. Top off the glass with ice and add 2 parts tequila, 1 part triple sec, 2 parts lime juice, 1 part simple syrup made with agave nectar. Shake and serve in a Himalayan salt rimmed glass.


Tuesday, July 19, 2016

DIY Disney Dinner | Catfish and Grits from the Coral Reef

I think one of the best kept secrets for Disney Dining is the Coral Reef at Epcot's Living Seas. If you have never taken the opportunity to dine there and you even remotely like seafood, you are missing out! Book an ADR for your next trip. You'll be glad you did. Not only is the menu outstanding, the atmosphere is complete unique from any other restaurant on property. Where else can you dine inside a living coral reef? And they even give you souvenir guides so you know what fishes you are looking at. (Don't forget to spot that hidden Mickey on the ocean floor!)

This recipe is from Magical Recipes, a truly great resource for Disney recipes from around the "World." If you are looking for something specific, I would search there first. Although I'd stay away from the Crystal Palace Lemon Bars. Just saying.

Mr. Photos from the Parks is an amazing chef and his spin on this recipe was simply delicious. Although I'm not sure I would recommend this wine for this meal, as we both felt it was more like a Pinot Grigio than a Chardonnay; we would go with Francis Coppola's Diamond Collection Chardonnay instead. It's one of my standbys. (And if you even get the chance to visit that winery I HIGHLY recommend it!)

Until next time, may all your days be filled with fairy dust!

Thursday, July 7, 2016

Walt Disney's Favorite Chocolate Soda Recipe

I'm a fan of Ghirardelli chocolate. A HUGE fan. And I don't feel my trip to Walt Disney World is complete without stopping at the Ghirardelli store in Downtown Disney. (Incase you are unaware, they give out free samples! Worth the trip to Downtown Disney just for that, if you ask me.) I especially love their chocolate soda. It's not on the menu; you have to ask for it. Without a doubt, it's my favorite thing there. Except for the Pumpkin Spice Chocolate Squares; those are to die for. So I felt a kindred bond when I found out that Walt himself was a fan of the chocolate soda. So much so, that the Plaza Restaurant recreated his favorite Chocolate Soda.

Here's the recipe, perfect for bringing a little magic home:


Ingredients:

  • 1/3 Cup chocolate syrup
  • 2 scoops vanilla ice cream
  • 6 oz. soda or seltzer water
  • Maraschino cherry

Directions:

  • Pour chocolate syrup in the bottom of an 8-ounce milk shake glass.
  • Smoosh in 1 scoop of ice cream.
  • Slowly pour in soda water almost to top of glass.
  • Perch another scoop of ice cream on top.
  • Add a cherry and a colorful straw or two.

Now we don't do Maraschino cherries here (Doc has a sensitivity to artificial dyes), but we are happy to report that the cottage approves even without the cherry on top. Personally, I can't get enough! We used our Soda Stream to make as much soda water as we needed. (A seriously great product!) And, while we didn't have any Ghirardelli syrup in the cottage at the moment, we highly recommend Trader Joe's Midnight Moo. It's delicious!

Until next time, may all your days be filled with fairy dust!

Thursday, June 9, 2016

DIY Mickey's Kitchen Pot Holders

Some of us are a little more "out" with our Disney obsession than others. We have great friends with a Mickey themed kitchen. There are all sorts of gadgets and cookware that can give your kitchen a Disney feel. In fact, Disney has an entire store in Downtown Disney devoted to such things. And for those of us who can't get to said brick and mortar store, Disney has conveniently provided a virtual store for our every shopping need. Check it out here.

Today we feature a project that would be perfect for the Mickey's Kitchen devotees: pot holders. I love the size of these. They are perfect for holding a hot mug of soup or a bowl that's been zapped in the microwave. It's also the ideally sized for the tea kettle handle. And it's easy enough that older kids can help with this project.

You could customize this project for any Disney character's color scheme (red, white, blue & yellow for Donald; green, blue, orange & black for Goofy; etc.) - but since most of the Disney kitchen accessories are in a Mickey color scheme, we chose to stick with red, black, yellow & white.

If you don't already have a potholder loom, they are fairly inexpensive and easy to come by. I found mine at the local JoAnn's, but they are available online as well. Check out Amazon for a wide selection, or just google potholder loom & use the shopping link. I have had good luck finding the loops in the kid's crafting area of any major craft or education store. But if you are finding it difficult to locate some (or get out of the house!), you can purchase them here.

Experiment with color and pattern. Doc helped me weave these two patterns and we loved the way they turned out. After completing these two, we had a few helpful hints to pass along:

1. The last couple rows of weaving are tricky, as the loops will want to pop off the loom. Go slowly.
2. To finish edges we used an H crochet hook started in the top right hand corner. Pull first loop off and leave on your hook; pull the second loop off and single crochet. Continue around the entire loom, pulling the last loop all the way through so it sticks out.
3. The last edge of the potholder wanted to pull off the loom; try to prevent that by using your left hand to hold it down while you finish the edge (assuming you are right handed).

And that's it! We were able to make 2 of these in an hour. If it's your first attempt at using the loom, give yourself a bit more time. And most importantly have fun! Until next time, may all your days be filled with fairy dust!

Saturday, May 14, 2016

DIY Mickey Oreo Pops


These are a labor of love, and definitely not a nap-time friendly project. But if you are a fan of Oreo cookies, or know someone who is, then it's totally worth it. These pops tend to be a bit fragile, so traveling with them can be tricky. They may be best left to party favors and at home magic. Still, the impact is great, so I still say give them a try.

I was inspired to try this when I ran across this pin on Pinterest. I tried a couple of different ways of doing this. The first and foremost recommendation is that if you are putting them on sticks, definitely get the double stuffed Oreos. They are easy to get the stick into and unlikely to break. (Wilton brand sticks can be found at your local craft store, or here.)

Getting the mini Oreos to stick onto the big ones was a bit of a challenge. I melted Wilton's light cocoa candies and used that as the glue. In retrospect, I would use the dark cocoa next time as it matches the Oreo color better. I found that melting the chocolate so that it wasn't runny was the best bet, as it provided a nice paste-like texture: enough to stick the cookies together, but not so thin it was running all over the mat and not staying on the pops. I also found the ideal tool for applying the chocolate was a small spreader.

Although these look fun and taste great, I was not pleased with the fragility factor, as I wanted to take these with us to Disney. Even surviving airport security, let alone the flight, seemed a bit perilous. I tried covering them in chocolate, but the Wilton's didn't spread evenly and they looked lumpy. (Although Doc said they tasted great!) I also tried using magic shell, but that didn't set up properly. I might try melting chocolate chips next time.

If you give this idea a try, I'd love to hear how it worked for you! And if you have any tips on how to make these a bit more resilient, please, please, share. Until next time, may all your days be filled with fairy dust!

Thursday, May 5, 2016

DIY Disney Margarita Tour for Cinco de Mayo!

In honor of Cinco de Mayo, we decided to do our own Disney Margarita Tour. If you are a margarita fan, you will no doubt know that La Cava del Tequila is THE place to go for some of the best and most inventive margaritas on property. But it's not the ONLY place. We chose to recreate some new and some vintage recipes to celebrate Cinco de Mayo with some of the the old crew. What a blast!

And special thanks to Mr. Photos From The Parks for the incredible food!

Here are the recipes we tried. We salted all of our glasses with pink Himalayan salt. Enjoy them! And until next time, may all your days be filled with fairy dust!

Sun-Kissed Margarita
From Mickey's Gourmet Cookbook
(Outer Rim, Contemporary - which is no longer there)

Lemon Rind
Kosher salt
1.5 oz 80 percent oak-aged tequila
3/4 oz brandy-based orange liqueur
3/4 orange liqueur
4 oz sour mix
crushed ice
lime wheel
1 oz orange juice

Rub the rim of the cocktail glass with lemon rind & dip into kosher salt. Combine tequila, liqueurs & sour mix in a shaker filled with ice. Shake well and strain into salt-rimmed cocktail glass. Top with orange juice. Garnish with lime wheel.

Seven Seas Sunset -- same as above, but substitute cranberry juice for the orange juice.


Avocado Margarita 

La cava del Tequila - Epcot's Mexico Pavillion
(recipe from Disney Food Blog)

1/2 ripe Haas avocado
2 oz white 100% agave Tequila
1 oz Midori melon liquor
juice of one lime
1 oz. Agave syrup
Ice

Blend all ingredients in a blender until very smooth and creamy. Serve in salt rimmed glass. (use Hibiscus salt if you can. Look for it at the market next time you're in the Mexico pavilion in Epcot!)

Habanero Lime Margarita
available at any resort lounge
(Recipe from Party Through The Parks)

1 part Patron Silver tequila
3 parts Mr. & Mrs. T's sweet & sour
pour ingrédients over ice and add a good drizzle of Monin habanero lime syrup and the juice from half a lime


Agave Nectar Margarita
available at any resort lounge
(from Party Through The Parks)

1 part Tierras Organic Blanco tequila
3 parts simple syrup made with agave nectar (50% agave/50% water)
Pour ingrédients over ice and add the juice from 1/2 a lime


Jalapeño Margarita Recipe
(Cava del Tequila - Mexico pavilion, Epcot)

1/4 fresh cucumber (peeled and seeded and then cut into 1.5" pieces)
2" piece green bell pepper (seeded)
1/2 of 1 small jalapeño (seeded and cut into 1.5" pieces)
1 shot Silver tequila
Fresh lime juice
Triple Sec - orange flavor
Simple Syrup / agave nectar

Method: place fruit in the bottom of your glass and muddle to release some of the juices. Don't go crazy here, muddling shouldn't create a mush of fruit, just sufficiently bruise them. Top off the glass with ice and add 2 parts tequila, 1 part triple sec, 2 parts lime juice, 1 part simple syrup made with agave nectar. Shake and serve in a Himalayan salt rimmed glass.

Saturday, April 23, 2016

Disneyland Snickerdoodle Knockoff Recipe

Sometimes it seems like a really long time between visits; that's when a little kitchen magic can really come in handy. I found this Disneyland Main Street Bakery Snickerdoodle knock-off recipe on Pinterest and decided a rainy afternoon was the perfect time for a little Disney pick-me-up. The family was happy to oblige!

It was simple to make them into Mickey heads. Instead of rolling only one ball, I rolled one larger and two smaller balls and laid them out on the cookie sheet as such. I tried not to smash the ears on too much, as they do spread in the oven.

They took a little longer to assemble than regular snickerdoodles would, so I was able to assemble one pan while the other was baking. It was just about the perfect amount of time. Be sure to let the cookies cool just a bit on the pan before moving them to the cooling racks - we lost a couple ears by being impatient! (Although, it was a good excuse for an early taste!) My apprentice chef became quite good at rolling and pressing out the Mickeys.
One small deviation from the recipe - I like a lot of cinnamon sugar on my snickerdoodles, so we employed the Joy of Cooking technique of rolling each ball of cookie dough in a bowl of cinnamon sugar, instead of sprinkling the tops as the original recipe suggests. A personal preference, but worth it, in my humble opinion.

And because someone will ask, the WDW serving tray was one of my parents' first souvenirs. It lived in our motor home until it died and now it comes out whenever we need a little shot of Disney magic! Until next time, may all your days be filled with fairy dust!

Saturday, March 12, 2016

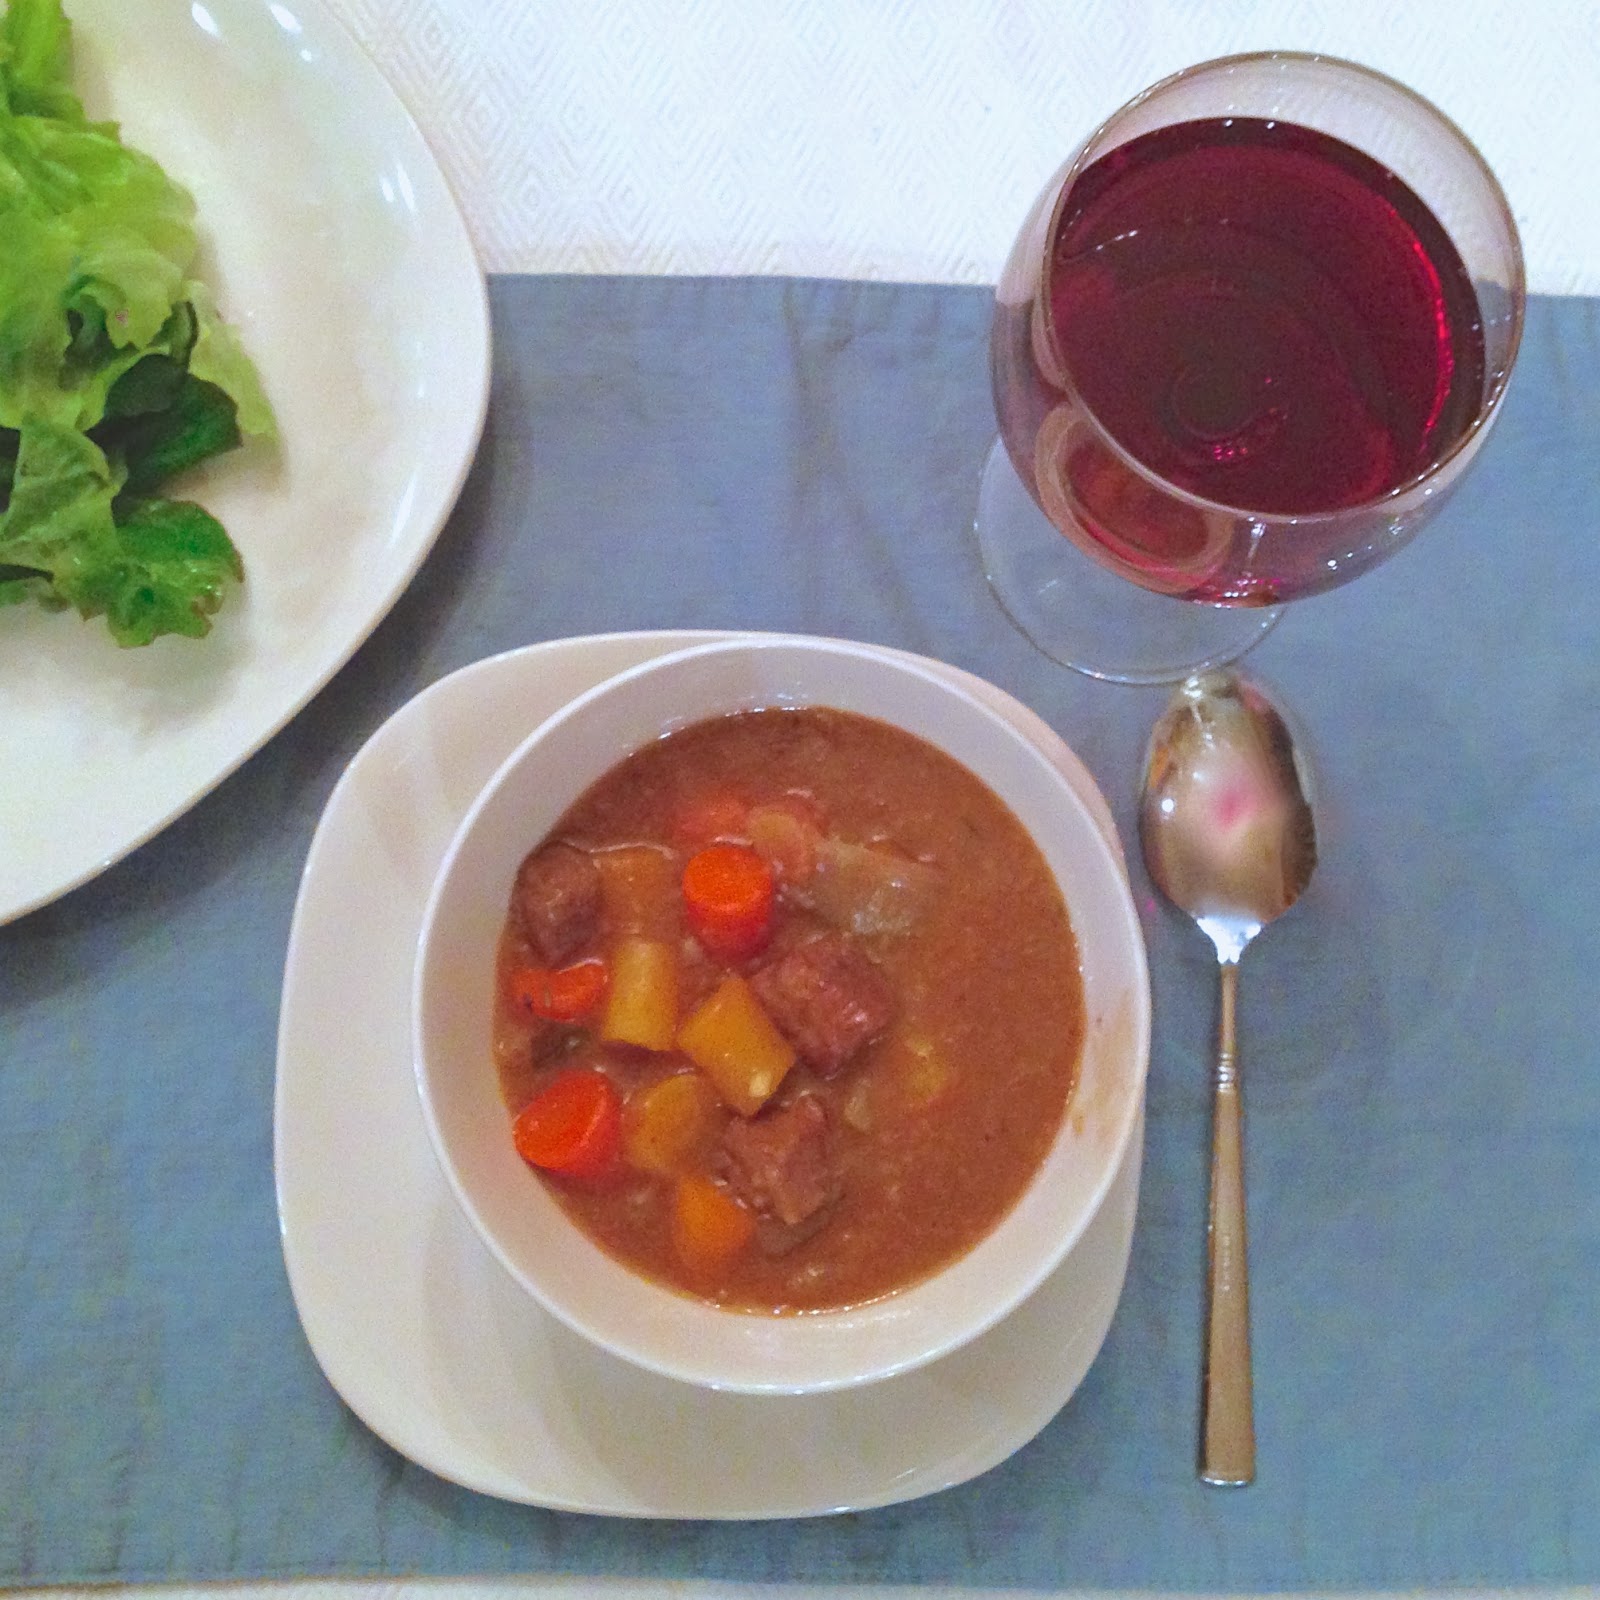
Celebrate St. Patrick's Day with Guinness Stew from Disney's Rose & Crown

It's time to start thinking about your St. Patrick's Day plans, and this Guinness Stew recipe from Disney's Rose & Crown is the perfect addition to a St. Patrick's Day menu. It was simple to make and LOVELY on the cold winter's night we enjoyed it. It's hardy and filling and just the thing for your Irish soul. (We may have added a little more Guinness than the recipe calls for - it didn't hurt a thing!)

We paired our stew with a Liberté Cabernet Sauvignon which was delicious! We can usually find that at our local Trader Joe's. It's one of our go to bottles. Of course, you certainly could serve it with Guinness! We rounded out the meal with a loaf of crusty rosemary bread and some in season greens.

I found this delightful recipe at The Disney Diner, where there is a HOST of other recipes as well. If you had it in Disney and you want to try it at home, chances are Lisa has the recipe. Lisa also has her own YouTube channel too, so if you are like me and need to see it happen, this is a great resource for all you're Disney recipe needs! Let us know if you have a favorite of hers. We'd be delighted to try it out! Until next time, may all your days be filled with fairy dust!

Thursday, June 25, 2015

Eggs Kamehameha from Disney's Papeete Bay Verandah | Forgotten Disney

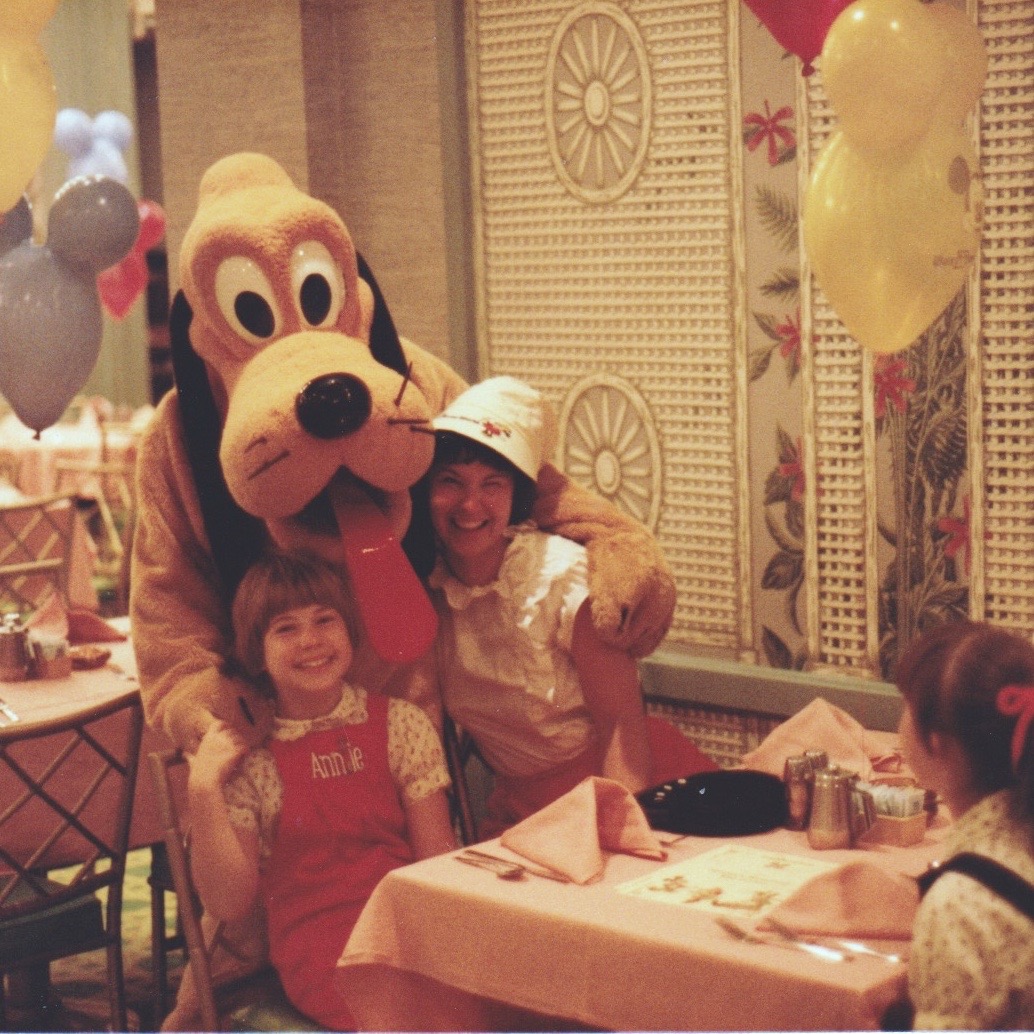
At that time there were no autograph books or handlers rushing the characters from table to table. In fact, it looks like we were one of two families in the restaurant in these photos! It was fun and we used to get Mickey balloons and a small token to remember the day by. I think leis were also given from time to time.

The 80s, perhaps, were not know for their amazing culinary moments. Even in Disney. I have mentioned before, one of my favorite Disney cookbooks for it's vintage recipes, Mickey's Gourmet Cookbook. Mostly, I love it for the cocktail recipes! But the Eggs Kamehameha reminded me of Minnie's Menehune and I just had to give it a try. The recipe is pretty simple, but I was suspicious of it's wine sauce. I was right to be. Suffice it to say, this recipe has potential, but needs some reworking in my opinion. I hope to work that out soon and post an update.

Here is the recipe for Eggs Kamehameah. It's good, and it's fast; two things that matter to this busy mom:

4 eggs
4 slices of bread, fried in butter
1/2 C Gruyére cheese, shredded
1/4 C dry white wine
salt
cayenne pepper

Preheat oven to 400 degrees

Arrange fried bread in oven-proof serving dish. Melt cheese in a saucepan with wine. Season with salt and cayenne pepper. Pour wine and cheese over fried bread.

Melt butter in frying pan and fry eggs. Place 1 egg on each slice of bread. Put dish in oven or under broiler for 2 minutes to glaze tops of eggs.

Serve at once; yields 2 servings.

I tweaked it by not using the oven. The sauce, did not come together as a sauce for me (as I suspected it wouldn't), but I put the cheesy wine on the toasted bread and  then put the cheese lump under the egg so it still looked good. And I used paprika instead of cayenne, as I prefer the flavor. Not a bad dish, just not as good as it could be. Definitely worth the stroll down memory lane!

Until next time, may all your days be filled with fairy dust!


Tuesday, December 23, 2014

12 Days of DIY Disney Holiday Goodies | Grapefruit Cake from the Brown Derby

This is my go-to cake recipe. I know, the grapefruit sounds really weird. I hear that you either love it, or you hate it. I happen to love it. And at every event I've taken it to or served it for, it has been a roaring success. I first ran across it in a copy of Flour, Butter, Sugar, Eggs (which appears to be out of print, but still available through Amazon). I didn't even realize you could get it at Disney until a few years ago. This is a photograph of the slice I had during our lunch with an Imagineer in October 2012. THAT was as amazing as this cake. (If you've never done this and your family is full of Disney geeks, this is SO the event for you. We were with 10 others who were just as geeked out as we were. Squee!)

The Grapefruit Cake very dense and the frosting is of the cream cheese variety. I also tend to like my sweets a little less sweet and a little more savory or tangy. So there you have it. If you like a dense cake with cream cheese frosting, give this recipe a try. It could really surprise you. I think it's the perfect thing for finishing off your Christmas Dinner. Oh, and I make two cakes so my layers aren't super thin. Here's the recipe:

Disney's Hollywood Studios Grapefruit Cake:

Ingredients:
1-1/2 C sifted cake flour
3/4 C sugar
1-1/2 t baking powder
1/2 t salt
1/4 C water
1/4 C vegetable oil
3 eggs separated
3 T grapefruit juice
1/2 t grapefruit zest
1/4 t cream of tartar

Prepare:
Sift together flour, sugar, baking powder, and salt into mixing bowl. Make a well in center of dry ingredients. Add water, oil, egg yolks, grapefruit juice, and lemon rind. Beat until smooth. Beat egg whites and cream of tartar separately, until whites are stiff but not dry. Gradually pour egg yolk mixture over whites, folding gently with a rubber spatula until just blended. Do no stir the mixture. Pour into an ungreased pan. Bake at 350 for 25-30 min., or until cake springs back when lightly touched with a finger. Invert pan on cake rack until cool. Run spatula around edge of cake. Carefully remove from pan.

Yield 4-6 portions

Cream Cheese Frosting:

Ingredients:
2 6-oz packages of cream cheese
2 t lemon juice
1 t lemon zest
3/4 C powdered sugar
1 16 oz can grapefruit sections (or one grapefruit, sectioned)

Prepare:
Let cream cheese soften at room temperature. Beat cheese until fluffy. Add lemon juice and zest. Gradually blend in sugar. Beat until well blended. Crush several grapefruit sections to measure 2 T. Blend into frosting (this makes it so pretty!). Spread frosting on bottom half of cake, cover with second layer of cake. Frost top and sides. Garnish with grapefruit sections.

It's a bit of work, but SO worth it! Until next time, may all your days be filled with fairy dust!

Thursday, December 11, 2014

12 Days of DIY Disney Holiday Goodies | Mickey's Strawberry Santa Hats


I found these delicious looking strawberry santa hats on the Disney Family website. And this is a direct lift from their page. These look great and I fully intended to make them, but Miss Minnie ate all my strawberries before I had the opportunity to give it a try! (She absolutely loves her berries!) I hope I will be able to get to it before the season is over, if not, we may have ourselves a little Christmas in July celebration this summer!

Enjoy this post from Family.Disney.com, and until next time, may all your days be filled with fairy dust!


What You’ll Need
Large fresh strawberries
White chocolate
Vanilla wafer cookies
Small chocolate disks or chocolate mints
How To Make It
  • 1
    Wash the strawberries with cool water, and carefully remove the hulls. Pat the fruit dry with a paper towel.
  • 2
    Melt some white chocolate in the microwave or on the stovetop, following the directions on the package.
  • 3
    Working with one wafer cookie at a time, dip the surface in the melted candy so that it is generously coated. If needed, dip it twice.
  • 4
    Place the dipped cookie on wax paper (coated side up), and immediately set a strawberry (hulled side down) on top. Quickly, but gently, push two small chocolate disks against the base of the berry for ears, holding them in place for a few seconds to make sure they stick. If they don’t hold, use a little more melted candy to attach them.
  • 5
    Repeat steps 3 and 4 to make as many more hats as you want, reserving some of the melted white chocolate for the pom-pom tops. When you’re ready to add the pom-poms, let the melted white chocolate cool slightly so that it will thicken a bit. Then spoon a small blob onto each strawberry tip.
  • 6
    Finally, add a little texture to the hat trim, if you like, by using a fork to gently “scramble” what’s left of the partially cooled white chocolate (it should resemble flaked coconut). Gently press some of the white chocolate flakes onto the candy hat brims while they are still warm so they will stick in place. Once the candy is completely set, arrange the finished hats on a plate to serve.

Tuesday, December 9, 2014

12 Days of DIY Disney Holiday Goodies | Matterhorn Macaroons

I am a fan of macaroons; not the almond kind (which are verboten around here anyway). I love the coconut macaroons, the lesser known and harder to find variety, naturally. The bakery in the France Pavilion used to sell them in Epcot, but not anymore. Since the recent remodel, they are strictly about the nut variety. I miss those coconut peaks!

A caveat: I find macaroons tricky to make. They take patience and this is an area in which I lack. When I saw this recipe for Matterhorn Macaroons (from Rumbly in My Tumbly), I decided I would give them a try. They don't sound difficult, and I am always looking for a new and different cookie recipe for the annual cookie exchange in my sorority. Unfortunately, these were a bust for me. Well, mostly a bust. The resulting cookie tastes delicious! But I could not get them to make peaks. Once in the oven they flattened right out. I didn't bother with the topping since they didn't hold their shapes. And don't forget to store them in an air tight container. If you don't they will get very hard on the outside.

Here's the recipe if you want to give it a try:

Matterhorn Macaroons
A Rumbly in my Tumbly original

Ingredients:
4 egg whites
3/4 teaspoon vanilla extract
3/4 teaspoon almond extract
1/8 teaspoon cream of tartar
1 1/2 cups white sugar
1 cup all purpose flour
1/4 teaspoon salt
2 1/2 cups flaked coconut

Topping:
1 bag of white chocolate chips (or white candy melts)
2 tablespoons milk or cream
confectioners sugar for dusting

Directions:

Preheat the oven to 300°. Line a cookie sheet with parchment paper.

In a medium bowl or mixer, beat egg whites, vanilla, almond extract, and ream of tartar until soft peaks form. Gradually beat in sugar and whip until stiff.

In a separate bowl, combine the flour, salt, and coconut. Fold into the egg whites. Drop by heaping tablespoons onto prepared cookie sheets, shaping each one into a “matterhorn mountain.” This is messy, and I found it worked best if I wetted my hands before shaped each one.

Bake for 20-30 minutes (depending on size) until slightly golden.

Melt the white chocolate with the cream over a double broiler, and dip the top of each cooled macaroon into the melted chocolate. Sprinkle with confectioners sugar.

Saturday, December 6, 2014

12 Days of DIY Disney Holiday Goodies | White Chocolate Raspberry Cookies

These cookies have a reputation in Disneyland. They are said to be swoon worthy, cookies you make time for, cookies that might deserve their own FastPass! Well, they did not disappoint!

These cookies are some of the best we have baked, bar none. I mean it. They live up to all the hype around them and they are really fairly easy to put together. The hardest part is not over mixing the jam! Everyone in the cottage (and that's a fair amount of people right now!) raved about them. And they are vanishing into thin air. Proof positive that this is a keeper.

If you are looking for a new recipe for your traditional cookie exchange, this one will have the other members of your organization begging for the recipe. Thanks to bakerlady for this one.


Disneyland’s White Chocolate Raspberry Cookie
adapted from Rumbly In My Tumbly

2 1/2 C Flour
1/4 tsp baking soda
1/4 tsp baking powder
1/4 tsp cream of tartar
1/2 C butter, room temperature
1/2 C granulated sugar
1/2 C brown sugar
1 egg + 1 egg yolk
1/4 tsp salt
1 tsp vanilla extract
1/4 tsp almond extract
Raspberry Jam (I used about 4 TBSP)
3/4 cup white chocolate chips
3/4 cup semi-sweet chocolate chips

Directions

1. Cream the butter & sugars until light and fluffy. Add egg/yolk, vanilla and almond extracts. Mix well. Add dry ingredients and mix until just combined. Add white & semi-sweet chocolate chips.

2. Scoop out about 1/4 of the dough into a smaller bowl. Add about 1 T of jam and cut it in using a butter knife. Be careful not to MIX it, or your dough will turn pink, you want more of a swirl.
3. Take the jam swirled dough and scoop by spoonfuls (I used a large melon baller/ice cream scoop) onto a cookie sheet lined with parchment paper. Flatten slightly with the back of a spoon or spatula and place in a 350° oven for 12-17 minutes. *Your bake time may be less depending on the size of cookie you make. I wanted mine big and bakery sized, so they took a little longer. Take them out when the edges are set but the center is still puffy and soft. Cool on baking sheet 5 minutes then transfer to a wire rack to cool completely.
4. Repeat steps 2 & 3 until all the dough is used.

Thursday, December 4, 2014

12 Days of DIY Disney Holiday Goodies | Mickey Mouse Snickerdoodles

This was originally posted to the blog in March of 2013. I'm sure some of you are new here. This is a great, easy cookie recipe to add to your cookie exchange list!

Sometimes it seems like a really long time between visits; that's when a little kitchen magic can really come in handy. I found this Disneyland Main Street Bakery Snickerdoodle knock-off recipe on Pinterest and decided a rainy afternoon was the perfect time for a little Disney pick-me-up. The family was happy to oblige!

It was simple to make them into Mickey heads. Instead of rolling only one ball, I rolled one larger and two smaller balls and laid them out on the cookie sheet as such. I tried not to smash the ears on too much, as they do spread in the oven.

They took a little longer to assemble than regular snickerdoodles would, so I was able to assemble one pan while the other was baking. It was just about the perfect amount of time. Be sure to let the cookies cool just a bit on the pan before moving them to the cooling racks - we lost a couple ears by being impatient! (Although, it was a good excuse for an early taste!) My apprentice chef became quite good at rolling and pressing out the Mickeys.

One small deviation from the recipe - I like a lot of cinnamon sugar on my snickerdoodles, so we employed the Joy of Cooking technique of rolling each ball of cookie dough in a bowl of cinnamon sugar, instead of sprinkling the tops as the original recipe suggests. A personal preference, but worth it, in my humble opinion.

And because someone will ask, the WDW serving tray was one of my parents' first souvenirs. It lived in our motor home until it died and now it comes out whenever we need a little shot of Disney magic! Until next time, may all your days be filled with fairy dust!

Tuesday, December 2, 2014

12 Days of DIY Disney Holiday Goodies | Disney's Famous Gingerbread


I know some of you may have seen this post before, but I wanted to share this incredible gingerbread recipe for all you Disney lovers out there. It's perfect for Christmas! This comes from our vintage Disney cookbook, Mickey's Gourmet Cookbook. It's the same thing you'll find at the Monorail Cafe in the Disneyland Hotel (is that place still around? -- I'm no expert on Disneyland!), and the Candy Cauldron in Downtown Disney.

If you've never made gingerbread cookies, I will start by saying, this is a process! The dough can be made ahead and refrigerated for up to a week. And this dough is stiff. It takes some real muscle to roll it out! But the payoff is TOTALLY worth it. Here is the recipe for the cookies and the icing. They are good without the icing; they are incredible with it! And if you don't have a pastry bag and tip for the icing, don't fret. Just put it in a ziplock bag and snip a hole in the corner of the bag as demonstrated here.

Until next time, may all your holidays be filled with fairy dust!

Gingerbread Mickey
yield: approx. 3 dozen cookies

1/4 C unsalted butter
1/2 C brown sugar
1/2 C dark molasses
3 1/2 C all-purpose flour
1 tsp baking soda
1/2 tsp ground cloves
1 tsp ground cinnamon
3 tsp ground ginger
1/2 tsp salt
1/4 tsp ground cardamom
1/2 C water

In a lage mixing bowl, cream butter and brown sugar. Add dark molasses and blend until completely absorbed.
Sift all dry ingredients together and add to butter mixture in thirds, alternating with water. Blend completely. (I added at least 2 tablespoons more of water and I think I could have even added more. the dough did not want to hold together.)
Store dough, wrapped in plastic, in refrigerator until well chilled.
Preheat oven to 350 degrees F.
Grease cookie sheet (or use Silpat mats)
Roll dough on a lightly floured surface and cut into desired shapes.
Bake on cookie sheet for 8-10 minutes, depending on size. Cool on a wire rack.
Cookies can be decorated before baking with nuts and candies, or when cool with royal icing.

Royal Icing

1 pinch (1/8 tsp) cream of tartar
2 egg whites
3 1/2 C powdered sugar, sifted

Add cream of tarter to egg whites. Beat egg whites in a small bowl with electric mixer at high speed until whites hold a soft peak. Reduce speed and gradually add sifted powdered sugar. Continue to whip frosting until a smooth, spreadable consistency is reached.
At this point, frosting can be separated into small bowls and colored with food coloring, as desired. Frosting will become very hard when dry.

Note: before preparation of frosting, make sure all utensils are free of any grease or oil and egg whites are free of any yolk. Egg whites will not whip if mixed with any type of oil or fat.

Saturday, November 29, 2014

12 Days of DIY Disney Holiday Goodies | Snow's Perfect Apple Punch

True confession time: I made this one up. You won't find it on any menu in the parks or the resorts; but when the wind is howling and the fire is crackling lively in the fireplace, (or you just need a warm and lovely pick me up!) this little beauty is exactly what you need to warm your winter's night!

I like a recipe for which you can make just one glass at a time, or an entire batch for a party. I've included both recipes for you here! You could certainly use this recipe without the brandy, but I think it's a marvelous addition!

And of course you can skip the garnish if you wish, but do yourself a favor and don't skip it. A pretty drink always makes me feel a little more special. And who couldn't use that, especially at such a busy time of the year! Cheers to a yummy winter warm up! Until next time, may all your days be filled with fairy dust!

Snow's Perfect Apple Punch

For one glass:
pour 2/3 C cider into mug, heat in microwave until steaming hot
add 1 jigger brandy, stir well
sprinkle with cinnamon and cloves to taste
garnish glass with one apple wheel, a cinnamon stick

For one punch bowl:
pour one gallon cider into pot
add several tablespoons of mulling spices
Bring to a boil, turn heat down and simmer for about 20 minutes
remove from heat and allow to cool slightly
add 3 cups brandy
Pour into punch bowl and float apple slices on top

Wednesday, November 26, 2014

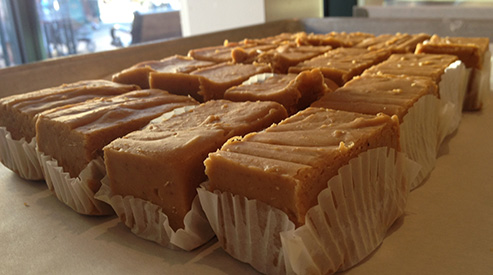
12 Days of DIY Disney Holiday Goodies | Pumpkin Fudge

That's right, it's time to being our Christmas series on the blog again! If you missed it last year, you can use the 12 days label to search 12 handmade Disney ornaments. This year's theme is one everyone loves: food! I will be researching and posting a recipe for 12 different holiday goodies you can find around the Disney parks and resorts, or themed to our favorite Disney characters! It should be fun and a great way to inspire you for your next holiday party or cookie exchange.

Today, since we are still so near to Thanksgiving, (and you may need an extra little something for your dessert table!) we will start off with Pumpkin Fudge! You can find this fudge at Marceline's Bakery in Downtown Disney at the Disneyland Resort in California, and the Main Street Bakery in Walt Disney World once fall rolls around! Thanks to Magical Recipes for the recipe. And until next time, may all your days be filled with fairy dust!


Ingredients

1 1/2 cups granulated sugar
1 1/2 cups packed light brown sugar
1 1/2 sticks unsalted butter, cut into small pieces
2/3 cup evaporated milk
2/3 cup pureed pumpkin
1 tsp cinnamon
1/4 tsp nutmeg
1/8 tsp cloves
2 cups white chocolate chips
1/2 lb marshmallows or marshmallow crème
3 Tbsp maple syrup

Instructions

Line a 12×8 inch baking dish with foil, letting it hang over the edges.
In a large sauce pan, whisk together the sugars, butter, evaporated milk, pumpkin, and spices.
Bring to a boil over medium heat, stirring constantly. 

Continue boiling for 10-12 minutes or until the candy thermometer registers 235 degrees Fahrenheit – soft ball stage (soft ball stage occurs when you drop some of the mixture into a bowl of cold water, and it forms a “soft ball” when it cools and is removed from the water).

Stir in the white chocolate chips first, and then the marshmallows or marshmallow crème and maple syrup. Stir until melted, and then immediately pour into the prepared pan.

Let cool on a wire rack for 2 hours or until completely cooled.
To cut, lift the foil from the ends of the dish.
Cut the fudge into 1 inch squares.
Store in the refrigerator or freezer.

Saturday, October 25, 2014

DIY Cheesy Grits and Bacon from The Wave at The Contemporary Resort

So first you should know that this is an improvised recipe. I didn't think to ask for the card while we were at The Wave, but I happen to live with an amazing cook, Mr. Photos From The Parks. And he already makes a similar recipe for shrimp and grits. So I with his guidance, I made my own version of this recipe and I love it!

*The Wave is one of my favorite places to eat breakfast in Walt Disney World. It's on the first floor of the Contemporary Resort and their breakfast buffet is sophisticated and delicious! If you haven't been, you really need to try it!


Here's what I did to recreate these grits:

1. I used Alton Brown's Cheese Grits recipe as a start.


2. When the recipe calls for cheese, I also added 4 strips of bacon, cooked and finely chopped.

That's it. Simple enough for me to make it and delicious. My friend who doesn't even like grits loves these. You should give it a try! Enjoy them for breakfast or for dinner. And until next time, may all your days be filled with fairy dust!

Tuesday, September 2, 2014

From Mrs. Potts' Cupboard | Jane's Cuppa

We have been on a crazy Tarzan kick around here these days. The two littles are constantly requesting it and the soundtrack seems to always be playing. So with being immersed in all things Tarzan, I decided Jane needed her own tea. Even though she's not technically recognized as one of the Disney Princesses, I think she qualifies as being the queen of the jungle, so to speak.

I know that at first glance this tea seems a little unconventional. In truth, it is; just like Jane! Trust me when I say you need to try it before you decide about the flavor. I was not at all sure this was going to work, but it seemed like the perfect combinations of ingredients for Jane. The Golden Monkey Tea was an obvious choice, and the coconut flavor inspired by the jungle. But there there are the typically British flavor of lavender, as well as the spices that would have been streaming in from all sorts of British colonies at the time. It doesn't seem like it should come together well, but I was very pleasantly surprised by this one! I have to say I like it.

I'd love to know if you give this one a try. And until next time, may all your days be filled with fairy dust!

Tuesday, May 20, 2014

From Mrs. Pott's Cupboard | Snow White's Iced Apple Tea

As it's finally warming up into summer I thought it would be the perfect time to introduce the next Princess Tea! Of course Snow White's tea would need apples, but when I brewed it, I could never find just the right combination for the perfect pot. I like to reuse my tea (you can usually get two-three pots from one of my recipes. But either the second pot was too strong and apply, or the first pot was too weak. If you are a fan of very fruity teas, this second pot is almost cider-like, so it could just be "your cup of tea!" But I am not a fan of super fruity teas in general. So I came to the compromise of using this as a one pot tea, hence the Iced Tea recipe. If you have an iced tea maker like the one here, you can simply use a coffee filter, put all of these in the basket, and brew as usual. If not, then brew a strong pot of this tea as you usually would and pour it into a pitcher full of ice. Remember that the ice will dilute the tea as it melts, so a strong brew is recommended.


When I think of brewing this tea my mind immediately goes to the Evil Queen brewing her transforming potion, to make her into an old hag. So to that end....

Begin with a black tea, as black as snow white's hair,
a teaspoon of skullcap & some peppercorns from the evil queen's lair,
add in some rose rosehips, 
as rosy as Snow White's lips,
a dash of spice & a bit of mint for the dwarves good fortunes,
and some apple slices, but be mindful of their origins.

Well, it's a good effort anyway! Until next time, may all your days be filled with fairy dust!