Showing posts with label graphic art. Show all posts

Tuesday, April 8, 2014

Sitting with Grandmother Willow: Nicole of Designs by Nicolina

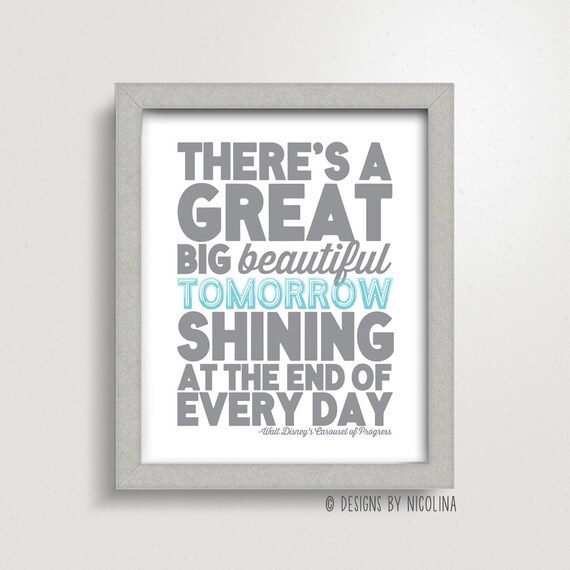
As part of our on-going series, Sitting with Grandmother Willow, I am happy to introduce Nicole of Designs by Nicolina, an Etsy shop and blog. My favorite art print of hers is this fantastic Carousel of Progress subway art! But there is so much more to see.

This series of blog posts highlights artists and bloggers of all stripes with one thing in common: a passion for Disney! I hope you will enjoy getting to know Nicole as much as I have. A big thanks to her for taking the time to interview with us! And be sure to visit her blog and her Etsy shop for a wonderful selection of Disney themed art prints, invitations, and paper goods!


Disney By The Numbers (with apologies to Harper's):


# of trips you have made: too many to count! My great grandparents lived about 20 min away so we would go every year when we went to visit them. Every year until I was about 7, and then we have been going about every other/every 2 years since. Although this past year we went twice!
Date of first trip: 1991
Date of next trip: TBD hoping sometime in 2015 maybe Spring time
# of Resorts stayed in: most recently we stayed at Saratoga Springs, I am sure we stayed at a few others when I was little. But since my parents and inlaws have time share we usually stay at the Bonnet Creek Wyndham or the Marriott by Seaworld
Usual # in your travel party: usually anywhere from 4-7
Pairs of mouse ears in your cottage: only 1! When I was little my parents didn't think I would keep them on, but I did get a pair of sparkly Minnie ears this spring!

WDW or Disneyland (or other)? WDW

How do you usually travel to Disney? usually we drive, although this past time we flew and used magical express, and that was pretty nice too!

Do you have any tips for trips? Always do Animal Kingdom first thing in the morning, then schedule your FastPass for the Safari or get straight in line. The time we got there at rope drop was the best!

Do you have a favorite place to eat while in Disney? We LOVE the quick service place in Mexico, and Pinocchio's has been my favorite since I was little, love the view of It's A Small World. But my husband can't get enough LeFou's Brew so the past few times Gaston's has been at the top of the list!

What is your absolute DON'T MISS attraction? Animal Kingdom - Expedition Everest (even though we got stuck at the top the last time we went), Magic Kingdom - Big Thunder Mountain & Peter Pan, Epcot - Malstrom and Hollywood - Tower of Terror

Stage shows, yes or no? YES!

Parades, yes or no? If I catch myself on one sure, but usually we run and get on a ride while everyone is watching!

Best Fast Pass to get: Peter Pan! That line is forever!

Favorite park: MAGIC KINGDOM

One piece of advice you'd give a novice about WDW/DL: Take break days, if you are going for 7 days take some time to enjoy Downtown Disney and your resort

How do you create extra magic for your family? We watch or listen to Disney movies and songs leading up to the trip and new outfits! Haha

How can we connect with you?
Instagram @nicoliaw
Twitter @designsnicolina
Facebook facebook.com/designsbynicolina
Tuesday, March 11, 2014

Sitting with Grandmother Willow: Danielle of DisneyLove417

Peter Pan Poster from DisneyLove417
As part of our on-going series, Sitting with Grandmother Willow, I am happy to introduce Danielle of DisneyLove417, an Etsy shop. This series of blog posts highlights artists and bloggers of all stripes with one thing in common: a passion for Disney! I hope you will enjoy getting to know Danielle as much as I have. A big thanks to her for taking the time to interview with us! And be sure to visit her shop for a great selection of Disney themed graphic art and phone accessories!


Disney by the numbers (with apologies to Harpers):

# of trips you have made: This is hard to say because I worked there from August 2009 till June 2013. I have visited the parks way more than the average person and loved every second of it.
Date of first trip: 1994
Date of next trip: May 2014 for Hollywood Studies 25th Anniversary
# of Resorts stayed in: I believe I have stayed in 10 different ones.
Usual # in your travel party: I would say 4 on the average day.
Pairs of mouse ears in your cottage: 7 beacuse you can never have too many mouse ears.

WDW or Disneyland (or other)? WDW .. I have never visited Disneyland :(
How do you usually travel to Disney? If on vacation a plane. But most of the time I just drive down the street in my car :)
Do you have any tips for trips? Yes lots. Feel free to contact me with any specific questions because there are just too many to name. I worked in guest relations at the parks so I know lots of fun facts.
Do you have a favorite place to eat while in Disney? Most recently I have been fascinated with Be Our Guest (like the rest of the world) You also can never leave without a Dole Whip
What is your absolute DON'T MISS attraction? Toy Story Mania
Stage shows, yes or no? Yes
Parades, yes or no? Yes .. I think some of them can use some updating but yes.
Best Fast Pass to get: Toy Story Mania for sure! Its the busiest ride at all 4 of the parks
Favorite park: Hollywood Studios. I have a special place in my heart for them considering I worked there for 4 years.
One piece of advice you'd give a novice about WDW/DL: Don't just show up and think you can figure out how to work the parks. Definitely do some research.
How do you create extra magic for your family? I know a lot of secrets about the parks so I will surprise them with things they didn't know about or show them great spots to watch fireworks or shows.
How can we connect with you?
www.etsy.com/shop/disneylove417
instagram.com/dswizzle417

Saturday, June 29, 2013

DIY Disney Snack Digital Brushes

For those of you digital scrappers out there, here is another free digital download! Ive said it before and I'll say it again: I love scrapbooking. I don't get to do it as often as I like, as I am sure is the case for most of us! I especially love digital scrapping. I love not having to leave a mess out, being able to customize the colors and sizes of things, and in general, making my layouts exactly the way I want them. But as I have said before, it can be hard to find Disney themed digital scrapbooking elements. So the DIYer in me has to get a little creative in this department if I don't want all my pages to look the same. And when you travel to Disney as much as we do, that can happen quickly.


If you are a digital scrapbooker too, then you know how fantastic brushes can be. Brushes are shapes that can be customized with texture, pattern, and color so that they can look like stickers, chipboard, metal, or a host of other scrapbook elements. They can even become a frame for your photo! The thing is, brushes are not hard to make if you have a little knowledge of Photoshop. If you'd like to try it yourself, check out this helpful brush-making tutorial. I was able to make three of these brushes in less than 5 minutes each. And now I have them to use in all my layouts! AND, so do you! I'm sharing my brushes with you as a FREE DOWNLOAD, for personal use only. Follow this link to download these free Disney Snacks Brushes.

I am working on an entire scrapbooking kit, but that will have to wait for another time. It's coming along though, so hopefully I'll be posting it sooner, rather than later! Until next time, may all your days be filled with fairy dust!


Tuesday, April 30, 2013

DIY It's A Small World Framed Art

This was a super simple project, with a big impact. It was budget friendly in the scope of framed art, but still the most expensive part of the room makeover; go figure. But when you break it down, these were just over $12 each. Not at all bad for framed artwork. And these really tied the room together for me, so I was willing to spend the money.

I was able to purchase everything through Amazon. I shopping with Amazon because they deliver everything to the cottage. With two in carseats, shopping isn't full of magic for me! I found an adorable It's A Small World mini calendar here, and the frames here. I chose to use these shadow box frames because they were the cheapest black 8x8 frames I could find. As chance would have it, I really like how they look. And since the calendar pages were not quite 8x8, I simply matted them on 8x8 cardstock in various colors to match the art. I already had the cardstock, so that was a little money saved right there. I also used the cardboard inserts from the frames to figure out the placement on the wall, as in this tutorial on eHow. Brilliant! These pictures really did do a lot to complete the room, and I couldn't have asked for more perfect art work!

Until next time, may all your days be filled with fairy dust!

Saturday, April 27, 2013

It's A Small World Kids Room: Subway Art

As a lover of graphic art, and a dabbler myself, this trend in Subway Art rocks my world. I just had to make some for our new Small World Room. In fact, with all those international farewell's already laid out for me, it was downright impossible to ignore. It's like this project was calling out my name. So, I skimmed over several of our vacation photos and found the words I wanted to use. I also referenced them for the fonts I chose. I mean really, how much easier does it get?

If you've never been through It's A Small World (which I find extremely hard to imagine, unless you are preparing for your first trip, in which case, I salute you for your admirable choice in vacation spots and blog reading), here is what you see at the end of the ride:

So how did I do it? It was simple. Measure the wall area on which you are going to hang the print. You can easily prints made at standard sizes, 11x14, 16x20, 20x30, so choose the size that works best for you. Don't forget to factor in the frame when deciding which size you want to use. I chose to use Shutterfly as my vendor. I had used them before to print posters for Doc's room, and I had a coupon to use. If money is an issue, shop around. You can find a good deal at many print shops. And don't forget to check out Staples and Office Depot. They usually have print centers.

To make your own subway art, open a document in Photoshop the size of the print you wish to make. Type each word in a separate text box. This gives you the ability to move them around and change fonts easily. Size them all to the margins you require. I used about an inch of white space all around so I would have room to mat and frame it. Then start playing around with fonts. As I said before, I had photos to reference, so that was helpful. And as a font enthusiast (and avid scrapbooker), I have a vast library of fonts to choose from (most of which I downloaded for free). If you need to find fonts, just search fonts on pinterest. You'll be swimming in them.

Fonts I used for this project (from top to bottom):
Eccentric Standard
Heavy Heap
Pepper
Wren
Rosewood Standard
Water Street
Ornatique
Mary Jane Tankard
Bimini

I hope your attempts at making subway art are as fun as this was for me! Until next time, may all your days be filled with fairy dust!


Tuesday, April 2, 2013

DIY Disney iPhone Case

So here is a really quick and easy way to personalize your iPhone. Shutterfly has a variety of iPhone cases (for all models) which can be customized with your Disney photos. If you are anything like the residents of the cottage, you will have LOADS of images to choose from. If you're not really the type to take lots of photos while at the parks, consider purchasing the PhotoPass images. You will not only get the images of your family, but you can purchase the entire package of photos from your trip and, bonus, you will get some stock images too. Our images included some seasonal shots, so we could remember how the parks looked during our October stay. Easy-peasey.

I made this case in less than 15 minutes. Mr. Photos From The Parks snapped this image during Mickey's Not So Scary Halloween Party several years ago. I love it! I added my own text, and poof! My very own iPhone case. The cost was about $55.00, so this isn't necessarily a project I would do for all the members of our travel party (we usually knock around Walt Disney World with upwards of 17 people), but it is perfect for that Disney fan who has everything.

Until next time, may all your days be filled with fairy dust!

Thursday, February 14, 2013

Disney Valentine Onesie DIY

We have a new little addition around the cottage these days, and I just couldn't resist whipping up a Bambi inspired Valentine onesie for her. It was so simple with the Silhouette SD and some fabric paint.

I used the baby deer shape (Design ID #5505 ), the hearts from the sheep card (Design ID #25095), and the font Coolvetica. The text is lifted from the main musical theme from Bambi, "Love Is A Song." I made sure that my design would fit a 4"x4" box, which was just right for a 0-3 month onesie. 

Once I had everything placed as I liked it, I cut out the shapes on stencil vinyl. This tutorial from the Silhouette blog was extremely helpful in getting it transferred to the fabric. From there, I painted the shirt with two coats of fabric paint and let it dry. Voila! A cute Disney themed valentine for our sweet new bundle of magic! I'm tempted to make one in an adult size for me. Happy Valentine's Day to you and your family. Until next time, may all your days be filled with fairy dust!