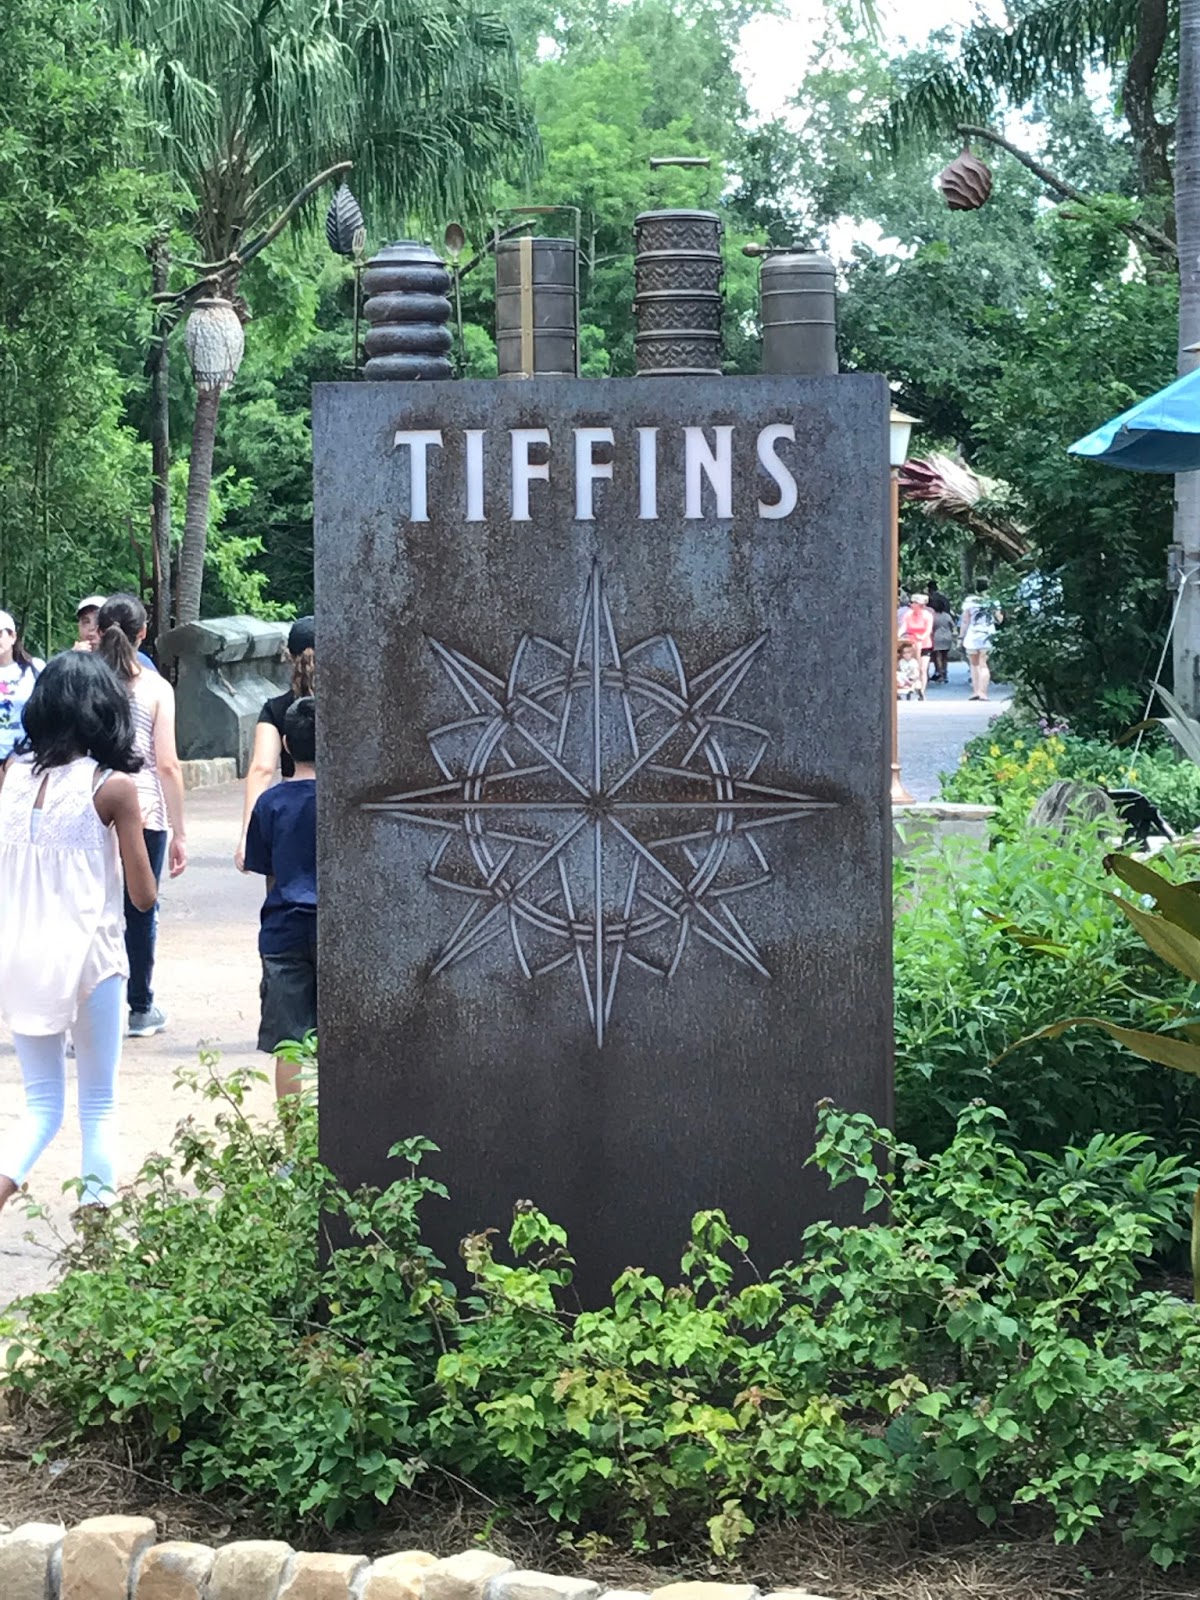
If you have not yet tried Tiffins in Animal Kingdom you really, really must. Our family takes food pretty seriously and we think it is currently the best restaurant on property barring Victoria and Albert's. The selections are interesting and not on your typical dining menu, the ingredients are fresh and delicious and the cocktails are inventive and satisfying. We think they truly live up to their claim to "set off on a culinary expedition of international cuisine inspired by exploration and adventure." We are in love with this new option.
Who Would Best Be Suited For This Location?
If your family likes ethnic cuisine, art and is ready to sit in the air conditioning for a while, this is the place for you. In fact, even if you have a couple picky eaters and a few adventurous souls, you will still be happy eating here. It is a signature dining location which means a.) you will be eating in a nice location, at a table with more than one server waiting on you = it's more expensive than other table service locations around the parks, and b.) you can expect there to be a wide selection of food and wines available, as well as a very accommodating kitchen.
What We Ordered:
You can reference the full menu here. It's full of fantastic selections! We arrived for lunch with a VERY picky kindergartener with food allergies, a somewhat adventurous preschooler, and 3 adult, self proclaimed foodies at our last dining experience at Tiffins. I had taken the time to email ahead (special diets) and ask specifically for chicken nuggets to be on the menu for the one who barely eats any other protein. They would not guarantee that they would be available, but lo and behold when we asked, they had them! In my experience, most signature dining locations will do this for you with a little planning ahead. Also, if you forgot to plan ahead, ask if they have them in the house. It's possible that they ordered a big bag of them at the request of someone else and still have some in the kitchen.
Our meal started with house made bread, and since I no longer eat gluten, I passed. As an alternative for me they brought out rice cracker "bread" made in house with the same olive oil and molasses combination to dip it in. Such a great alternative to the usual gluten free bread served elsewhere on property!
Preschooler:
Pasta Marinara followed by Caramel-Chocolate Cake
VERY picky Kindergartener:
Chicken Nuggets, Fries and Green Beans followed by Caramel-Chocolate Cake (chef made sure the cake was safe for his food allergies)
Foodie 1: Zinger Fizzie, Marinated Grilled Octopus, Pan-seared Duck Breast, Lime Cheesecake
Foodie 2: Jenn's Tattoo, Selection of Artisanal Cheeses, Berkshire Pork Tenderloin (no dessert)
Foodie 3: Annapurna Zing, Selection of Artisanal Cheeses, Duo of Venison, Sorbet Tasting
Suffice it to say, all meals were shared around our table and in all seriousness, the 3 foodies believed we had each ordered the best meal on the menu. All dishes were inspired and delicious. Nothing was over or under cooked. The only complaint at our table was from the VERY picky eater who asked our server, "why did you bring me these?" regarding his green beans.
And speaking of our server, we were delighted to meet someone from home who was very accommodating and just as tickled as we were regarding his complaint. Food allergies can be a pain to deal with but we never felt we were cause anyone any trouble. Our server's recommendations and advice were perfect. Our meal and experience were outstanding. We couldn't have asked for better.
And I can't wrap this up without a nod to the atmosphere at Tiffins. It is beautiful as well. It felt like an oasis (not just for the air conditioning). Tiffins is also an art gallery showing off a range of art that has inspired or become part of Disney's Animal Kingdom. It really is a feast for the eyes as well. And it kept our small tourists occupied as we waited for our meals to be ready.
In short, Tiffins will be part of our Animal Kingdom visits for many years to come. There was no wait for a table on a week day in the middle of June and we were over the moon with this perfect break in our hot and hectic theme park day. You really need to try this place if you haven't been. We can't wait to go back.
Showing posts with label food. Show all posts
Wednesday, July 5, 2017
Sunday, February 19, 2017
Magical Coffee | Tinkerbell Coffee Cup Cozy
Sometimes a project just falls into your lap: you realize that you have all the supplies you need and suddenly you go from idea to finished project in less than 48 hours. This Tinkerbell Coffee Cozy is just such a project. and I really love the way it turned out!
Last Thursday I ran into a friend I hadn't seen in a while. As we were chatting with one another we suddenly realized that we went to the same very small college but had just missed one another by a year! It's not something that happens too often and so we had to do all the requisite reminiscing about our alma mater. Later, she mentioned that she loved my Mickey Coffee Cozy (which I almost always have with me!) and further mentioned how she needed one (like NEEDED one) that was Tinkerbell. So how could I resist? I knew I needed a new project for the blog too, so voila! Here you go! Magical Tinkerbell coffee at your service!
This one is not knit, it's crocheted; so you'll need to get your hooks out! But if memory serves, March is national crochet month, so it's the perfect time to dust them off and get this party started! If you want all the details on how to make one for yourself, you can see my notes on Ravelry. I didn't make an actual pattern for it, but if you are willing to do a little guess work, and you don't mind fudging a little bit on the pattern, it's fairly simple.
I'm really pleased with how this project turned out! I would love to hear if you have done anything like this yourself. Let me know in the comments. And until next time, may all your days be filled with fairy dust!
Thursday, August 11, 2016
Star Wars: A Galactic Spectacular Dessert Party Review
First off, let me start by saying, Disney got this right. They got this SO right. We were absolutely impressed with the Spectacular! I felt like the Incredible's neighbor when it was all over:
If you haven't seen it yet, you are missing out! For real. And if you are a Star Wars fan at all, this is something you have to put on your "Must Do" list for your next trip. I loved it! All of it.
And if you want to make the most of your Galactic Spectacular, consider adding the dessert party to your day at Hollywood Studios. It's an extra ticketed event, so on top of your park admission, you will need to purchase tickets. Currently, the price per adult is $58.63 and $33.20 per kid (3-9). Here's what you get for that price:
If you haven't seen it yet, you are missing out! For real. And if you are a Star Wars fan at all, this is something you have to put on your "Must Do" list for your next trip. I loved it! All of it.And if you want to make the most of your Galactic Spectacular, consider adding the dessert party to your day at Hollywood Studios. It's an extra ticketed event, so on top of your park admission, you will need to purchase tickets. Currently, the price per adult is $58.63 and $33.20 per kid (3-9). Here's what you get for that price:
- Desserts. So many desserts! But not just desserts, there are also savory items as well as fresh fruits, AND a very nice assortment of drinks both alcoholic and non-alcoholic. You can go back as many times as you like and take your food all around the Launch Bay. For a full menu, head over to AJ's blog and see what all is on offer. (The write up is old, but the menu is just about the same.) Even with my restricted diet, I was able to find desserts to enjoy!
- The Launch Bay is open for you to enjoy. With all the Star Wars artifacts, the movie and the Chewbacca and Kylo Ren meet and greets, you could easily spend most of your time seeing all there is to see.
- Wait times for Chewie and Kylo Ren were only 10 minutes or less. I definitely recommend using this time for meeting them.
- Storm Troopers are patrolling the area. Our Storm Troopers were not in a photographic mood claiming they were not allowed to be photographed while on duty; although I have heard that at other parties they have been willing to pose with guests and be photographed.
- Jawas are also roaming the party and willing to trade if you have something of value. Our 15 year old tried to complain that the droid he traded for had a bad motivator, but this Jawa wouldn't hear of it.
- Storm Troopers will escort you to the reserved viewing area for the Galactic Spectacular. It is PRIME viewing.
- A souvenir Chewbacca stein and a bottle of water are waiting for you when you arrive for the Galactic Spectacular. We only had to wait 8 minutes once we arrived before the show began. And I can't say it enough: it was SPECTACULAR!
What you don't get:
The one downside we found (which Disney is clear about on their dining page) is that there are NO seats. And by 8 pm, our feet were tired and begging for a seat. Given the space, I am not sure how Disney would manage that; and if you use your time at the Launch Bay well, going to all the attractions, you don't really have a long time to stand around before you're headed out to see the show.
Was it worth it? For my money, this experience is totally worth it, at least once. We are bona fide Star Wars fans, we are crazy for Disney and we value our time in the parks; we would rather pay for the party than spend hours saving a place for the Galactic Spectacular. And bonus, it was on our eldest kid's 15th birthday. What could be better than that?
Until next time, may all your days be filled with fairy dust!
Thursday, April 7, 2016
Dining at Remy on the Disney Dream
Those of you who are regular followers know that Mr. Photos From The Parks and I are Disney foodies. Not only do we love a dole whip whenever we can find one, we've also dined at Victoria and Albert's more than once, enjoyed Lunch with an Imagineer in Hollywood Studios and have mourned the passing of our favorite Bistro de Paris. We like to try new things and love inventive foods. And for the most part, we are always pleased by what Disney has to offer.
It is no understatement for me to say that the meal I had at Remy, aboard the Disney Dream, is quite possibly the best meal I have ever had. Ever. In the movie, Ratatouille, Anton Ego remarks in his review of Gusteau's that "to say that the meal and its maker have challenged my preconceptions about fine cooking is a gross understatement." I have to concur with this foodie. You will not be disappointed.
Remy, the restaurant, is themed beautifully to the movie Ratatouille. If you have not watched it before and you are a food lover, you must stop what you are doing this minute and watch. If you find yourself on a Disney cruise, you can always pull it up on demand before your reservation. It is amazing the attention to detail in this restaurant. Everything from floor to ceiling is like you would see it in Ratatouille. And Little Chef is there too. Your server can help you spot him if you wish. But don't be deterred by the theming. It is as elegant as any restaurant we've been to in Paris. We were seated in the Gusteau Room. It was very intimate with a gorgeous view of the sea. We had the privilege of watching a storm roll in and may have made a few bad jokes about how our meal tasted "lightening-y."
I will not go through the entire menu, but I will offer up this bit of advice. We let our server know that we considered him and our chef the experts of the evening and we were entirely at their mercy. We did not order from the menu, but let them choose for us what we would be served. I had never before had the experience of a server telling me that he was proud to be serving me that evening. And our server, Juan, was amazing. He walked us through the water menu (yes, I said water menu), brought over the sommelier who helped us make the perfect selection for a bottle of wine that paired with every course, was only as attentive as we needed him to be, determined our food preferences and dietary restrictions, and brought us stunning course after course. Our cheese master, BB, was exceptionally knowledgeable about the cheese course too, letting us know which ones would be for the more adventurous palate.
I never once had to worry about my food sensitivities; once they were mentioned, I was all set. From the start, they brought me gluten free bread that actually tasted and felt like baguette. And they brought me ghee instead of butter. The entire meal was that way. Before I even had the chance to ask, Juan would tell me about the special changes to my meal that made them gluten and dairy free. I felt like a princess! And everything was delicious. More than delicious. It was delectable.
From the moment we arrived to the last bite of the evening (and the sweets they sent home with us!) we were delighted. The experience of dining at Remy is one I will not soon forget. For my money, it's worth every dime. If you are hesitant about taking the time out of your cruise or finding the money in your budget, I would encourage you to do it. I am still dreaming of the loveliness of that evening.
Until next time, may all your days be filled with fairy dust!
It is no understatement for me to say that the meal I had at Remy, aboard the Disney Dream, is quite possibly the best meal I have ever had. Ever. In the movie, Ratatouille, Anton Ego remarks in his review of Gusteau's that "to say that the meal and its maker have challenged my preconceptions about fine cooking is a gross understatement." I have to concur with this foodie. You will not be disappointed.
Remy, the restaurant, is themed beautifully to the movie Ratatouille. If you have not watched it before and you are a food lover, you must stop what you are doing this minute and watch. If you find yourself on a Disney cruise, you can always pull it up on demand before your reservation. It is amazing the attention to detail in this restaurant. Everything from floor to ceiling is like you would see it in Ratatouille. And Little Chef is there too. Your server can help you spot him if you wish. But don't be deterred by the theming. It is as elegant as any restaurant we've been to in Paris. We were seated in the Gusteau Room. It was very intimate with a gorgeous view of the sea. We had the privilege of watching a storm roll in and may have made a few bad jokes about how our meal tasted "lightening-y."
I will not go through the entire menu, but I will offer up this bit of advice. We let our server know that we considered him and our chef the experts of the evening and we were entirely at their mercy. We did not order from the menu, but let them choose for us what we would be served. I had never before had the experience of a server telling me that he was proud to be serving me that evening. And our server, Juan, was amazing. He walked us through the water menu (yes, I said water menu), brought over the sommelier who helped us make the perfect selection for a bottle of wine that paired with every course, was only as attentive as we needed him to be, determined our food preferences and dietary restrictions, and brought us stunning course after course. Our cheese master, BB, was exceptionally knowledgeable about the cheese course too, letting us know which ones would be for the more adventurous palate.
I never once had to worry about my food sensitivities; once they were mentioned, I was all set. From the start, they brought me gluten free bread that actually tasted and felt like baguette. And they brought me ghee instead of butter. The entire meal was that way. Before I even had the chance to ask, Juan would tell me about the special changes to my meal that made them gluten and dairy free. I felt like a princess! And everything was delicious. More than delicious. It was delectable.
From the moment we arrived to the last bite of the evening (and the sweets they sent home with us!) we were delighted. The experience of dining at Remy is one I will not soon forget. For my money, it's worth every dime. If you are hesitant about taking the time out of your cruise or finding the money in your budget, I would encourage you to do it. I am still dreaming of the loveliness of that evening.
Until next time, may all your days be filled with fairy dust!
Tuesday, August 4, 2015
Disney Lunch Box Notes | Back To School

School is already underway here at the Cottage, so I thought I would re-run one of my favorite items for back to school: lunch box notes. You can print and use these notes right away. I hope you will enjoy this post from 2013:
It's back to school time and those first few weeks can be rough getting back into the routine! If you have a student (or frankly, a teacher) in your life you know how hard it can be. These sweet lunch box notes are a perfect mid-day pick-me-up. There are lots of these out there but these are my favorites. Add a little magic to your loved one's lunch.

Disney Family has a cute selection, both boy and girl themed. These are the boy selection.
Disney Stationery has lots of great notes including these wonderful Wall-E notes. Check out the link for more from Mickey and the gang, your favorite princesses, a pirate and a few dwarfs.
And finally, if your kids are a bit older and enjoy trivia from the parks (*cough*, Doc, *cough*), then here are 6 from the cottage. We hope you enjoy them. Simply click here to download them for yourself. Special thanks to Disney Trivia for the questions and answers!
Until next time, may all your days be filled with fairy dust!
Thursday, July 30, 2015
Epcot's Food & Wine Festival Recipe: Banoffee Pie
Those of you who follow the blog may remember that my niece and I took a trip to Ireland last spring. It was one of the best vacations I have ever had. We did a lot of new things there, but one of our favorite memories includes having Banoffee Pie, something neither of us had ever encountered before. We sat and analyzed the pie, what we tasted, what it must be made from, and decided right there that we needed to make it for our family at home. And when I got home I realized how very simple it actually was to make!
It is, as the name would suggest, mostly bananas and toffee. Our first attempt at making it here was, well, overzealous and quintessentially American. Since it was for a party we decided to make an extra large pie. This is not a recipe that needs to be extra-large in any way. It would be like making a giant treacle tart. Who could eat that? It was overly sweet and sticky, but in the end, still quite delicious. Everyone at the table agreed.
We used a recipe from The Disney Food Blog, which is my first choice when it comes to finding out anything about food at Walt Disney World. Apparently this was part of the 2013 Food and Wine Festival in Epcot. We didn't use a chocolate crust, because we didn't have one in Ireland. We just used a ready made graham cracker crust. But everything else was the same. It turned out well for us, but as I mentioned, we'll use a much smaller crust and filling in the future.
Until next time, may all your days be filled with fairy dust!
Thursday, June 4, 2015
Lunch with An Imagineer | Wish With Amy
Dining with a Disney Imagineer is available at the Hollywood Brown Derby in Disney Studios at the Walt Disney World Resort in Florida. As far as I know, this is the only place you have the opportunity to speak one-on-one with an actual Disney Imagineer! For my husband, our oldest, and me, this was the highlight of our trip!
We booked this experience in October of 2012 and immediately upon arrival at the Hollywood Brown Derby, we were checked in an received our very own Walt Disney World name badges. Hayes was already in his glory. His face says it all! This experience is recommended for those 15 and over, but as an overachieving science geek, foodie and Disney expert, he was the perfect guest even at age 11. We knew he would enjoy a four-course gourmet meal and have thoughtful, reflective questions for whomever our Imagineer would be.We were seated at a table in a private dining room with 9 other Disney geeks, given a souvenir menu and met our Disney Imagineer. We were lucky enough to be dining with Bernadette Mosher, or Bernie as she liked to be called. Her position at the time was Director of Creative Development Services. We heard all about her work solving the challenge of making Spaceship Earth a reality, as no one had been able to construct a complete geodesic sphere prior to EPCOT being built. She talked about the development of Disneyland Paris, where she was the lead Imagineer for the Haunted Mansion and the Grand Canyon Diorama. She had a lot of great stories to tell and was very engaging!
The end of our meal came all too soon, but we were each given a souvenir plate, autographed by Bernie, as a keepsake of our experience, as well as a photograph, our name badges and the menus too. But the best take away for our family was the conversation! We were inspired and awed by the stories we heard and Hayes was ready to sign up then and there to work for Disney (aren't we all?)!
If you are wanting to book this experience, you need to reserve Monday, Wednesday, or Friday at noon. I recommend booking on your 180 day mark, as I wasn't able to find any seats available at the time of this writing! The cost is roughly $60 per person. As of this writing, the Disney Dining plan is NOT accepted for this event. Currently only the Hollywood Brown Derby is participating in this program. In years past, other restaurants were included, but that appears to have gone away.
I'd love to hear your experiences with this Disney dining experience too! Until next time, may all your days be filled with fairy dust!
Saturday, May 16, 2015
Mary Poppins DIY Movie Viewing Party
Sometimes, on a Tuesday, you just need a little something special to happen! I surprised our littles mid-week with a Mary Poppins Movie Party! They couldn't have been more excited!
There is an absolute WEALTH of information available on Pinterest if you happen to be planning for just such an occasion! I also used my Silhouette SD to great advantage. There are many pre-made shapes that work perfectly with the Mary Poppins theme. In addition, I have made my Poppins Party Pinboard available on Pinterest so you can see the ideas that inspired me, and perhaps try a few of these ideas with your friends and family.
Ok, let's get into the details!

Setting the Stage:
I used this Carousel Horse Hexi-box shape as my centerpiece for the table. I cut it from card stock using my Silhouette Portrait, and then used a dry adhesive and glue pen to assemble it; it went together quite easily. There is also a tutorial on how to assemble it if these things tend to frustrate you. The kids absolutely wanted to play with it from the moment they saw it!
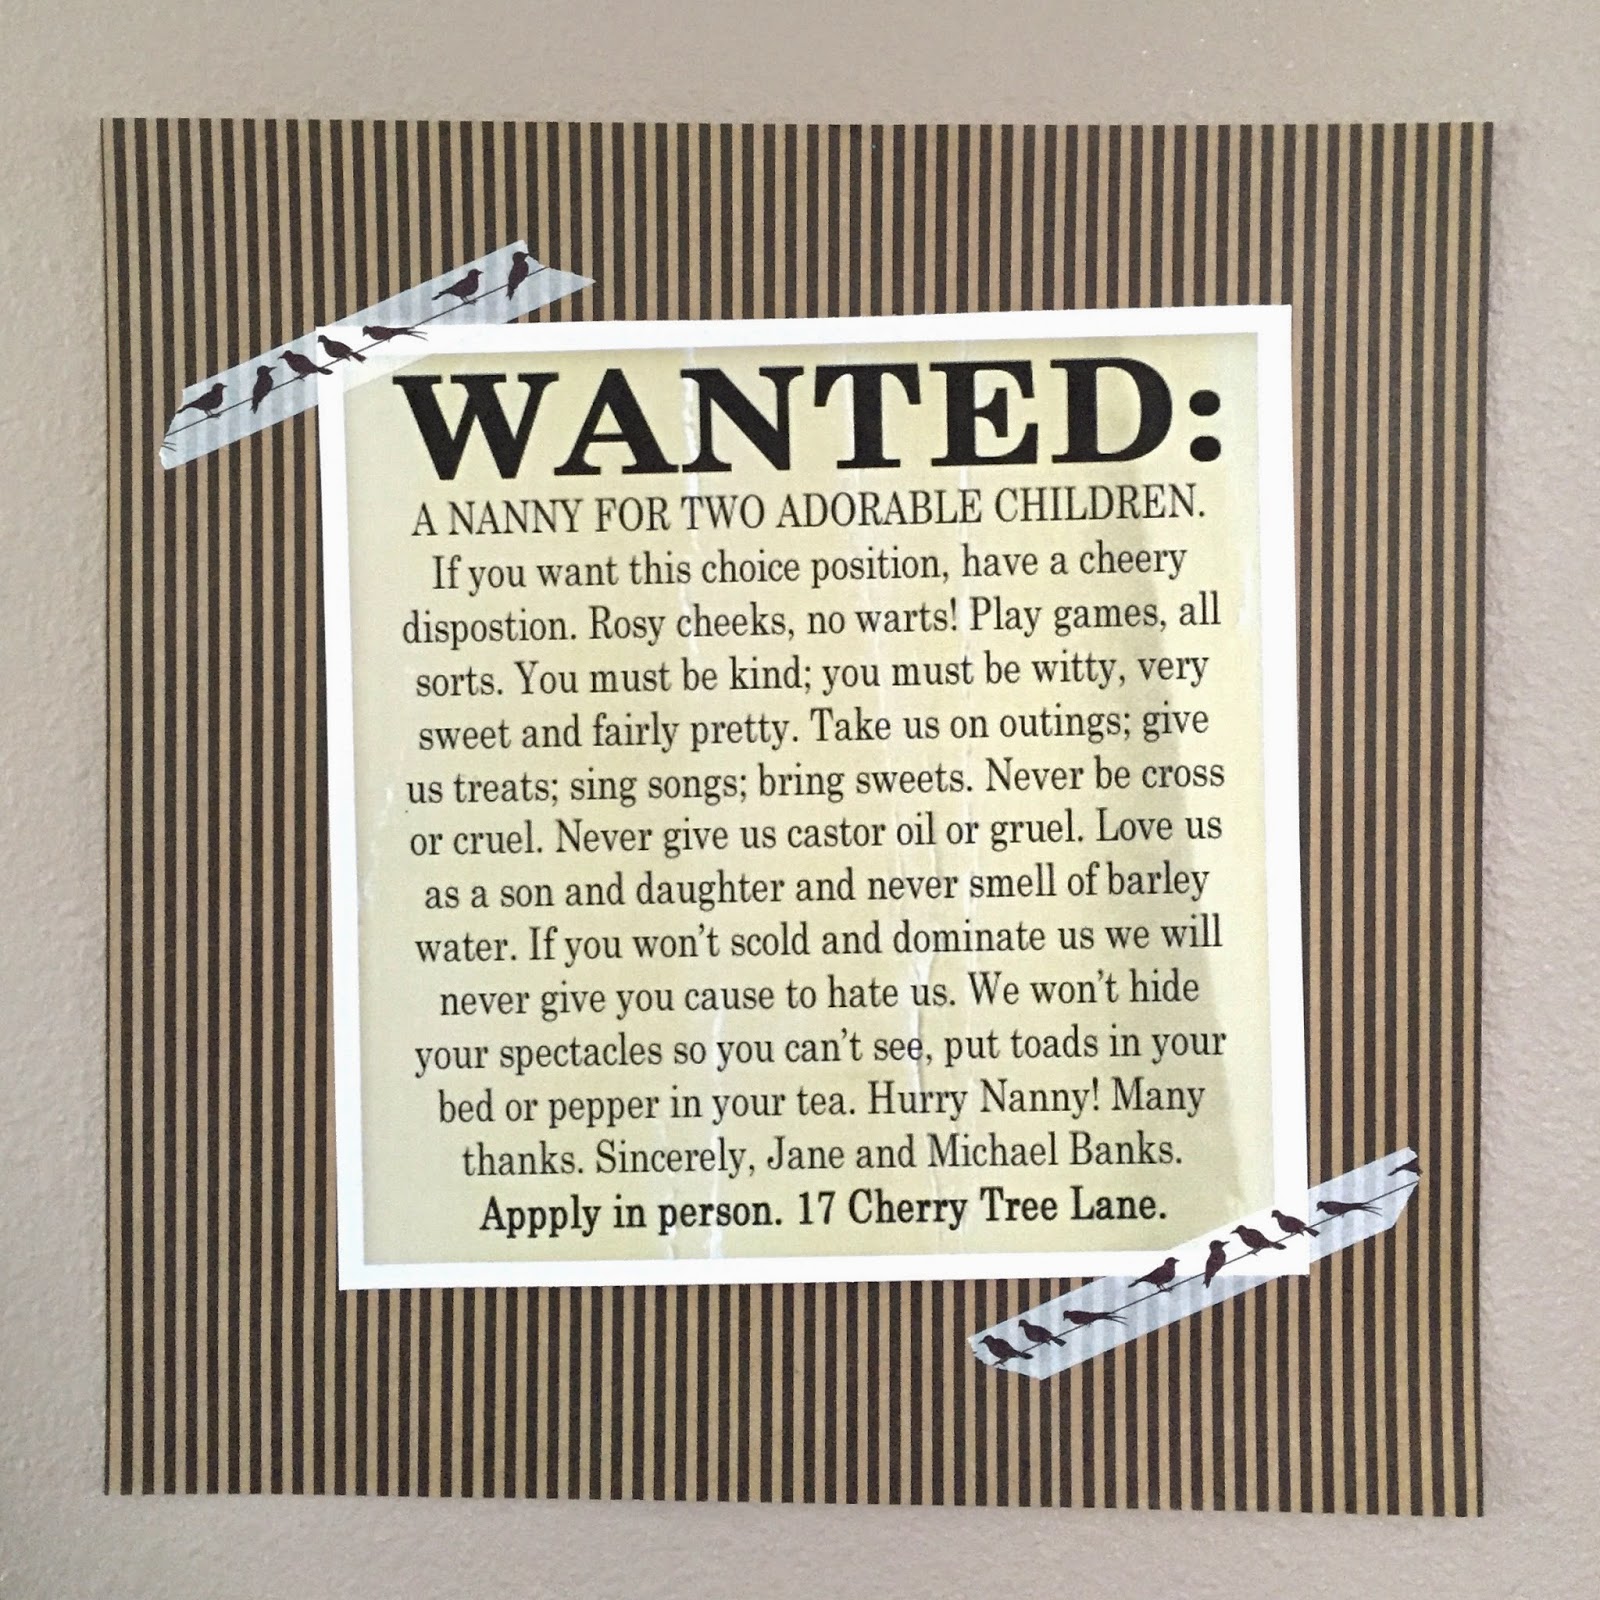
I wanted a backdrop of sorts for the table, but didn't want to do anything overwhelming (read time-consuming). So I hunted up some Mary Poppins printables. I simply printed them and adhered them to scrapbook paper to frame them up a bit. All of these were free, and I am including my own printable of Jane and Michael's advertisement for a nanny. If you would like to print your own you can find the Nanny Want Ad here to download, the Lucky printable, the Keep Calm printable, and the Spoonful of Sugar printable, here.
The Food:
I wanted all the food to be themed in one way or another to the movie. And I also wanted a solid variety of sweet, savory and salty. So we started with Kite Sandwiches. These were simple. Little Chef, ironically, loves to cook, but is not an adventurous eater. So these are simple ham and cheese with a little veggie cream cheese for good measure. I cut the crusts off a sandwich and trimmed each half into diamonds. I then used sliced cheese to cut out the crosses on the top of the sandwiches. (I just laid it on top.) Finally, I used some frilly 4-inch toothpicks to create the tails for the kites.
You can also see here the chocolate coins which were our Tuppence, and our Rum Punch (which we made without the rum for the kiddos!). For the punch I just mixed orange juice, pineapple juice and some La Croix Coconut sparkling water in a pitcher. The flamingo straw toppers were again from the Silhouette design shop. We don't have much juice here in the cottage, so this punch was a real treat for the littles! Also, the version with the coconut rum was a real treat for the adults!! Rum punch, delicious!
We added to the sweets with Raspberry Ice (store bought sorbet). If you really want to make some granita from scratch, I found a recipe for you. It looks pretty simple to make, but time intensive. And a little bit of time saving sounded great to me on a weeknight! I passed on the homemade raspberry ice.
And then it was time to move on to the salty snacks!
My kids adore goldfish crackers, but I was having a hard time making them fit into this Mary Poppins theme. And then I saw these umbrella party favors and I knew I had my solution! Here is a link to how to make them. Instead of a regular handle I wanted the classic Mary Poppins parrot head. So I found a .png image on line and imported it into the silhouette, traced it and cut it out. Voila! A Poppins umbrella full of goldfish! My littles loved them! (And so did I!)

We also had these adorable cream cheese and black olive penguins! Of all the food we made for this party, I loved these the most. They were a little bit of prep work, but nothing overwhelming. And the effect was well worth the effort! I guarantee I will be making them again this Christmas! You only need cream cheese (we used the veggie kind), black olives, carrots and 4-inch toothpicks to create them. You can find the full tutorial here. I used the same frilly toothpicks as I did for the kite sandwiches. The effect was exactly as I hoped! And these are incredibly delicious little snacks! The toddlers were not as thrilled with them, but the adults were definitely pleased.
And because no movie party is complete without popcorn, I made these themed popcorn boxes! I used the Let's Go Fly A Kite Tile and the popcorn box shape with my Silhouette Portrait. These, surprisingly, took the longest time to assemble. The Fly A Kite tile has a LOT of intricate pieces cut from several different colors of card stock. I love the overall effect, but I'm not sure how many of these I could do. I'm glad I was only working on three.
A word about popcorn here (because I can); I am a huge fan of popcorn made on the stove. None of that chemical infused microwave popcorn for this family! It's so simple and much less expensive too. Plus, our family prefers the taste and smell to the microwave variety.
And there it is: the recipe for your very own DIY Mary Poppins movie viewing party. Of course, you could do the same thing for a Saving Mr. Banks viewing party as well.
Until next time, may all your days be filled with fairy dust!
There is an absolute WEALTH of information available on Pinterest if you happen to be planning for just such an occasion! I also used my Silhouette SD to great advantage. There are many pre-made shapes that work perfectly with the Mary Poppins theme. In addition, I have made my Poppins Party Pinboard available on Pinterest so you can see the ideas that inspired me, and perhaps try a few of these ideas with your friends and family.
Ok, let's get into the details!

Setting the Stage:
I used this Carousel Horse Hexi-box shape as my centerpiece for the table. I cut it from card stock using my Silhouette Portrait, and then used a dry adhesive and glue pen to assemble it; it went together quite easily. There is also a tutorial on how to assemble it if these things tend to frustrate you. The kids absolutely wanted to play with it from the moment they saw it!
I wanted a backdrop of sorts for the table, but didn't want to do anything overwhelming (read time-consuming). So I hunted up some Mary Poppins printables. I simply printed them and adhered them to scrapbook paper to frame them up a bit. All of these were free, and I am including my own printable of Jane and Michael's advertisement for a nanny. If you would like to print your own you can find the Nanny Want Ad here to download, the Lucky printable, the Keep Calm printable, and the Spoonful of Sugar printable, here.The Food:
I wanted all the food to be themed in one way or another to the movie. And I also wanted a solid variety of sweet, savory and salty. So we started with Kite Sandwiches. These were simple. Little Chef, ironically, loves to cook, but is not an adventurous eater. So these are simple ham and cheese with a little veggie cream cheese for good measure. I cut the crusts off a sandwich and trimmed each half into diamonds. I then used sliced cheese to cut out the crosses on the top of the sandwiches. (I just laid it on top.) Finally, I used some frilly 4-inch toothpicks to create the tails for the kites.You can also see here the chocolate coins which were our Tuppence, and our Rum Punch (which we made without the rum for the kiddos!). For the punch I just mixed orange juice, pineapple juice and some La Croix Coconut sparkling water in a pitcher. The flamingo straw toppers were again from the Silhouette design shop. We don't have much juice here in the cottage, so this punch was a real treat for the littles! Also, the version with the coconut rum was a real treat for the adults!! Rum punch, delicious!
We added to the sweets with Raspberry Ice (store bought sorbet). If you really want to make some granita from scratch, I found a recipe for you. It looks pretty simple to make, but time intensive. And a little bit of time saving sounded great to me on a weeknight! I passed on the homemade raspberry ice.And then it was time to move on to the salty snacks!
My kids adore goldfish crackers, but I was having a hard time making them fit into this Mary Poppins theme. And then I saw these umbrella party favors and I knew I had my solution! Here is a link to how to make them. Instead of a regular handle I wanted the classic Mary Poppins parrot head. So I found a .png image on line and imported it into the silhouette, traced it and cut it out. Voila! A Poppins umbrella full of goldfish! My littles loved them! (And so did I!)

We also had these adorable cream cheese and black olive penguins! Of all the food we made for this party, I loved these the most. They were a little bit of prep work, but nothing overwhelming. And the effect was well worth the effort! I guarantee I will be making them again this Christmas! You only need cream cheese (we used the veggie kind), black olives, carrots and 4-inch toothpicks to create them. You can find the full tutorial here. I used the same frilly toothpicks as I did for the kite sandwiches. The effect was exactly as I hoped! And these are incredibly delicious little snacks! The toddlers were not as thrilled with them, but the adults were definitely pleased.
And because no movie party is complete without popcorn, I made these themed popcorn boxes! I used the Let's Go Fly A Kite Tile and the popcorn box shape with my Silhouette Portrait. These, surprisingly, took the longest time to assemble. The Fly A Kite tile has a LOT of intricate pieces cut from several different colors of card stock. I love the overall effect, but I'm not sure how many of these I could do. I'm glad I was only working on three.A word about popcorn here (because I can); I am a huge fan of popcorn made on the stove. None of that chemical infused microwave popcorn for this family! It's so simple and much less expensive too. Plus, our family prefers the taste and smell to the microwave variety.
And there it is: the recipe for your very own DIY Mary Poppins movie viewing party. Of course, you could do the same thing for a Saving Mr. Banks viewing party as well.
Until next time, may all your days be filled with fairy dust!
Thursday, March 5, 2015
Forgotten Disney | DIY Spoodles Crispy Polenta with Greens and Mushrooms
File this under Forgotten Disney. So much at Walt Disney World (and Disney in general) has come and gone, or undergone change and rehab since I was little. Periodically we will revisit some of the forgotten places and things from Walt Disney World, starting today.
One of the restaurants Mr. Photos From The Parks and I used to love was Spoodles at Disney's Boardwalk Resort. For my money, they had the best breakfast around. (I now proudly support the buffeteria at the Trail's End in Fort Wilderness as the best kept breakfast secret on property.) I stumbled across this recipe in my Delicious Disney book and all those wonderful memories came flooding back!
This recipe was really quite easy to make. The Balsamic Vinaigrette was the hardest part. I used prepackaged polenta from Trader Joe's so all the prep work for that was unnecessary. I just opened the package and sliced it. Everything else is just a sautƩ. And since I've been making a conscious effort to eat more veggies through the day (my one thing I can do right now to be healthier), this seemed like a no brainer. I added a bit of sweet onion to my mushrooms, and a slice of smoked provolone atop my polenta, and served it with the polenta slices on the bottom, but otherwise, it's the same recipe.
Enjoy this entrƩe from Spoodles, and until next time, may all your days be filled with fairy dust!
Crispy Polenta with Mushrooms, Wilted Greens and Balsamic Vinaigrette
from Delicious Disney
Serves 4
Ingredients:
2 C warm cooked polenta
5 T butter, divided
coarse salt and freshly ground pepper to taste
1/2 C red wine
1 C vegetable stock
4 T olive oil
1 C shiitake mushrooms (or sub what you have)
1 C cremini mushrooms
2 C Swiss chard or large leaf spinach
2 C arugula
2 T water
Balsamic Vinaigrette (recipe follows)
1. In a large mixing bowl, stir together cooked polenta with 4 T butter. Season to taste with salt and pepper.
2. Pour polenta into 1/2" thickness in an 8" square pan. Refrigerate for 2 hours.
3. While polenta is cooling, make Balsamic Vinaigrette. Set aside.
4. In a sautƩ pan, whisk together wine and vegetable stock; cook until reduced by half. Remove from pan and set aside.
5. In the same pan, heat 2 T oil and sautƩ the mushrooms.
6. Add the wine and stock reduction to the mushrooms; cook 2 minutes. Season to taste with salt and pepper. Remove from pan and keep warm until ready to serve.
7. In the same pan, melt the remaining T butter. Add greens and water and cook just until greens are wilted. Keep warm.
8. Remove polenta from refrigerator and cut into 8 squares.
9. In a large skillet, heat the remaining 2 T oil and cook the polenta until crispy, turning once.
10. Place wilted greens on serving plates, top each with 2 squares of warm polenta, then spoon mushrooms over the top. Drizzle with vinaigrette.
Balsamic Vinaigrette
1 shallot, minced
3T balsamic vinegar
1/2 t fresh thyme, basil or other favorite herb
5 T olive oil
Coarse salt and freshly ground black pepper to taste
1. In food processor or blender, mix together shallots, vinegar, and herbs.
2. Drizzle in olive oil with machine running.
3. Season with salt and paper to taste.
One of the restaurants Mr. Photos From The Parks and I used to love was Spoodles at Disney's Boardwalk Resort. For my money, they had the best breakfast around. (I now proudly support the buffeteria at the Trail's End in Fort Wilderness as the best kept breakfast secret on property.) I stumbled across this recipe in my Delicious Disney book and all those wonderful memories came flooding back!
This recipe was really quite easy to make. The Balsamic Vinaigrette was the hardest part. I used prepackaged polenta from Trader Joe's so all the prep work for that was unnecessary. I just opened the package and sliced it. Everything else is just a sautƩ. And since I've been making a conscious effort to eat more veggies through the day (my one thing I can do right now to be healthier), this seemed like a no brainer. I added a bit of sweet onion to my mushrooms, and a slice of smoked provolone atop my polenta, and served it with the polenta slices on the bottom, but otherwise, it's the same recipe.
Enjoy this entrƩe from Spoodles, and until next time, may all your days be filled with fairy dust!
Crispy Polenta with Mushrooms, Wilted Greens and Balsamic Vinaigrette
from Delicious Disney
Serves 4
Ingredients:
2 C warm cooked polenta
5 T butter, divided
coarse salt and freshly ground pepper to taste
1/2 C red wine
1 C vegetable stock
4 T olive oil
1 C shiitake mushrooms (or sub what you have)
1 C cremini mushrooms
2 C Swiss chard or large leaf spinach
2 C arugula
2 T water
Balsamic Vinaigrette (recipe follows)
1. In a large mixing bowl, stir together cooked polenta with 4 T butter. Season to taste with salt and pepper.
2. Pour polenta into 1/2" thickness in an 8" square pan. Refrigerate for 2 hours.
3. While polenta is cooling, make Balsamic Vinaigrette. Set aside.
4. In a sautƩ pan, whisk together wine and vegetable stock; cook until reduced by half. Remove from pan and set aside.
5. In the same pan, heat 2 T oil and sautƩ the mushrooms.
6. Add the wine and stock reduction to the mushrooms; cook 2 minutes. Season to taste with salt and pepper. Remove from pan and keep warm until ready to serve.
7. In the same pan, melt the remaining T butter. Add greens and water and cook just until greens are wilted. Keep warm.
8. Remove polenta from refrigerator and cut into 8 squares.
9. In a large skillet, heat the remaining 2 T oil and cook the polenta until crispy, turning once.
10. Place wilted greens on serving plates, top each with 2 squares of warm polenta, then spoon mushrooms over the top. Drizzle with vinaigrette.
Balsamic Vinaigrette
1 shallot, minced
3T balsamic vinegar
1/2 t fresh thyme, basil or other favorite herb
5 T olive oil
Coarse salt and freshly ground black pepper to taste
1. In food processor or blender, mix together shallots, vinegar, and herbs.
2. Drizzle in olive oil with machine running.
3. Season with salt and paper to taste.
Tuesday, August 26, 2014
DIY Mickey Mouse Serving Tray
I think this tray is one of the funniest and delightful things I've done in a long time! I love walking by it on the command center and seeing our ADRs for our next trip. Mickey just makes be smile every time. The ridiculousness is part of the charm! And for under $10 and a little time, it's totally worth it for me to have this fun little Maitre d, er, Mousetre D, at my next Disney themed event!
The last time we were in Walt Disney World, I stumbled upon these plastic, movable Mickey toys at the International Gateway Gift Shop in Epcot. This shop is right at the World Showcase entrance to the park. You may have walked right by it many times and never really noticed it if you haven't had occasion to use it, but it is where the boats dock from the Epcot resorts and Hollywood Studios, tucked in between the UK and France pavilions. It's one of my favorite little shops to check out.
When I saw these plastic Mickey toys for $7 each I decided to pick up two of them. Not only were they good bath toys for the little ones on that trip (which I never seem to remember to bring), it seemed to me they were perfect for some yet unthought of craft. And so they were.
This Mickey already separates at the waist, so all I had to do was pull him apart. I made sure both halves of him were level and would fit seamlessly on the tray. I found this lightweight silver tray at the dollar store in the party goods area. It was exactly the right size for this project. After that, I simply used gorilla glue to adhere both sides of Mickey to the tray. He was hollow inside, so I put a few marbles in his bottom half to weight him down. And since I used gorilla glue, I don't think I would use this for food unless I put a doily around it first or the food was individually wrapped, like candy or cupcakes. I think it's the perfect think for party favors or information though! I used this tutorial as an inspiration for this craft.
Until next time, may all your days be filled with fairy dust!
The last time we were in Walt Disney World, I stumbled upon these plastic, movable Mickey toys at the International Gateway Gift Shop in Epcot. This shop is right at the World Showcase entrance to the park. You may have walked right by it many times and never really noticed it if you haven't had occasion to use it, but it is where the boats dock from the Epcot resorts and Hollywood Studios, tucked in between the UK and France pavilions. It's one of my favorite little shops to check out.
When I saw these plastic Mickey toys for $7 each I decided to pick up two of them. Not only were they good bath toys for the little ones on that trip (which I never seem to remember to bring), it seemed to me they were perfect for some yet unthought of craft. And so they were.
This Mickey already separates at the waist, so all I had to do was pull him apart. I made sure both halves of him were level and would fit seamlessly on the tray. I found this lightweight silver tray at the dollar store in the party goods area. It was exactly the right size for this project. After that, I simply used gorilla glue to adhere both sides of Mickey to the tray. He was hollow inside, so I put a few marbles in his bottom half to weight him down. And since I used gorilla glue, I don't think I would use this for food unless I put a doily around it first or the food was individually wrapped, like candy or cupcakes. I think it's the perfect think for party favors or information though! I used this tutorial as an inspiration for this craft.
Until next time, may all your days be filled with fairy dust!
Thursday, August 7, 2014
Disney Roadtrip 101 | DIY Lunchables
Here in the cottage we are at the stage in our lives that when the kids sleep, we let them go as long as possible. Sleep seems like the magic elixir! And on the road, it's even more true. You can make very good time while the kids are sleeping. But sometimes, when we are road tripping, that means the kids fall asleep and we end up driving right through lunch. That does not work well for this mama.
So on our last road trip, I decided to pack sandwiches for the cooler. The littles, however, don't really do sandwiches; they sort of shred them. And in an attempt to make things less of a mess in the car (always worth the struggle), I made up my own Lunchables. My friend Flora always says, toddlers will eat anything if you cut it up for them. And that holds true for our toddlers.
This was really simple and easy to prepare, and when I pulled them out of the cooler for the littles, they were delighted! I started with a disposable, square, plastic container. You can find them in the paper goods and food storage aisle at any grocery store. I wanted it to be disposable so we could toss it at the next rest stop. I then put cupcake papers in the bottom of each container to hold each food item seperately. (I also discovered that cutting off and using the bottom of a Solo cup worked for this as well!) This technique is specially helpful if you have a kid who hates for his food to touch! After that it was as easy as finding what they would eat, cutting it up and putting it in their boxes. Done and done!
If you have food allergies in your house, you know how hard it can be to find healthy foods on the road that are also safe for the whole family. This will definitely be one of our solutions to that problem. Until next time, may all your days be filled with fairy dust!
So on our last road trip, I decided to pack sandwiches for the cooler. The littles, however, don't really do sandwiches; they sort of shred them. And in an attempt to make things less of a mess in the car (always worth the struggle), I made up my own Lunchables. My friend Flora always says, toddlers will eat anything if you cut it up for them. And that holds true for our toddlers.
This was really simple and easy to prepare, and when I pulled them out of the cooler for the littles, they were delighted! I started with a disposable, square, plastic container. You can find them in the paper goods and food storage aisle at any grocery store. I wanted it to be disposable so we could toss it at the next rest stop. I then put cupcake papers in the bottom of each container to hold each food item seperately. (I also discovered that cutting off and using the bottom of a Solo cup worked for this as well!) This technique is specially helpful if you have a kid who hates for his food to touch! After that it was as easy as finding what they would eat, cutting it up and putting it in their boxes. Done and done!
If you have food allergies in your house, you know how hard it can be to find healthy foods on the road that are also safe for the whole family. This will definitely be one of our solutions to that problem. Until next time, may all your days be filled with fairy dust!
Saturday, July 5, 2014
Disney's Onion Tart from Citricos
I have long been a fan of the onion tart, ever since I went to Paris for the first time and tasted it. Americans tend not to use onions as a main ingredient. We are missing the boat, friends.
When I saw this recipe in our Delicious Disney cookbook, I knew I needed to try it. And all the credit goes to Mr. Photos From the Parks for creating this delicious meal. It was incredible! I don't love blue cheese, but this was just enough for me.
I did find that this is an exceptionally rich dish. We agreed that it would be an excellent first course. Mr. Photos served it will a sautƩed roasted corn and asparagus that was a superb compliment. This will definitely show up on a dinner party menu in the future!
There is a walnut dressing that we opted out of as we are a nut-free household. I am sure it would be just as delicious as the tart itself. Enjoy making this bit of Disney magic at home. Until next time, may all your days be filled with fairy dust!
Serves 4
2 tablespoons olive oil
1 large onion, halved and thinly sliced
1 bay leaf
2 eggs
2 tablespoons heavy cream
2 tablespoons milk
1 clove garlic, minced
Coarse salt, white pepper, to taste
1 package refrigerated pie dough
1/2 cup crumbled blue cheese
4 3 1/2- inch tart pans (for individual tarts)
1. Preheat over to 375 degrees F.
2. Heat olive oil in a large skillet over medium heat. Add the onion and bay leaf and sautƩ until soft and lightly browned, about 10 to 15 minutes. Remove to a plate to cool.
3. In a mixing bowl, beat together eggs, cream, milk, and garlic. Season with salt and white pepper and set aside.
4. On a work surface with a rolling pin, roll out the dough to 1/8-inch thick. Cut into circles about 4 inches in diameter. Place in tart pans so that they fit in the bottom and up the sides. Trim off the portion over the top if necessary.
5. Prick the dough with the tines of a fork and bake for 5 minutes.
6. Remove from oven and place a teaspoon of sautƩed onions in each tart, spreading evenly.
7. Spoon 1 1/2 tablespoons of egg mixture on top of onions in each tart, then top each with 2 tablespoons blue cheese.
8. Bake at 400 degrees F for 8 to 10 minutes.
9. Remove from tart pans and place on serving plates with a drizzle of walnut dressing. Serve warm or at room temperature.
When I saw this recipe in our Delicious Disney cookbook, I knew I needed to try it. And all the credit goes to Mr. Photos From the Parks for creating this delicious meal. It was incredible! I don't love blue cheese, but this was just enough for me.
I did find that this is an exceptionally rich dish. We agreed that it would be an excellent first course. Mr. Photos served it will a sautƩed roasted corn and asparagus that was a superb compliment. This will definitely show up on a dinner party menu in the future!
There is a walnut dressing that we opted out of as we are a nut-free household. I am sure it would be just as delicious as the tart itself. Enjoy making this bit of Disney magic at home. Until next time, may all your days be filled with fairy dust!
The Recipe:
Serves 4
2 tablespoons olive oil
1 large onion, halved and thinly sliced
1 bay leaf
2 eggs
2 tablespoons heavy cream
2 tablespoons milk
1 clove garlic, minced
Coarse salt, white pepper, to taste
1 package refrigerated pie dough
1/2 cup crumbled blue cheese
4 3 1/2- inch tart pans (for individual tarts)
1. Preheat over to 375 degrees F.
2. Heat olive oil in a large skillet over medium heat. Add the onion and bay leaf and sautƩ until soft and lightly browned, about 10 to 15 minutes. Remove to a plate to cool.
3. In a mixing bowl, beat together eggs, cream, milk, and garlic. Season with salt and white pepper and set aside.
4. On a work surface with a rolling pin, roll out the dough to 1/8-inch thick. Cut into circles about 4 inches in diameter. Place in tart pans so that they fit in the bottom and up the sides. Trim off the portion over the top if necessary.
5. Prick the dough with the tines of a fork and bake for 5 minutes.
6. Remove from oven and place a teaspoon of sautƩed onions in each tart, spreading evenly.
7. Spoon 1 1/2 tablespoons of egg mixture on top of onions in each tart, then top each with 2 tablespoons blue cheese.
8. Bake at 400 degrees F for 8 to 10 minutes.
9. Remove from tart pans and place on serving plates with a drizzle of walnut dressing. Serve warm or at room temperature.
Thursday, June 19, 2014
DIY Disney's Vegetable Cuban Sandwich from Epcot's Sunshine Seasons
Hands down, my favorite quick service restaurant in Epcot's Future World is Sunshine Seasons in The Land pavilion. There are SO many great choices, especially for vegetarians. I was a committed vegetarian for seven years, and still tend to prefer eating as a vegetarian when I have the choice. One of my favorite sandwiches at Sunshine Seasons is this Vegetable Cuban and I was delighted to find the recipe in my new Disney cookbook: Delicious Disney.
This sandwich takes a little prep work, but what was nice for me is that the prep can be done piecemeal, so you don't have to spend a committed 45 minutes in the kitchen making this one. So helpful when I am also chasing toddlers! Mr. Photos From The Parks grilled up all our veggies the day before, as the grill was already hot from grilling that day's meal. I just wrapped them up and put them in the fridge for later. And THEN made us homemade Cuban rolls for these sandwiches! What a treat! I also cheated on the peppers and used some prepared roasted hot red peppers from Trader Joe's. It was a delicious choice!
You can find the entire recipe below. Let me know if you decide to make these amazing sandwiches! And until next time, may all your days be filled with fairy dust!
Sunshine Seasons' Roasted Vegetable Cuban Sandwich:
Ingredients:
3 Portobello mushrooms
Olive oil as needed, for grilling
8 ounces fresh eggplant, unpeeled, cut in half lengthwise
8 ounces yellow squash, cut in half lengthwise
8 ounces zucchini, cut in half lengthwise
1 red pepper, sliced
Coarse salt and freshly ground black pepper, to taste
1 teaspoon olive oil
1 24 -inch Cuban bread roll
1/4 cup store-bought hummus
1 tablespoon yellow mustard
4 slices Swiss cheese
1/4 cup or more sliced sour pickles
Method:
Preheat grill or oven up to 400°F. Carefully remove the stems from Portobello mushrooms and wiped the caps. Brush olive oil on both sides, and grill 8 to 10 minutes on each side until mushrooms begin to brown and are soft to the touch. Refrigerate.
Season eggplant, squash, zucchini, and red pepper with salt and pepper; drizzle with olive oil and roast for 15 minutes. Refrigerate.
Slice chilled vegetables into 1/4" planks. Slice jeweled Portobello and 1/4" rounds.
This sandwich takes a little prep work, but what was nice for me is that the prep can be done piecemeal, so you don't have to spend a committed 45 minutes in the kitchen making this one. So helpful when I am also chasing toddlers! Mr. Photos From The Parks grilled up all our veggies the day before, as the grill was already hot from grilling that day's meal. I just wrapped them up and put them in the fridge for later. And THEN made us homemade Cuban rolls for these sandwiches! What a treat! I also cheated on the peppers and used some prepared roasted hot red peppers from Trader Joe's. It was a delicious choice!
You can find the entire recipe below. Let me know if you decide to make these amazing sandwiches! And until next time, may all your days be filled with fairy dust!
Sunshine Seasons' Roasted Vegetable Cuban Sandwich:
Ingredients:
3 Portobello mushrooms
Olive oil as needed, for grilling
8 ounces fresh eggplant, unpeeled, cut in half lengthwise
8 ounces yellow squash, cut in half lengthwise
8 ounces zucchini, cut in half lengthwise
1 red pepper, sliced
Coarse salt and freshly ground black pepper, to taste
1 teaspoon olive oil
1 24 -inch Cuban bread roll
1/4 cup store-bought hummus
1 tablespoon yellow mustard
4 slices Swiss cheese
1/4 cup or more sliced sour pickles
Method:
Preheat grill or oven up to 400°F. Carefully remove the stems from Portobello mushrooms and wiped the caps. Brush olive oil on both sides, and grill 8 to 10 minutes on each side until mushrooms begin to brown and are soft to the touch. Refrigerate.
Season eggplant, squash, zucchini, and red pepper with salt and pepper; drizzle with olive oil and roast for 15 minutes. Refrigerate.
Slice chilled vegetables into 1/4" planks. Slice jeweled Portobello and 1/4" rounds.
Slice Cuban bread lengthwise. Spread top with hummus. Spread bottom with mustard. Arrange vegetables evenly on the bread and top with Swiss cheese and pickles.
Brush griddle or skillet with oil and grill for two to three minutes on each side, or until bread is crusty and cheese is melted. Cut into four servings.
Tuesday, June 17, 2014
DIY Disney's Frozen Take-Out Sacks
I recently posted about the Disney Movie Reward site where you can download all manner of cool Disney printables. In that selection of things there is a PDF bundle of Frozen Travel Posters (they also have a bundle of Planes travel posters!). I LOVE this sort of thing and knew I needed to find a way (or several ways) to use these gorgeous graphics. As I was looking at this poster for the Arendelle Chocolatier, I realized it would look great printed on my take-out sacks!
If you missed the earlier back-to-school posts (can you believe it's almost time for that again?), we have printable designs for Gousteau's, and Tiana's Place. These chocolatier bags will fit right in! I also think they would make a great presentation for some lovely chocolates (and maybe some wine!) for a Disney fan. And if you are throwing a Frozen party in the near future (perhaps to bring back summer?), these would be great as goodie bags!
In order to print these on white kraft bags (mine are 6x11"), I had to turn the image upside down. Once you have downloaded your PDF files, open them in Acrobat reader. Once you have it open, select "view" and then "rotate view" until your image is upside down. Load the bags in the printer, centered, and right side up with flap facing back. I printed "current page" at 50%. I love the way these came out. So simple and budget friendly! Just a reminder that if you are printing for the first time, I would recommend doing a test run on paper before loading your sacks to see if the layout is the way you want it.
Have fun with this idea! Until next time, may all your days be filled with fairy dust!
If you missed the earlier back-to-school posts (can you believe it's almost time for that again?), we have printable designs for Gousteau's, and Tiana's Place. These chocolatier bags will fit right in! I also think they would make a great presentation for some lovely chocolates (and maybe some wine!) for a Disney fan. And if you are throwing a Frozen party in the near future (perhaps to bring back summer?), these would be great as goodie bags!
In order to print these on white kraft bags (mine are 6x11"), I had to turn the image upside down. Once you have downloaded your PDF files, open them in Acrobat reader. Once you have it open, select "view" and then "rotate view" until your image is upside down. Load the bags in the printer, centered, and right side up with flap facing back. I printed "current page" at 50%. I love the way these came out. So simple and budget friendly! Just a reminder that if you are printing for the first time, I would recommend doing a test run on paper before loading your sacks to see if the layout is the way you want it.
Have fun with this idea! Until next time, may all your days be filled with fairy dust!
Tuesday, April 1, 2014
DIY Disney | The Grey Stuff from Be Our Guest
Making this was really easy, and if you follow the recipe at The Disney Diner, it would be even easier! As our regular readers will know, we are all about using homemade ingredients as we have food allergies to contend with (nuts, peanuts and synthetic food dyes). Here is the original ingredient list:
- 1 (3.4 ounce) pkg Instant Vanilla Pudding Mix
- 1 1/2 cups Whole (or 2%) Milk
- 15 Oreos (regular, not double-stuffed)
- 1 (8 ounce) tub Whipped Topping
- 3 tablespoons Instant Chocolate Pudding Mix
- Edible Pearl Sprinkles
Instead of the instant pudding (which often has synthetic dyes), I made mine from scratch (with the expertise of Mr. Photos From The Parks) using the Joy of Cooking recipe for cornstarch pudding. Oreos are safe for us, but we don't like Whipped Topping (too many chemicals), so we just whipped up some heavy whipping cream until if formed stiff peaks. I think next time we'll add a touch of rum or Grand Marnier! We omitted the instant chocolate pudding altogether and I was able to find some edible pearls from HomeGoods that were safe for us too! (By the way, I love shopping the food aisles at HomeGoods. I can almost always find some organic goodies to bring home!)
I tried piping the mousse onto plates, but as Doc said, it looked like poop! So instead, we decided to serve it in these martini glasses. It was a MUCH more appetizing choice! I think an Oreo propped up in it would have been just perfect for a dinner party! And it tasted out of this world! It was a really fun treat to put in lunch boxes this week. If you've never tried it, I highly recommend doing so. You should try it, it's delicious! And such an easy way to bring a touch of Disney magic to your home.
Until next time, may all your days be filled with fairy dust!
Thursday, February 27, 2014
Ratatouille Birthday Party for Little Chef
As you regular readers will know, Little Chef is all about the cooking. Any time one of us is in the kitchen he demands a chair so he can be at the counter with us, no matter how small the task. So it was really a no brainer to have a Ratatouille themed birthday party for him this year! I'd be lying if I told you it wasn't a lot of work, but it was so much fun and Little Chef could not have been happier! It was worth every bit of time and effort putting this party together.I had plans to use this adorable rolling pin invitation, but as it turns out, this busy mom just couldn't get it done. So instead I went with my old stand-by, Red Stamp. If you've never used this amazing app, I highly recommend it. It makes keeping up with birthdays and holidays a snap! We sent electronic invitations to keep it simple.
I was pleasantly surprised by how much Ratatouille themed party decor was available on Amazon. After all, it's been seven years since Ratatouille was released. (Can you believe it's been that long?) But we were able to find party hats (toques), balloons (which you can see in the photo above) and a backdrop with Linguini and Remy for our party. Perfect for those photo ops!
And remember these Gusteau's take out sacks from our back to school posts? Of course I printed them up and used them for goody bags!
The cooking part was a lot more like decorating, but the toddlers didn't seem to mind! I decided to have two different stations. Our table is pretty big, and we have a rule of thumb that we only invite as many kids as the age you are turning (in this case 3). So I set up each end of the table with "cooking stations."
The first thing we did was make chocolate fondue fruit kabobs. We had lots of fruit cut up (whatever looked fresh at the market) and I whipped up a chocolate sauce. This is so easy and a real hit with the kids!
The second station was a decorating station. I decided to make homemade marshmallows so we could decorate them, along with brownies. I had never made marshmallows from scratch, but I had heard they were to die for. I was shocked at how easy they were to make! Of course Little Chef helped me make them and the sensory experience and transformation was enough to make both of us giddy! I used Alton Brown's recipe to make them. If you try it, make sure you watch the video first. I was so glad I knew what to expect as I was working in the kitchen. I love the way these turned out. They were delicious and decorating them was new and different! I was concerned that the marshmallows would melt in the chocolate and frosting, but they held up beautifully! I used cake pop sticks to make them easy to handle.
I wanted everyone to have individual decorating supplies. I know the sorts of arguments that can break out over shared equipment! These mini muffin tins were the perfect solution. I filled each section with all natural colored sugars from India Tree. I would never have dreamed how much fun the kids had with these!
And then we sat around playing with all the great toys that Little Chef received for his birthday! It was a great party and so fun catching up with good friends! Until next time, may all your days be filled with fairy dust!
Labels:
at home magic,
birthday,
Disney,
DIY,
food,
kids,
kitchen,
Little Chef,
marshmallows,
party,
Pixar,
Ratatouille,
take out sacks
Tuesday, January 28, 2014
A Freezer Full of Mickey Waffles
If you've ever had the opportunity to breakfast in one of the Disney Resorts, you know how magical those Mickey waffles can be. There is something so delightful about sitting down to breakfast and seeing Mickey right there on your plate. You know the day is going to be a good one.
Here in the cottage, the days just got happier. We now have a Mickey Waffle Iron! The whole family is excited about it. In fact, Little Chef couldn't WAIT to get his hands on it. It helps that we love waffles any way you make them. So starting our days with a Mickey waffle seems like a bonus!
We also make our own freezer waffles; with our allergy issues, we make a lot of things at home. Plus it's SO much cheaper to make them ourselves and freeze them. It's really easy. We just make the waffles a little underdone, let them cool, and put them into gallon size ziplock bags. I like to put a piece of waxed paper between each waffle as it goes into the bag. It's just makes getting them out a lot easier. When it's breakfast time, we simply pop them into to the toaster to heat them up. Easy as can be. And now we will have Mickey waffles to make our mornings that much better.
Until next time, may all your days be filled with fairy dust!
Here in the cottage, the days just got happier. We now have a Mickey Waffle Iron! The whole family is excited about it. In fact, Little Chef couldn't WAIT to get his hands on it. It helps that we love waffles any way you make them. So starting our days with a Mickey waffle seems like a bonus!
We also make our own freezer waffles; with our allergy issues, we make a lot of things at home. Plus it's SO much cheaper to make them ourselves and freeze them. It's really easy. We just make the waffles a little underdone, let them cool, and put them into gallon size ziplock bags. I like to put a piece of waxed paper between each waffle as it goes into the bag. It's just makes getting them out a lot easier. When it's breakfast time, we simply pop them into to the toaster to heat them up. Easy as can be. And now we will have Mickey waffles to make our mornings that much better.
Until next time, may all your days be filled with fairy dust!
Labels:
at home magic,
budget,
Disney,
DIY,
family,
food,
kitchen,
Mickey Mouse
Tuesday, January 14, 2014
Mulan Chinese New Year Viewing Party
Chinese New Year is about to begin (January 31st) and it's the Year of the Horse! What better way to ring in the new year than with a Mulan viewing party? Thanks to Pinterest, I had no trouble putting together a Year of the Horse snack bar for our viewing pleasure. Because a good movie deserves good snacks!
We started with these Khan horse cookies, using a new chocolate sugar cookie recipe that I love! The dough was really messy to work with; Little Chef and I had chocolate everywhere! Still, they are well worth the effort. I used my Silhouette portrait to cut out these adorable take out boxes. I used regular scrapbooking paper that I already had on hand to make them, not card stock. I was a little tentative about how sturdy they would be, but they held up really well.
We rounded out the snack bar with these awesome horseshoe donuts (which we made from scratch using this wonderful recipe; and substituting our left over egg nog for the buttermilk), and "tea" which was really apple juice. I just love this tea pot my sister found while antiquing! So perfect for our party (not to mention my It's A Small World obsession)!
And for those of you looking for a comfy way to enjoy Mulan, check out these adorable cozy socks and satin robe from Hot Topic:
We had a great time watching Mulan and kickstarting the New Year. Until next time, may all your days be filled with fairy dust!
Tuesday, January 7, 2014
DIY Disney Character Party Cups with Temporary Tattoos
| Disney Princess Cups |
| Winnie the Pooh Cups |
I would definitely try this again. And even with 20 some cups, it only took me about 10-15 minutes to do them all. Tune in Saturday to find out what vintage cocktail recipe we used to fill these up! Until next time, may all your days be filled with fairy dust!
Labels:
at home magic,
budget,
Cars,
Disney,
Disney Princesses,
DIY,
family,
food,
kids,
party,
Pixar,
Winnie The Pooh
Thursday, January 2, 2014
DIY Back To School Mickey Mouse Rice Krispie Treats
![]() |
| Mickey Mouse Rice Krispie Treats |
When we are at home, however, and the sweets from WDW are far, far away, we make do with our own version of Rice Krispie Treats. We follow the recipe on the Rice Krispie box with one exception: we put caramel bits into ours. You can find them in most stores next to the chocolate chips. You won't believe the difference these make!
Now if you've ever made Rice Krispie Treats, you will know that there is a reason they are cut into squares. They are incredibly sticky! In order to cut them into Mickey's I used cooking oil, lots of cooking oil! I slicked up the cookie cutter with it, and my hands so that I would get the shapes to come off of the cutter as easily as it went in. You have to work at it a bit, but the end result is so worth it! You could also take a Disney twist on them and frost them or dip the ears in chocolate. So much fun for lunches as school starts back up.
Enjoy these sweet treats, and until next time, may all your days be filled with fairy dust!
Subscribe to:
Posts (Atom)